Merry Christmas everyone!! This post will be a fun and easy ornament DIY. Next week I hope to finally answer all those reader requests for a fiddle leaf fig update. Before I get into this post, I just wanted to apologize for being MIA for so long. I guess you could say Joe and I have been in a “season of trial” recently. A couple months ago, I suffered a ruptured ectopic pregnancy. I had to undergo emergency surgery to remove my fallopian tube and stop some major internal bleeding. The recovery time took a while and I was forced to take disability from work and have been trying to catch up ever since. A little overwhelming! On top of that there have been other hardships among loved ones and before you know it, four months go by without any blog posts. I hope I haven’t lost too many of you!
But you’ll be happy to hear that I’m back and I have several projects photographed and in the queue. One of the nice things about my disability leave is that I was able to work on a bunch of light personal projects and have lots of photos to share. The first of which is this Christmas ornament!
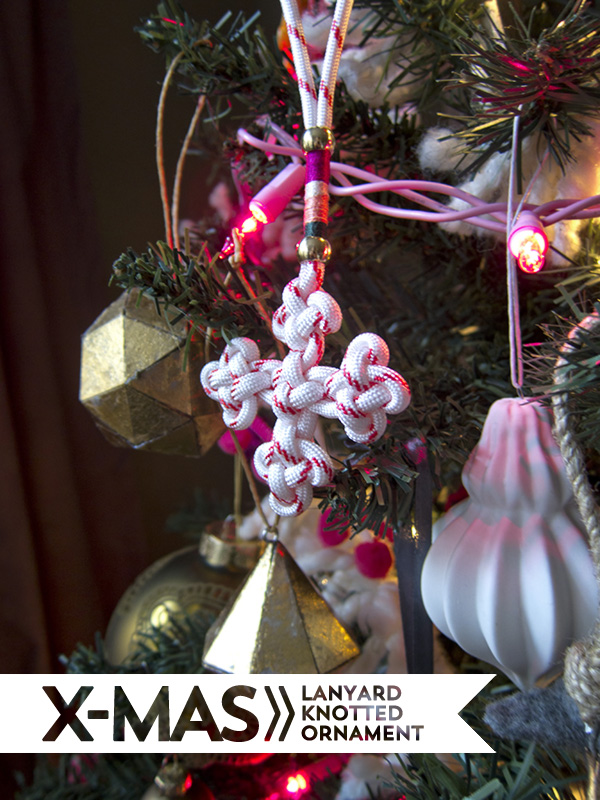
When I was a kid, my mom used to send me to this week long summer Chinese culture camp in Deleware. One of the things I learned there, and continue to use all the time, is Chinese knotting and lanyard making. Being half Chinese and half Caucasian, I love using these techniques and mixing them with western traditions – for me it’s a meaningful representation of my mixed heritage. So I decided to make a cross shaped Christmas ornament using one of the knotting techniques I have learned. Its part Asian, part cross, part candy cane, and just super cute in my opinion!
SUPPLIES:
– Parachute cord – I found mine on etsy, and I love that it looks like a candy cane
– Brass beads with large holes – a brass bolt or hex nut would work too
– Embroidery thread in a couple different colors
– Clear fabric glue or puffy paint
– A candle
– Scissors
The first step is to cut a nice long length of cord. I wish I took a more specific measurement so that you don’t cut too much or too little, but you’d rather have too much than too little. After its cut, melt the end of the cord in the flame of your candle. Parachute cord is made of synthetic materials and melts really nicely. This will prevent it from fraying and will make it easier to work with when tying your knots. I usually stick it in the bottom part of the flame where it burns a little cleaner. You wont get as many burnt or sooty spots that way.
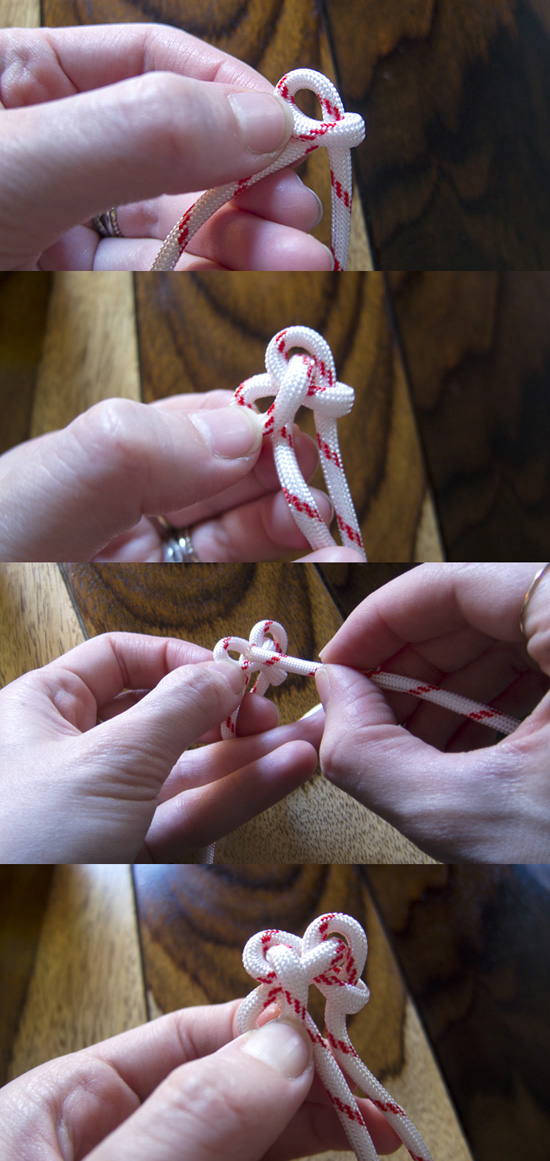
Next tie all of the knots in the cross section of the ornament. The pictures explain it much better than I can with words, but you usually start from bottom to top. Below is a photo of how to make one single knot. This is the first knot that will become the bottom point of the cross (the southern point). In all you will have knots in the following positions: north, south, east, west, and middle. I will refer to them as such in the rest of the post.
After the last image, pull the loose end tightly and your knot should look like this:
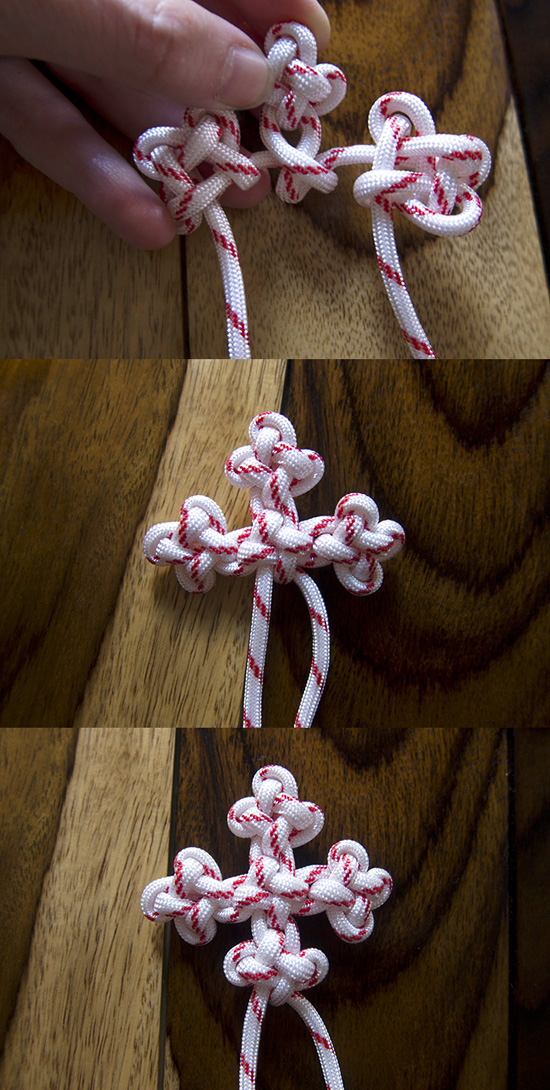
Next, follow the same procedure to make the east and west knots. Both are attached to the middle knot, so you have to leave a little length in the cord so that it can be knotted into the middle. I make sure that it is facing the proper direction by pinching a kink in the cord as pictured below:
It’s OK to leave these knots a little loose because you’ll probably have to adjust it a little once you tie the middle knot. And the photos below show you how to make that middle knot. Everything is woven in the exact same pattern, even in the middle. And after the middle knot, you add the northern knot in the same way as well:
Next, string one of the brass beads over both loose ends of the cord.
Then start wrapping embroidery floss. I start with a knot, and then make sure to keep the loose end tucked into the part that I am wrapping.
Feel free to add a few different colors!
Once you’ve decided to end the wrapped floss, just glue the loose end down with a little bit of fabric glue or puffy paint. I did it in between the two loose ends of the parachute cord so that it will stay hidden.
Then add on a second brass bead.
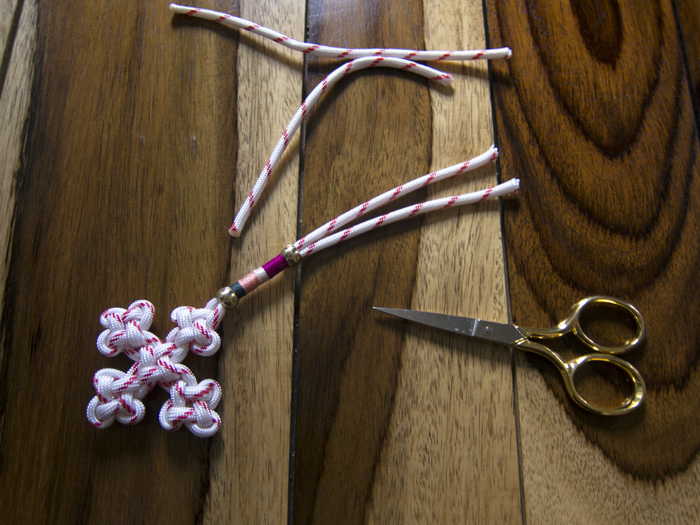
Next trim down the excess parachute cord and burn the ends again. However, this time you want to burn them simultaneously then quickly join the ends together before the melted plastic hardens. It makes for a nice clean joint and will act as the loop for hanging.
And there you have it! A lovely new Christmas ornament for gifting or decorating!


Leave a Reply