
Other posts in this series: Part 1, Part 2, and Part 4

Onto Part three of my four part series. This part is less about aesthetics and more about functionality. Of course, when things are less of a mess, that always helps make things look better.
Originally I was only planning to do the counter tops and back splash. However, the lack of counter space and storage space was really starting to drive me crazy. Our kitchen only has two sections of counter space. One is the little sliver between the sink and the stove. That is not functional at all since it is occupied by the dish drying rack. The other counter is across the room next to the refrigerator. This is the only useful space for food prep, but nearly half of it was taken up by the microwave. When doing food prep, I’d mainly just fit my cutting board and barely had additional space for ingredients, recipe book, utensils, etc. Many times I’ve knocked items onto the floor when opening the microwave door. Below I took a picture of how it used to look on a typical night when I would cook dinner.
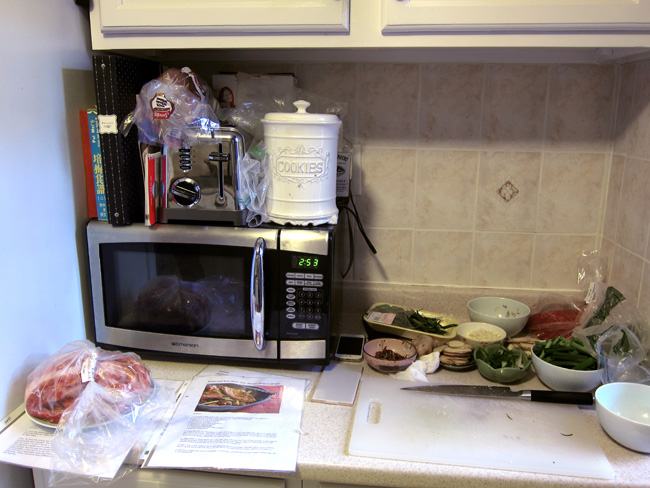
So crowded. And look at all that crap on top of the microwave! The top of our fridge was getting pretty ugly too. We just had nowhere else to store this stuff.
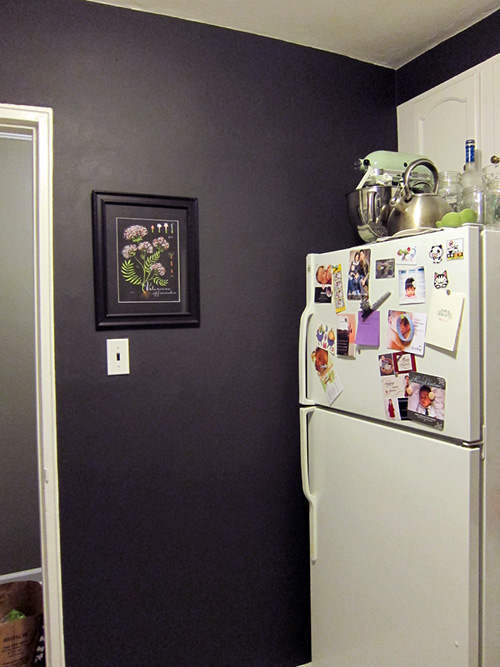
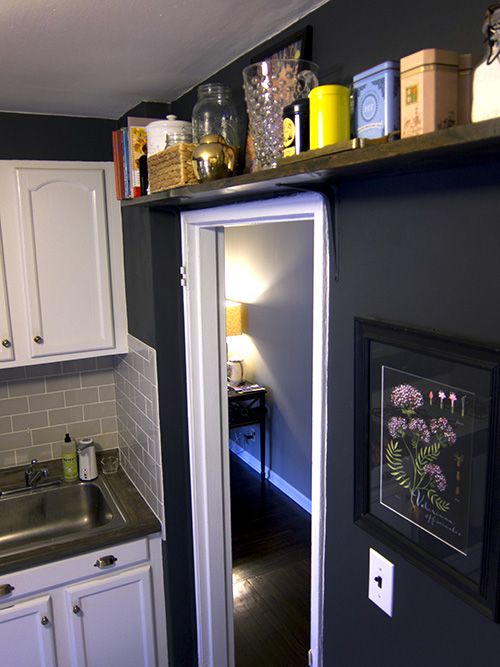
So I decided to free up counter space by making a microwave cabinet that I could undermount beneath the existing kitchen cabinets. And to make up for the lost “storage space” on top of the microwave (and to clear off the fridge a bit), I decided to install a long shelf on the wall above the kitchen door (to the left of the fridge.)
And just like all of the other projects in this kitchen, I did it for CHEAP. I spent maybe $30 on wood, and another $15 on brackets, screws, and other hardware.
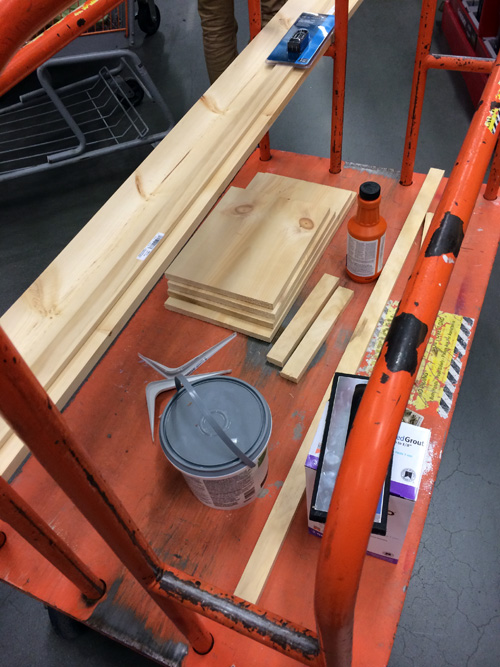
First stop, Home Depot! I love that they will cut wood to size for you there. So I took many careful measurements and created detailed plans for how I would build the cabinet and shelf. Prepared with my measurements, I got a bunch of lumber cut to size. (in the pic below, you can also see all the grout and stuff I had to buy for re-tiling)
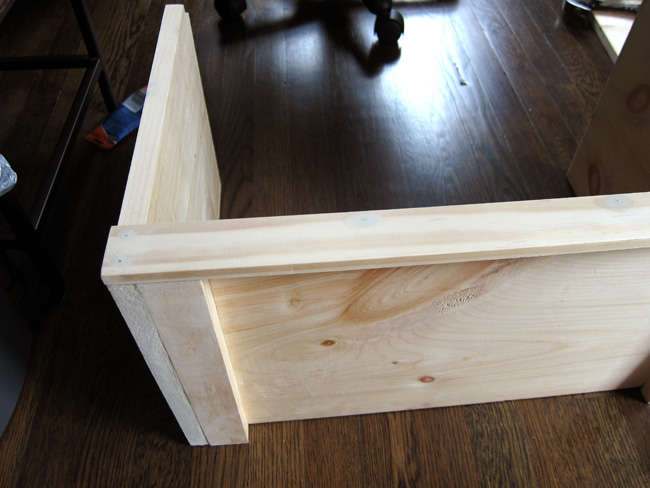
Unfortunately I did not take process shots when I first started building the cabinet. I got too excited and the first pic I took was when the basic structure had already been built.
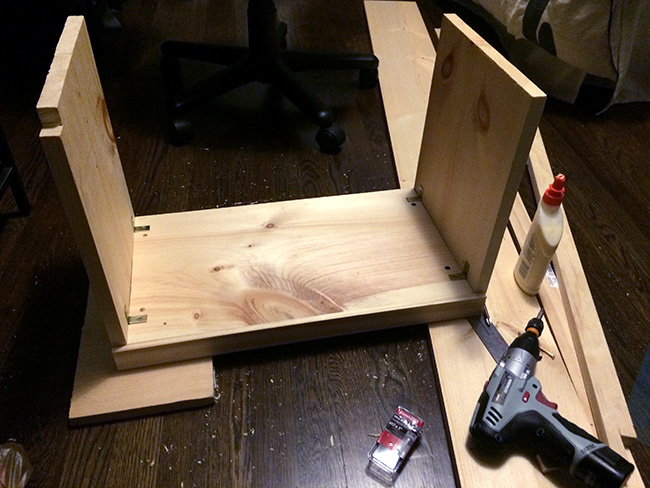
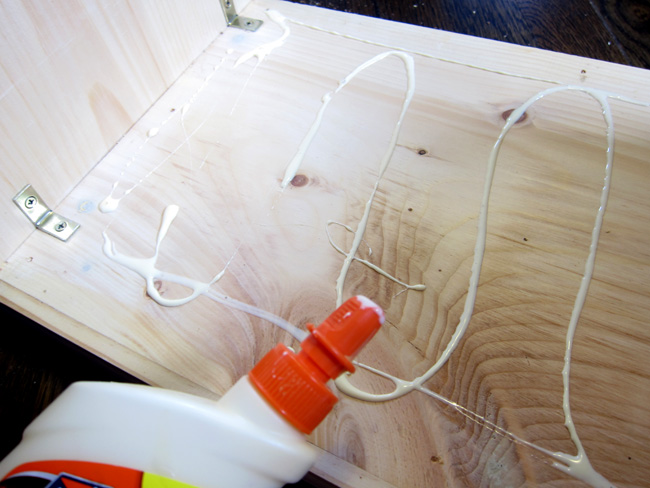
Anyway, there it is. I was very paranoid about it being strong enough (mainly because Joe tends to think everything will always fall apart whenever we get anything new). So I super duper reinforced everything. I attached the boards to each other with wood screws, but also used metal corner braces AND wood support beams on the bottom outer edges. All joints had a nice line of wood glue to make it extra tight.
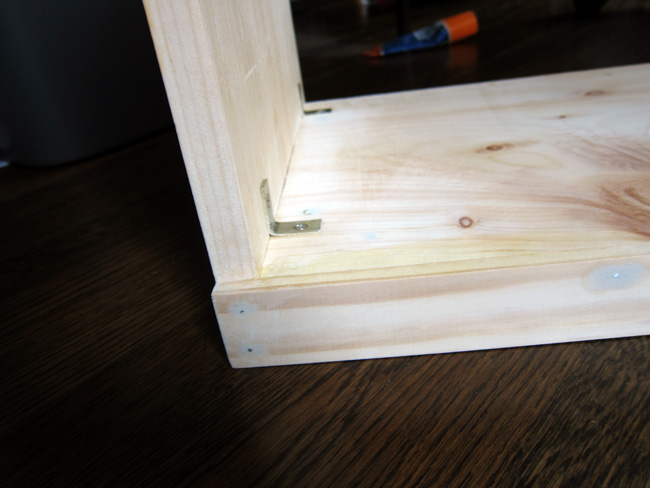
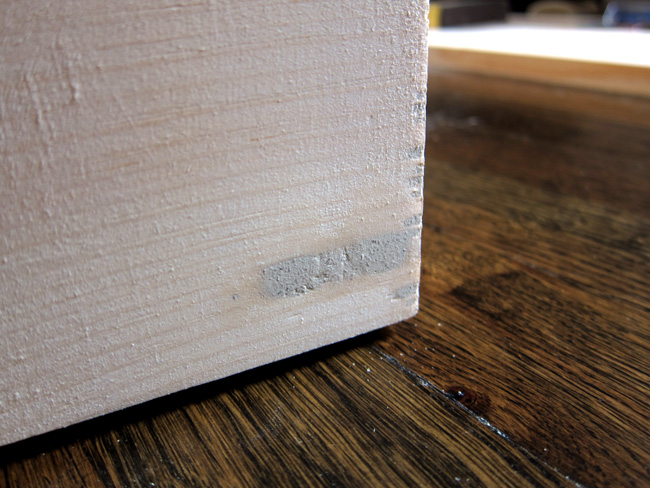
I trimmed the front bottom edge with a simple flat piece of molding to give it a clean finish. And I used countersunk flat screws that I later covered with wood filler and then sanded flat.
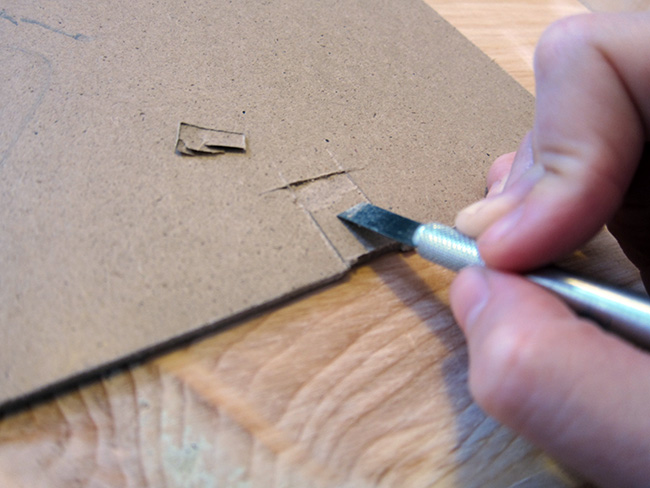
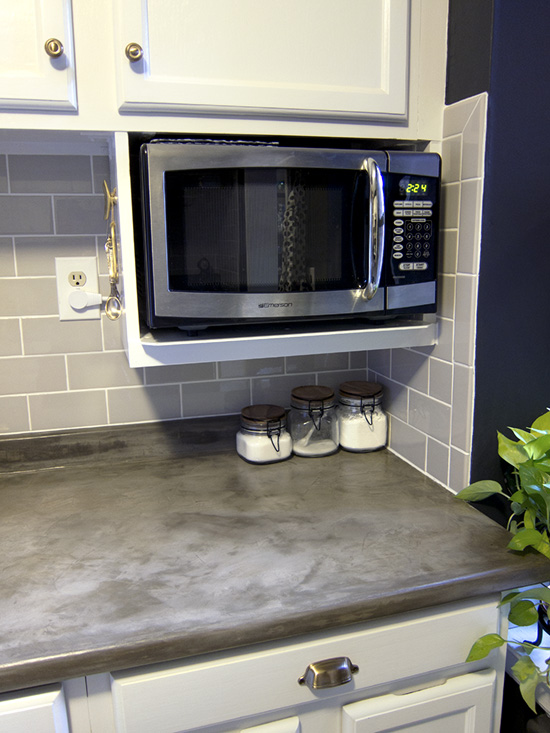
The depth of the shelf is the same depth of the existing cabinets which JUST accommodates the depth of the microwave feet. The actual front of the microwave would protrude outward a little but. I was thinking about this and half way through building this thing, I kept having visions of pulling the microwave door open and having the whole thing slide off the shelf. So I decided to extend the lip of the shelf with a little piece of masonite hardboard. I cut a piece to fit the dimensions of the shelf and then carved away a little bit of it so that it would lay flat against the corner braces that I had already installed.
Then I glued it on, screwed it in place, and painted the whole thing white to match our cabinets. Luckily I had plenty of paint left from when we first painted them white. The paint had thickened up over time so I had to use a little paint conditioner to smooth it out.

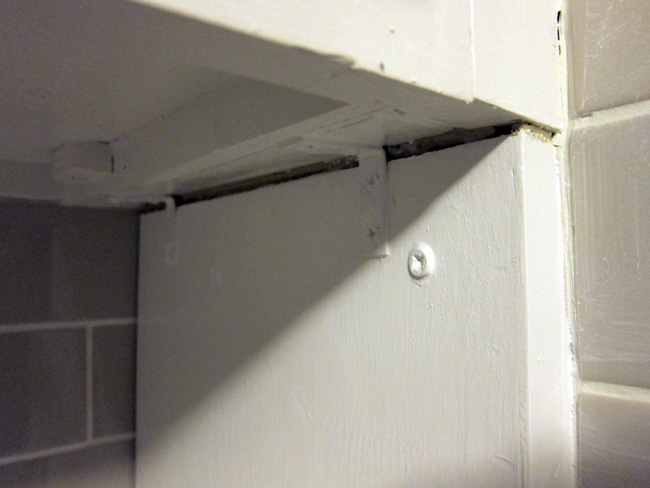
Later, after I finished the counter top resurfacing and all the re-tiling, I installed the microwave cabinet. The right side was drilled directly into the studs in the wall to make sure that it was nice and sturdy. And the left side was attached using a combination of corner braces and a cross beam I attached under the original cabinets. It was more challenging than I expected since the original cabinets were installed crookedly. I had to make sure that my addition stayed level.

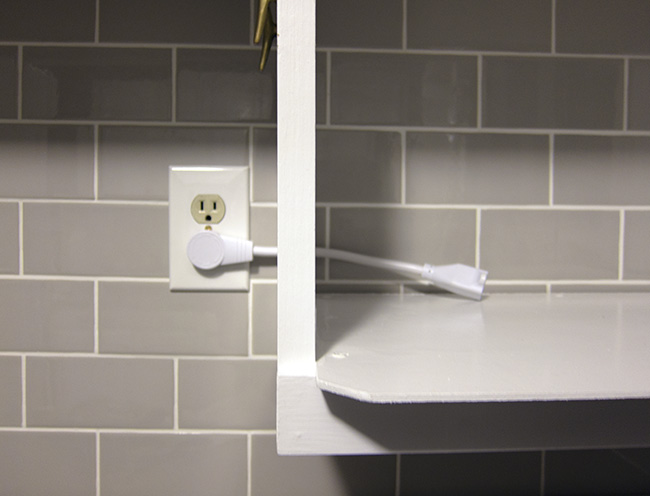
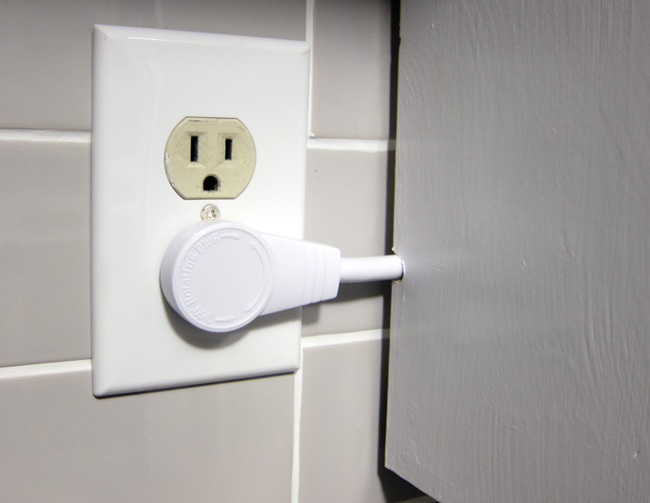
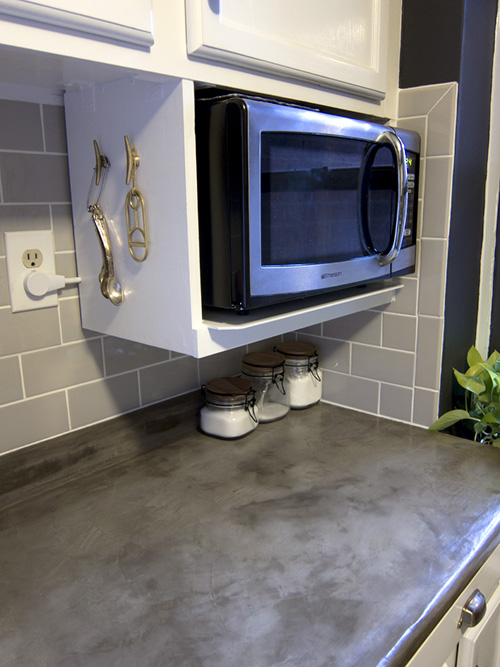
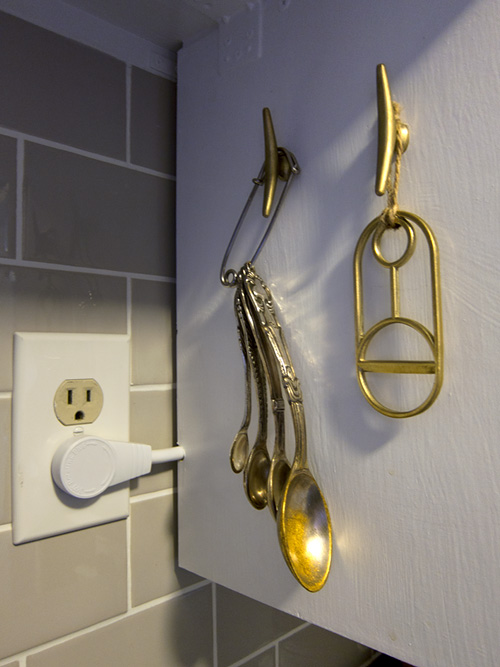
All hardware was painted white after I was done and I caulked around the edges to give it a clean finish. I also cut a little notch into the back of the cabinet so that I could pass through a small extension cord with flat rotating plug. This way the microwave could be plugged in without looking like a mess. Looks nice and clean, just short of doing any electrical work behind the wall.
And there’s the finished cabinet doing its job quite nicely in the kitchen. Our counter space is still small, but compared to what I had before, this feels down right luxurious!
I also got a couple of brass hooks from Anthropologie and screwed them into the side for hanging utensils I use more often.
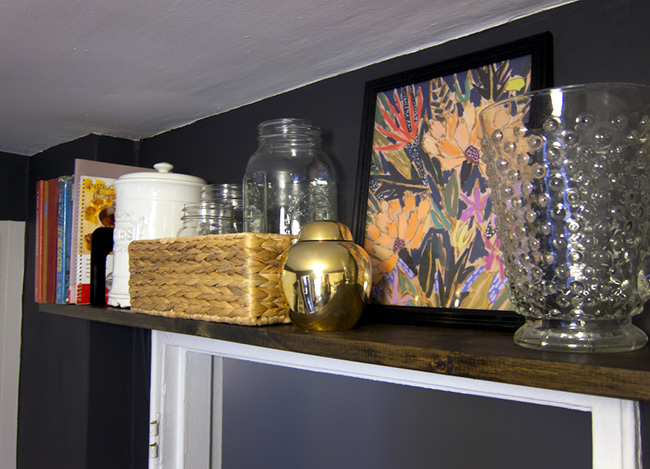
Now where to put all that stuff that used to be sitting on top of the microwave?? The best solution was to install a shelf above the kitchen door. I stained it and finished it the exact same way I did with our foyer shelf. The only difference is that I used cheap utility brackets that I painted to match the wall. I liked how utilitarian they look in the kitchen, and you hardly even notice them since they match the wall color.
The only annoying thing about hanging the shelf was that pretty much everything in our old apartment is crooked. The door frame is on a slant, our walls are curved, and even the ceiling slopes a little. I did my best to keep the shelf level, but you’ll notice that the angle looks different next to our slanted door frame. Trust me, the shelf is level, the door frame is not.
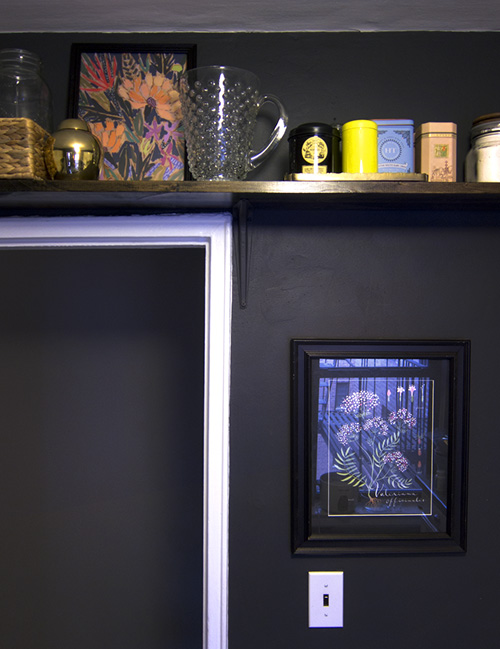
I’m so happy with this shelf, and I love having a place to display my tea canisters, glass jars, and cook books. There is definitely more order in this kitchen now.
Later this week I’ll put up one last post with all of the before and after pics of the kitchen =)

HOW DID I MISS THIS POST WHEN I STALK YOUR BLOG? Everything looks great! Can’t wait to see it in person 😉 hehe
great job as always ! Now onto the floors !
Pretty impressive job there… Thanks again for the tips!
Damn that shelf looks great! Curious, whats the kitchen utensil that you hung next to your measuring spoons?
Thanks for the idea. I’ve been trying to figure out how to mount the microwave up. Those ‘L’ brackets are a good idea!
My big question is what side of your microwave are the ventilation holes? Mine are on the left. I thought I’d cut out a 4″x4″ hole on the side. I even thought of using my large screw bit and drill many holes.
Love your ideas!
J
Where did you find that small pug ?
I wondered the same thing as Alice above…what is that thing hanging next to the measuring spoons? A pasta measure?
We are in dire need of a microwave cabinet but there was one part of your post I didn’t quite understand…What did you mean when you said, “And the left side was attached using a combination of corner braces and a cross beam I attached under the original cabinets”.
What exactly is a cross beam, and how did you build it? I couldn’t figure it out from the photos you posted and I was hoping you could offer some advice???
What is the depth of this microwave?
its a bottle opener
[…] Microwave that takes up valuable counter space? Think vertically. A shelf under the closet can be the answer. about joeandcheryl […]