
Other posts in this series: Part 1, Part 3, and Part 4
OK, part two! once the counter tops were done, we moved onto tiling the back splash. This youtube video taught me a lot of what I need to know about tiling, and I highly recommend watching it before tackling a project like this.
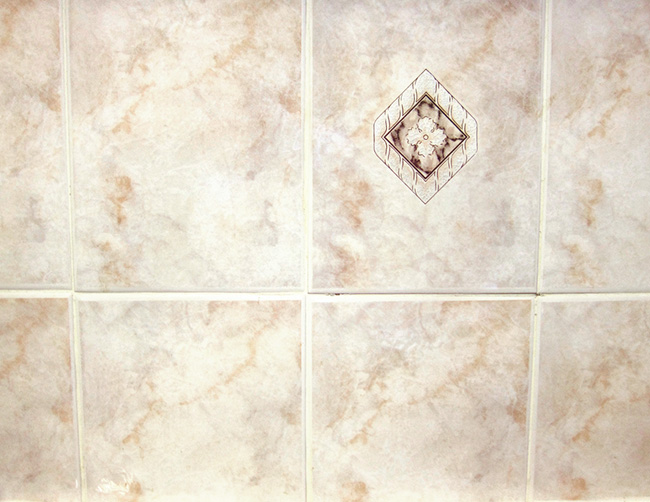
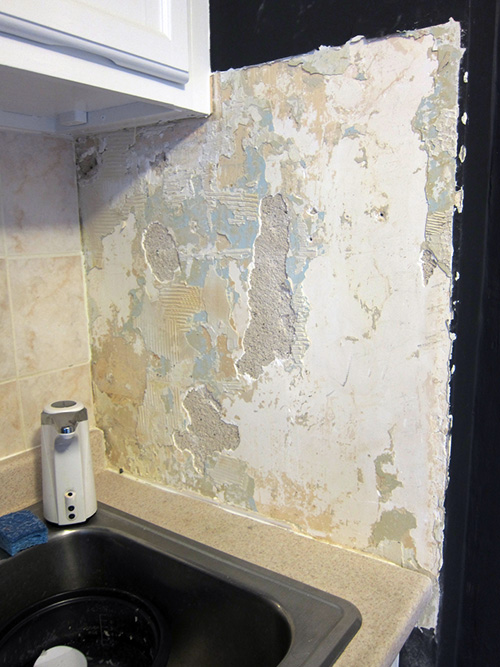
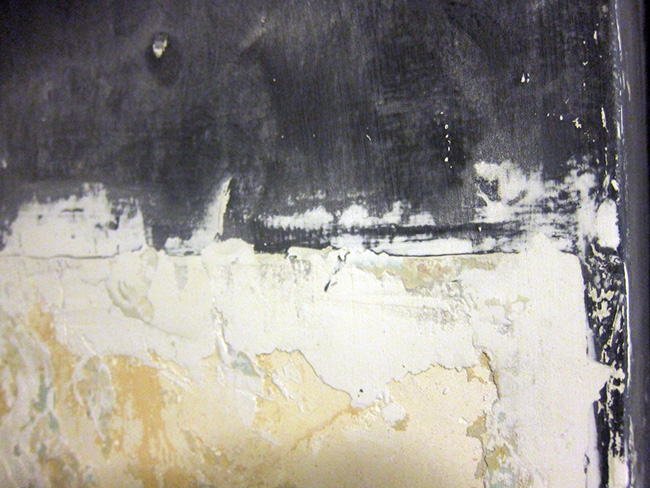
Here’s what our ugly old tile looked like. Its more of that pinky beige color and has fake marble printed onto ceramic. I hate that every tile is the same fake marble pattern and that it repeats over and over and makes it extra obvious that its fake. If you cant afford real marble (which we can’t) use something else and make it look intentional. Don’t get an obvious fake that calls attention to itself. Major pet peeve of mine.
When deciding on new tiles, I would have loved to do something like this photo below:
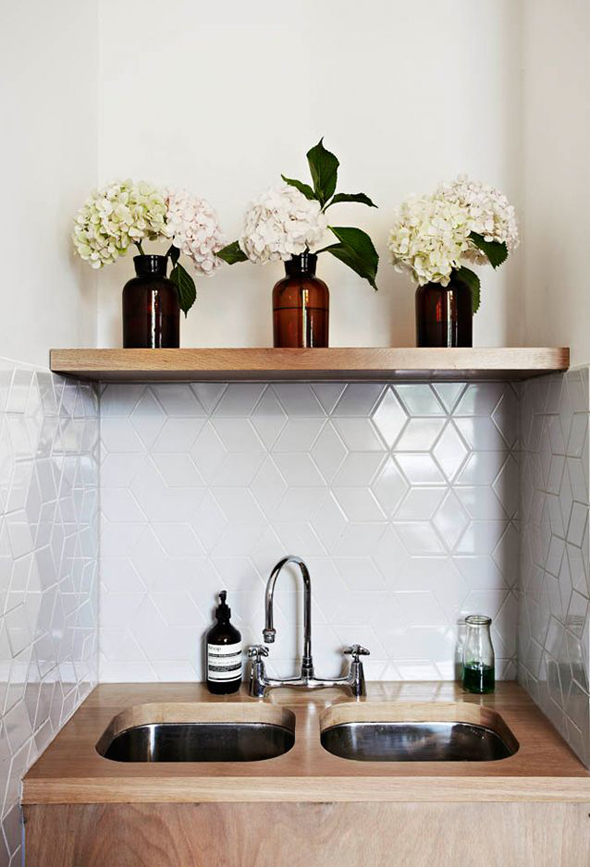
photo source: http://www.desiretoinspire.net/blog/2013/9/19/she-gets-it.html
I love the unconventional “falling blocks” shape, but had no idea where to source something like this. I did a bunch of internet searches, but came up empty. Also, after some thought I decided it might make things too complicated for a noobie like me. A standard rectangular shape would probably be much better this time, but I will be keeping my eyes open for these diamond shaped tiles for future projects.
Anyway, The new tile I chose is a pale warm grey subway tile that I bought from buytile.com. Their prices were very fair and they had lots of shades of grey (and other colors) to choose from. I wasn’t sure what I wanted at first so I ordered a few samples.
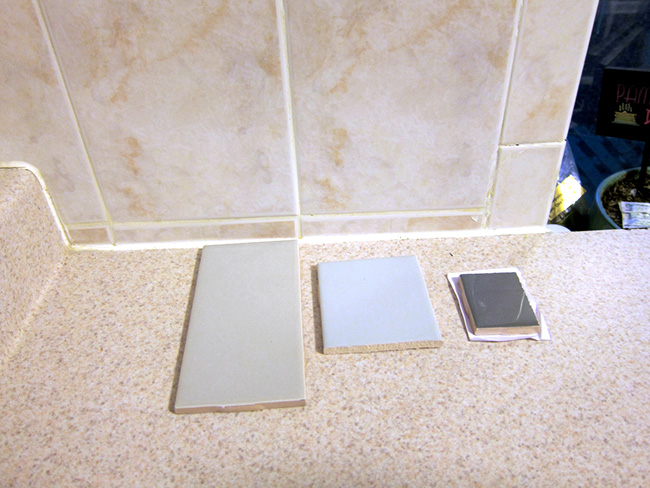
Ultimately I decided the “tender grey” by Apricot Tile (the large tile on the left) would compliment the color of the concrete the most. I ended up spending around $100 for about 30 square feet of subway tile, and several bullnose tile for the border. Always buy a little more than you really need, tiles will break and you’ll definitely need the extra. I also spent a little more on the grout, spacers, thin set, etc. too.
Like I mentioned in my last post, we did all of our tile removal BEFORE we even got started on the counter tops. Tile removal is a pretty violent process, so I didn’t want to risk damaging all of the work we would have done with the concrete by doing it afterwards. Also, I wanted to be able to spread the concrete evenly and smoothly to the edge of the wall, and the old tile would have gotten in the way. Removing the tile FIRST will allow for more professional looking results.
Tile removal (or “tile demolition” as Joe and I like to call it when we want to sound hard core) is really simple and easy, but it does require a bit of physical effort and can be quite tiring. Luckily Joe has had a bit of free time before he starts a new job so he did most of this for me. Thank goodness for men and their brute strength.
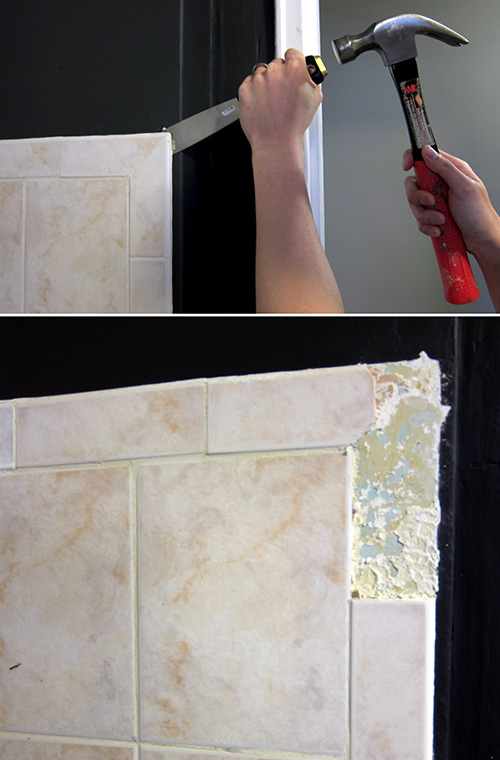
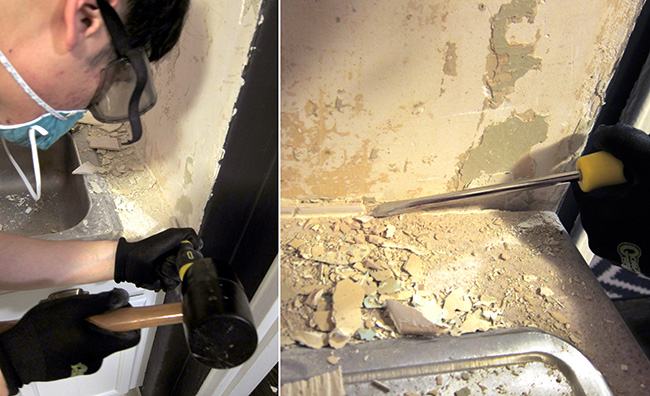
Anyway, just wedge a putty knife between the old tile and the wall… tap the back of the knife a few times with a hammer… and then it should just pop off. Some tiles may be more stubborn than others. You can just keep hacking at it, or use the putty knife as a lever to pry it off. CAUTION – definitely wear shoes and safety goggles while doing this whole project. There will be sharp flying shards of tile that will definitely cut feet and poke eyes.
Let me just say, this apartment is just full of surprises. Back when we renovated the bathroom, we found that the previous owners had just tiled on top of the old tile on both the walls and the floor. They took short cuts left and right. Well the kitchen was no different. As we removed tile, we realized that the previous owners installed all of the cabinets and countertops right on top of the backsplash which I can only imagine are the old tiles from before they renovated or whatever. This made things a little tricky.
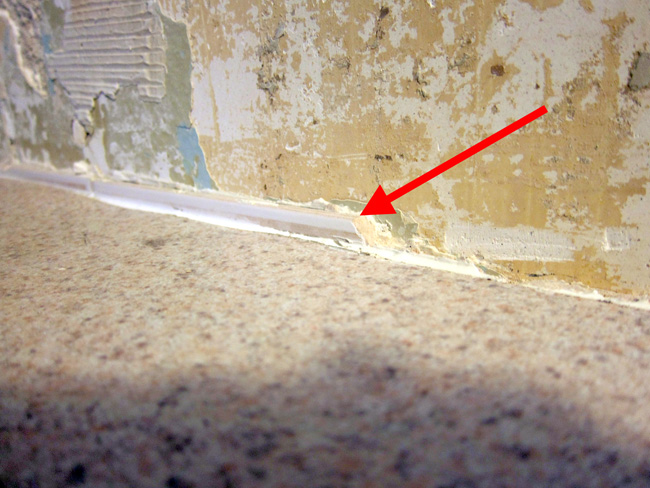
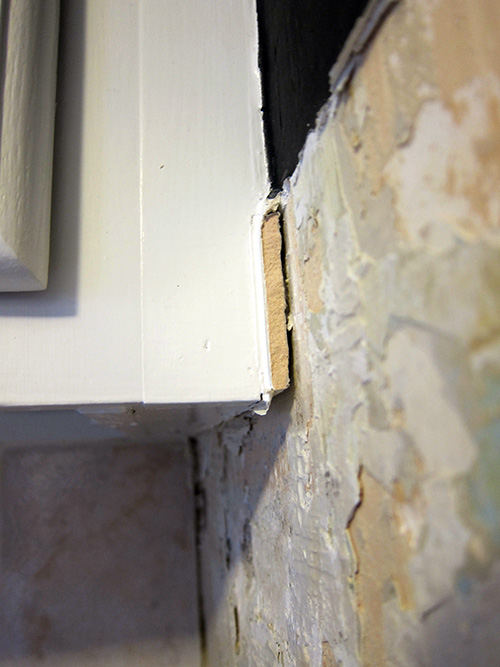
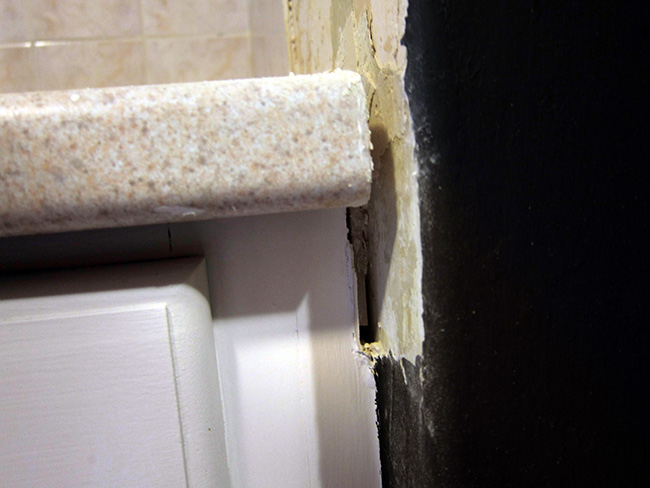
We ended up having to use a screw driver to chisel away at the tile that was trapped underneath, just to get a flush edge with the counters and cabinets. It also left gaping holes in spots that I had to spackle over. Super duper annoying. But these kinds of surprises are pretty standard with renovation projects.
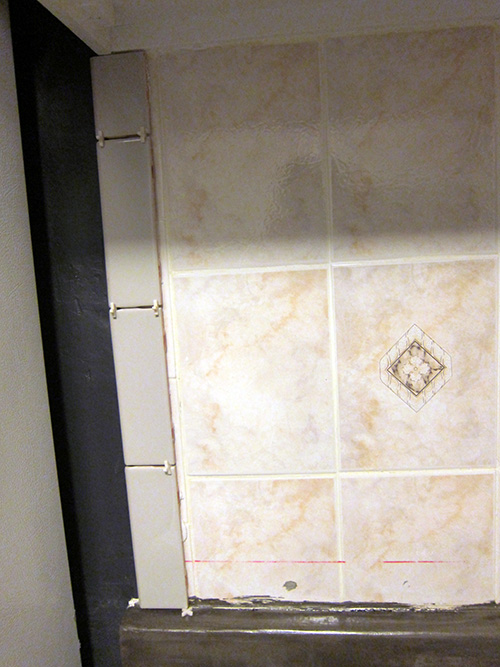
As I mentioned in my last post, we only removed the tiles from the side walls. I decided to take a little shortcut of my own and just tile over the tile on the back wall. I wouldn’t lose any counter space because of the trim on the back of the countertops, and you are not able to perceive any additional thickness with your naked eye. This made it a lot easier and more manageable for us noobie tilers. We removed the side walls because you’d be able to see the additional thickness on the bordering bullnose tiles.
Once all of the tiles were removed, I had to patch up some of the holes were left behind. You want a level surface when you apply the new tile. So I bought a nice bucket of spackle and went to work. It doesn’t have to be perfect where the tiles will be, just enough for a level gluing surface.
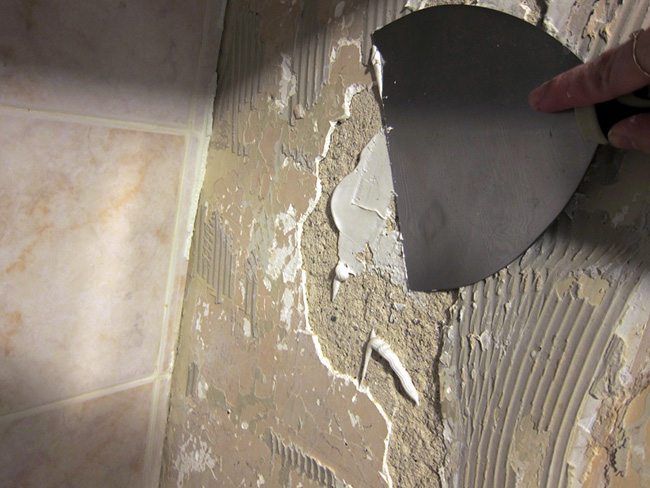
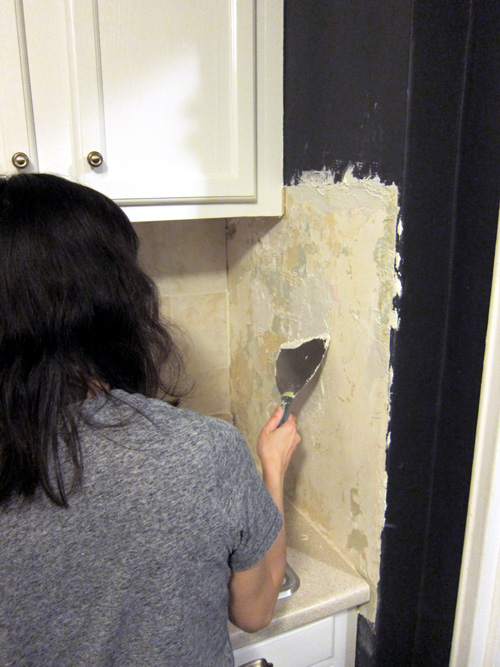
But you should also spackle around where the painted wall formerly met the old tile. Once you are done with the project, you’ll have to re-paint the walls, and you don’t want it to be a bumpy mess. So in those edge areas, definitely sand down the spackle when it dries. This will restore the smoothness of the walls for painting.
After all of this, I did the countertop resurfacing project.
When you get back to tiling, everything is going to be a dusty mess. Clean off all dust with a damp rag before applying tile. You want a nice clean surface for the Thin-set to bond with. I used this pre-mixed Thin-set mortar, but if you mix it yourself, you want about the consistency of peanut butter.

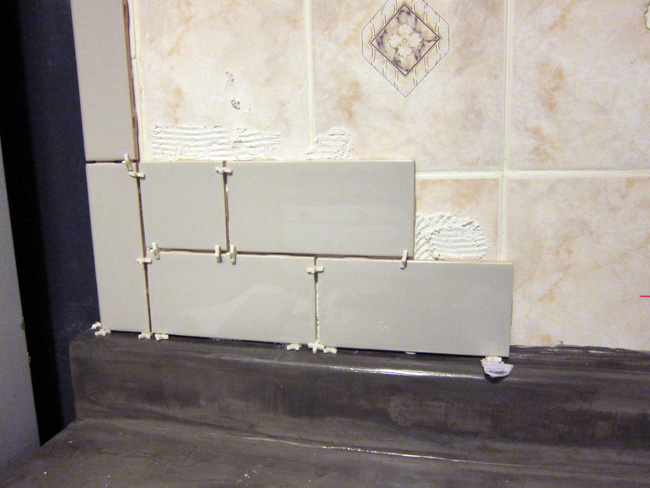
You have two choices. You can use a notched trowel to apply the thin-set directly to the wall, or you can “back butter” directly onto the back of your tiles (also using a notched trowel). I found back buttering to be a better option for me. This way I could draw a level line guide directly onto the wall. Also, Joe and I created a bit of an assembly line where he’d back butter, hand me the tile, and I’d position/apply/etc. This ended up being very efficient for us. BTW, this is one of the few joeandcheryl.com projects that actually involve both Joe and Cheryl. Haha.
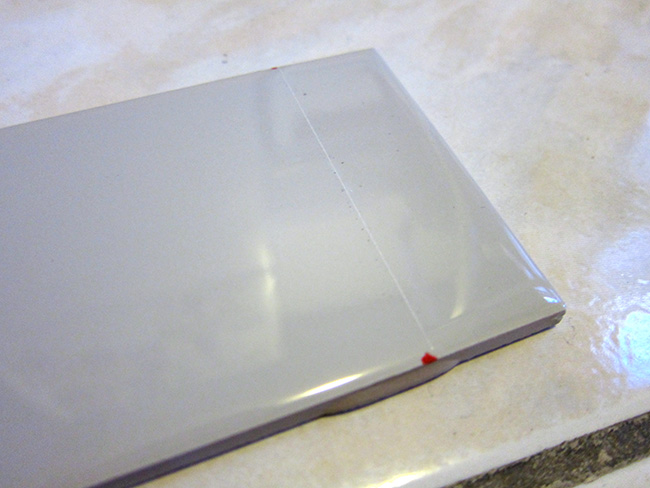
I liked starting out with the bullnose tiles on the border, then filling in with the subway tile. When you start with the subway tile, apply the bottom row first, making sure that it is level. You’ll see my red sharpy level line in the photo below. Once you have that row down, you don’t have to think as much for the rest of the rows as they will just stack on top and will naturally be level too. Note: I used eighth inch spacers for everything.
If there was a corner involved in the bullnose tile, I’d save the top bullnose piece until I was done with all the subway tile to get a more precise measurement.

I’d say the most challenging thing was cutting the tiles to the correct size. I decided not to buy a wet saw since its pricey and I’d have nowhere to store it. So I used a tile scribe instead, which is basically like an exacto knife with a tungsten tip that you can use to score and snap your tiles. It wasn’t until after the whole project was done that I realized I could have RENTED a wet saw from home depot. That would have saved me so much time and trouble.
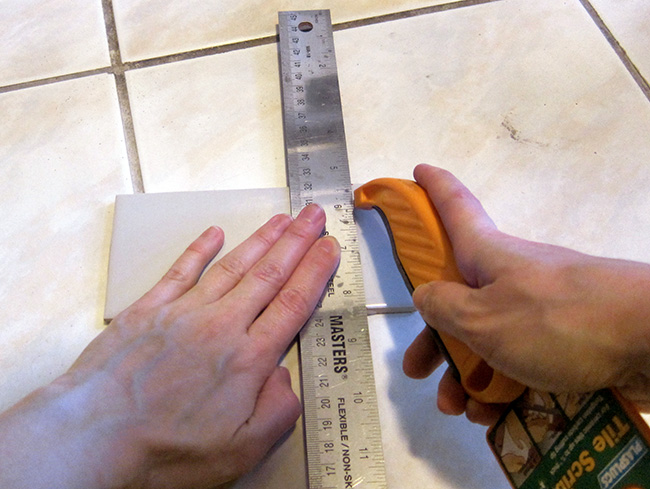
Well, what’s done is done. This is how you use the tile scribe. Measure and mark where you want to cut the tile.
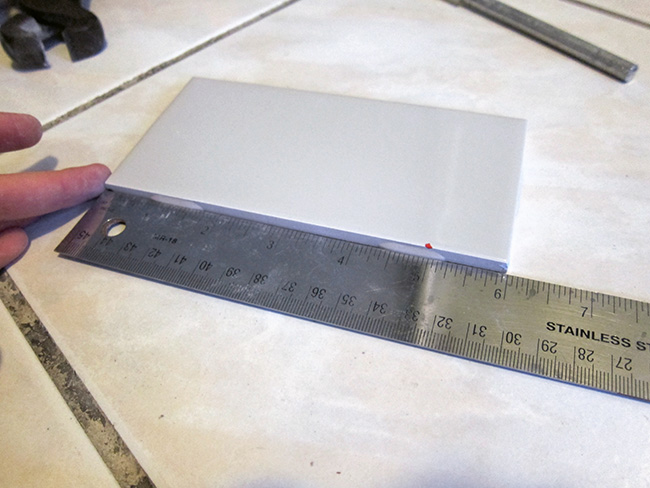
Then use a ruler and the tile scribe to score a line on the surface of the tile.
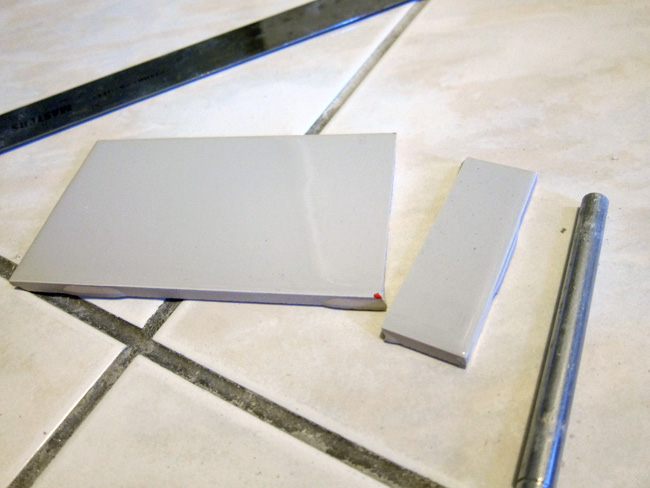
Then simply place on top of a pencil and snap it in half!
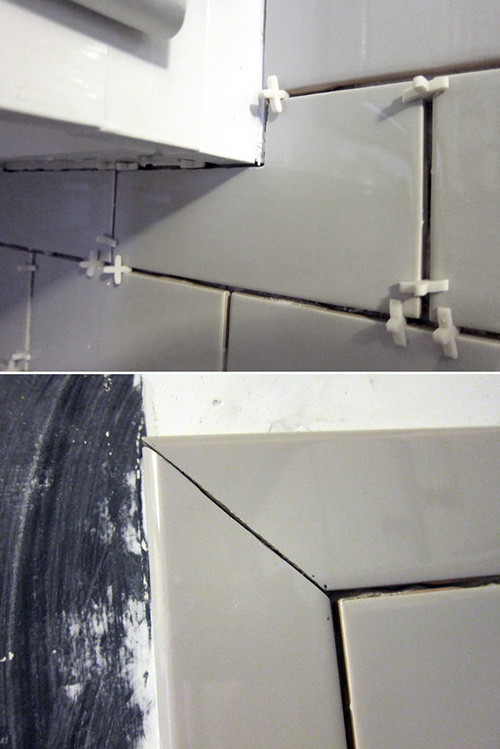
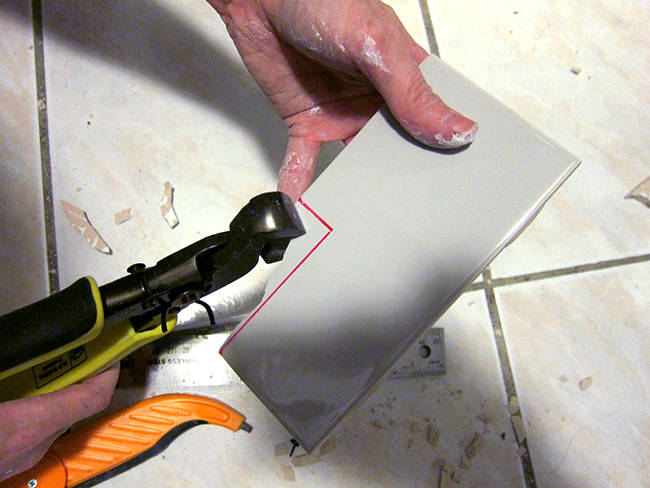
It only gets tricky if you need to do a 45 degree angle or a corner cut. These cuts were very very challenging and I ruined many tiles trying to do it.
What I found to work best was scoring the tile first, but NOT SNAPPING. It never snapped right and in this situation and tile nippers worked much better. And if you are doing a particularly narrow section, you’ll want to take teeny tiny nibbles so that you don’t accidentally crack the whole thing in half. For this reason alone, a wet saw would have been way better. Again, be careful, the shards will be very sharp and I did slice my fingers open a couple times. Definitely wear shoes, gloves, and goggles.
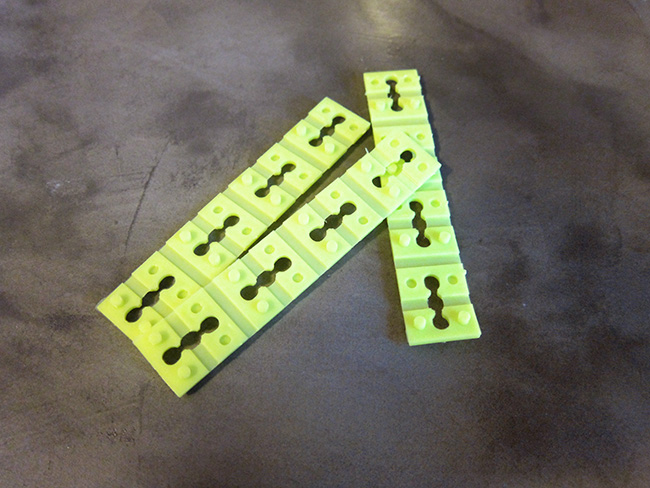
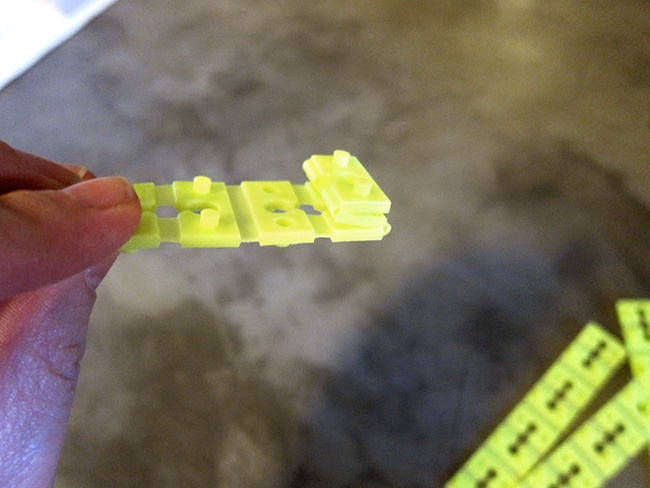
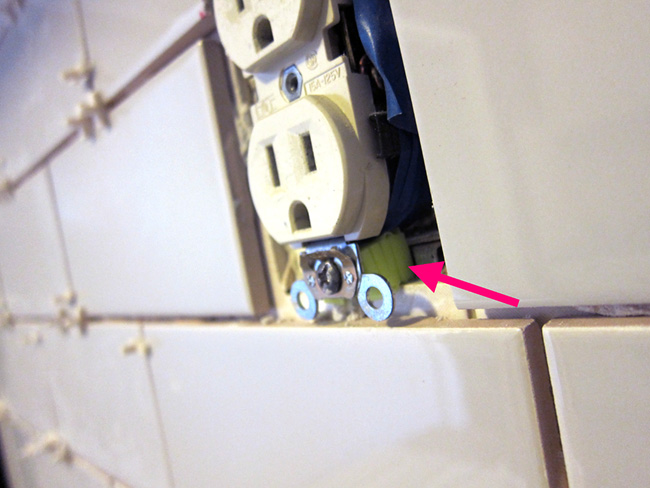
Another important thing to keep in mind is the electrical socket. Make sure to turn off power to any sockets you’ll be working around. Also, if you are tiling on top of tile, you’ll want to use electrical spacers to extend the socket so that it is flush with the new tile.
Once you have all of the tile applied, give it at least 24 hours to dry. When all is dry, it’s time for grout!
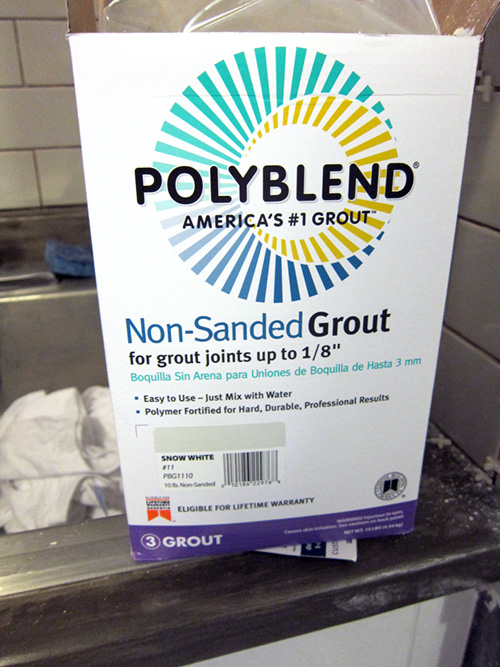
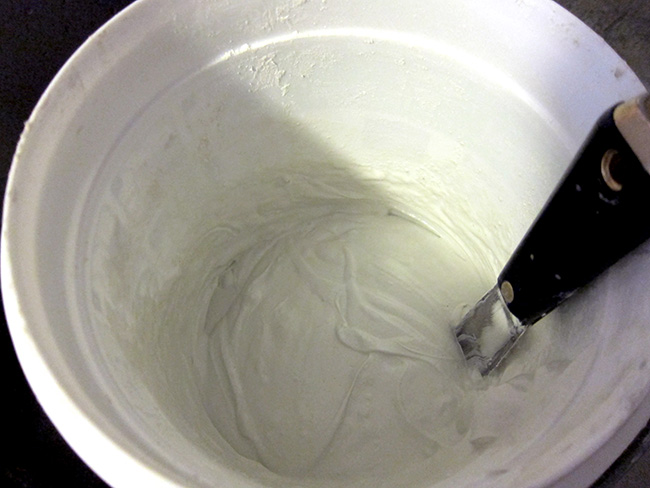
I went with a standard white non-sanded grout (sanded is more for floors). Follow the instructions on your packaging, but when I mixed mine, I tried to get the consistency of – you guessed it – peanut butter. And just like I did with the concrete, I mixed it, let it sit for 10 minutes, then mixed it again.
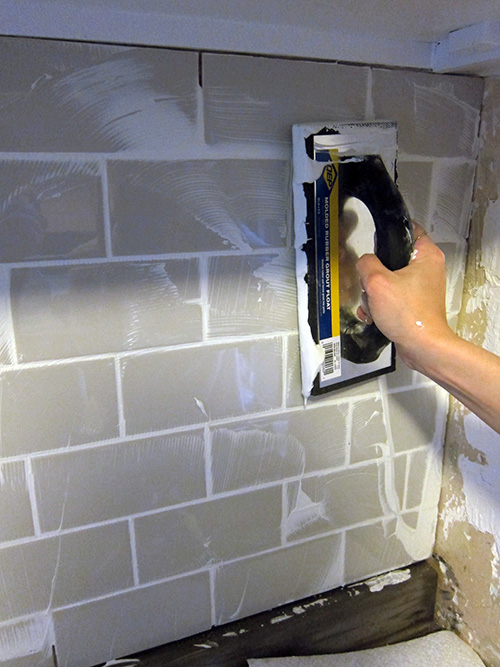
I used a rubber grout float to squeegee the grout into the crevices between all of the tiles. Make sure to note the time when you start.
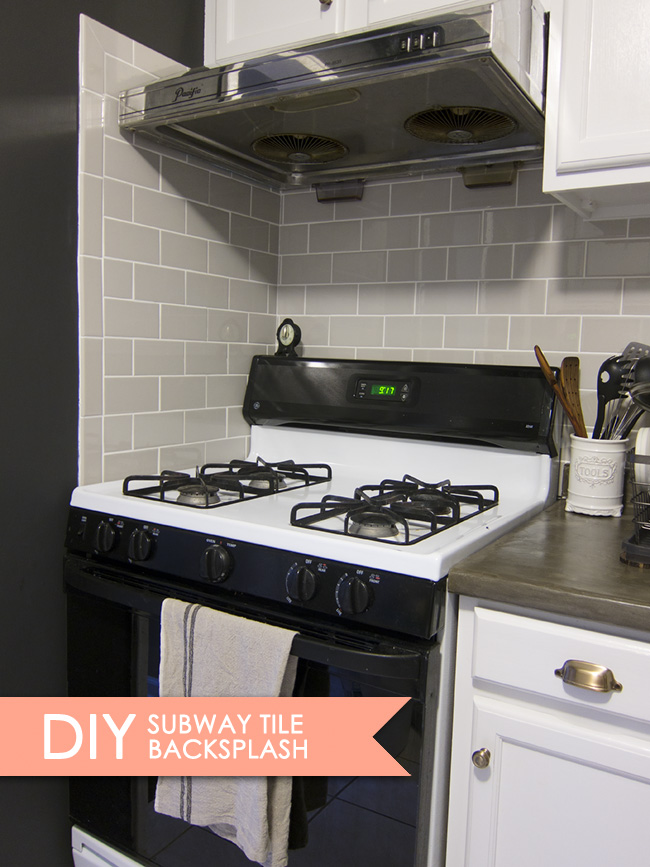
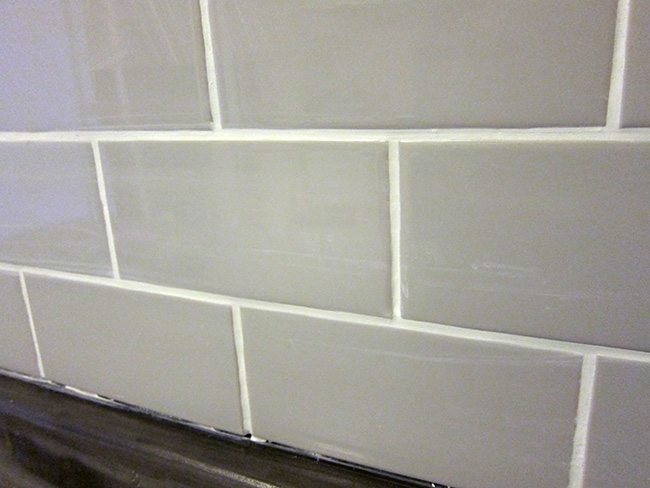
Once its all done it will look like this.

Wait 20 minutes from when you STARTED grouting, then come back with a damp sponge and wipe all the excess grout from the surface.
You’ll notice a slight foggy haze on the surface of the tiles at this point. Wait another three hours and buff it off with a cheese cloth to restore the shine of the tile.
Give your grout another three days to totally dry and then apply grout sealer.
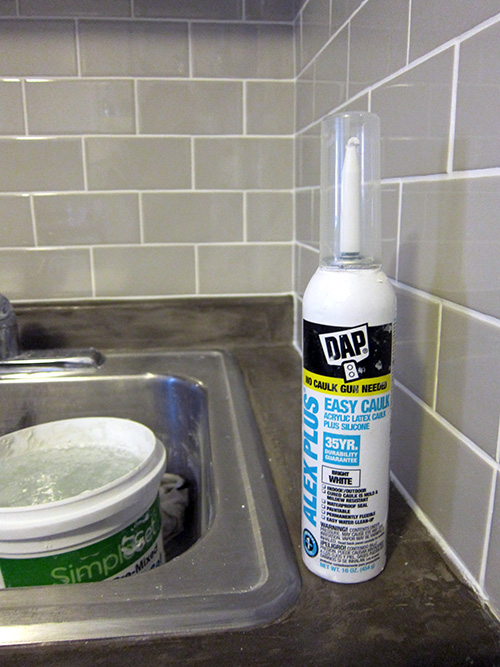
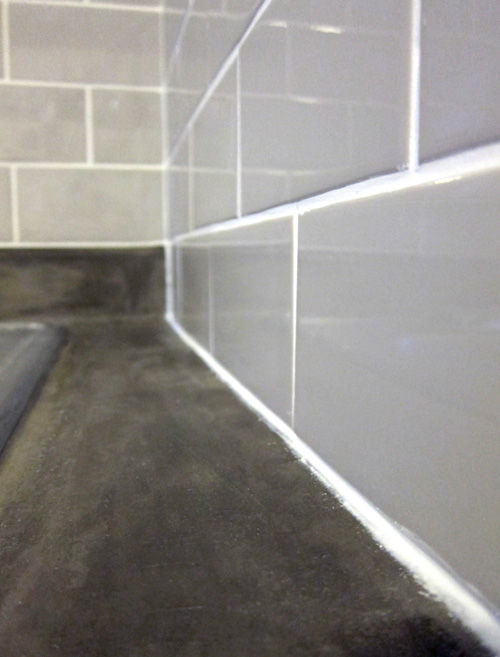
And the final touch is caulk. You can see from the photo above that it’s still a little ugly where the tile meets the countertops. Apply a line of caulk along all edges where the tile meets another surface (like counters, cabinets, walls, etc). To get a perfect clean caulking job, dip your finger into soapy water and run your finger along the caulk line. For caulk, I used this nifty product from Dap called “Easy Caulk.” You don’t need a caulking gun to use this and it squirts out of the nozzle just like a whipped cream can. They used to sell it at Home Depot, but now I only seem to be able to find it on Amazon.
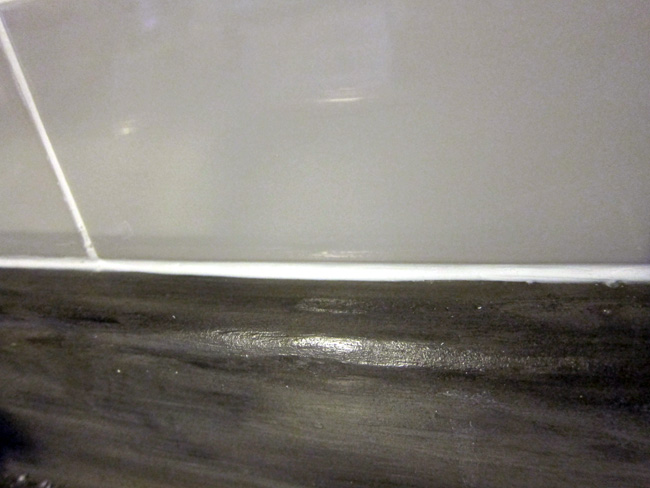
I had a harder time with caulking along the rougher parts of the countertop. But it turned out OK for the most part.
Finally, finish things off by touching up the paint on the wall. Luckily I had tons of paint left over from when we first moved in.

My next post will be about the new shelving I added to the kitchen =)

Did you ever consider getting one of these? I used it and then returned it. Shady, I know, but it worked great. Excellent post as always.
http://www.homedepot.com/p/QEP-14-in-Rip-Ceramic-Tile-Cutter-10214-6/100658263
Nice…and “this was one of the projects on the website where it was done by Joe and Cheryl”… thanks.
easy caulk is the shiz … so much easier than using the bulky, screechy caulk gun we had.
nicely done, dears!
Matt! I did look into that product! But for some reason or another I thought the tile scribe would be simpler (and even cheaper). Oh well.
Great job, guys! This is one of the DIY posts that I could actually follow. 🙂 It actually seems pretty manageable, given time (I know you spent quite a few hours on it). Thanks for recording and sharing!
wow…I am impressed! Great Job you guys!
Wow even with the step by step it looks highly intimidating! Way to go Joe & Cheryl! You guys are definitely above and beyond!
hello
stumbled upon your blog via pinterest image of the gorgeous white Heath tiles in this post. so just fyi, those are from the Dwell patterns line by Heath. I just ordered them for my backsplash in my laundry remodel. but I am not as bold as you to try and DIY install 😉
Thank you so much for the Tile info Jessica!!! I’ll definitely keep that in mind for future projects!