
Other posts in this series: Part 2, Part 3, and Part 4
Over two and a half years ago, Joe and I moved into our apartment and made due with our less than perfect kitchen. We painted the cabinets so that I’d be able to hold out until we saved enough money to do a full renovation. Unfortunately, things don’t always go according to plan. Saving is a bit slower than expected and we decided that it might be more productive to save up for our next place (we are hoping this apartment is just our starter home) where we can really invest in what we really want. So the possibility for a better “future” is motivating me to hold out with a less than perfect “right now.” And having less is always the greatest inspiration for creative productivity. Like I always say, why settle for less when you can make whatever you want.
So onto more kitchen DIY’s! This is the first of a four part series of posts outlining more ways that I’m improving our kitchen. I’ll finish it all off with the grand reveal and lots of before and after shots. The first stop on our journey is how I resurfaced our laminate countertops.
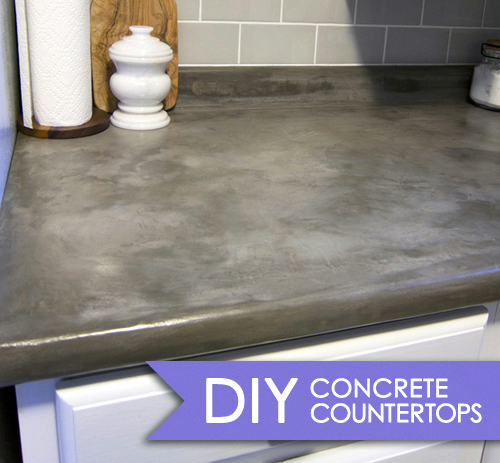
This whole project was inspired by a blog post that I read on Little Green Notebook. Concrete countertops! Brilliant! Concrete is very stylish right now, and It definitely seems like the next best thing to stone… AND I was able to do it all for only around $30! This felt like a no-brainer to me.
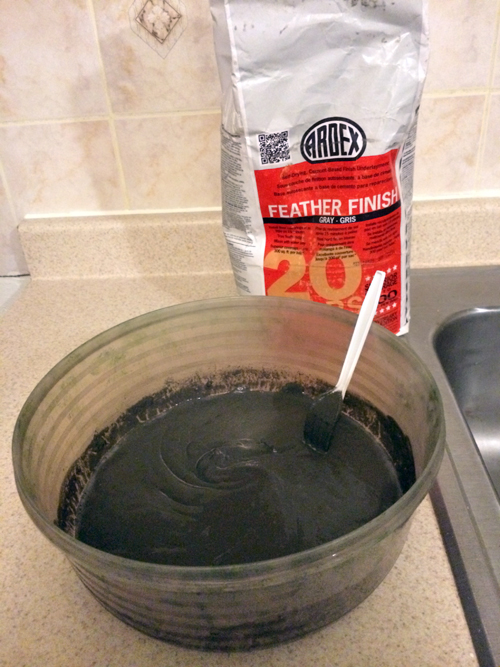
Jenny from LGN gives great step by step instructions, and so does this other blog post that she links to. They tell you most of what you need to know, so I’ll be focusing on my own experiences and anything I did differently that might add to what they have already said. We all used a product called “Ardex Feather Finish.” It works like a dream and is designed to stick to almost any surface. Apparently they intend this product for use on floors and all of these blogs caution that countertops are not one of the recommended uses. But enough people seem to be having positive results with counters that I feel good about it. And anything durable enough for a floor must be OK as a work surface.
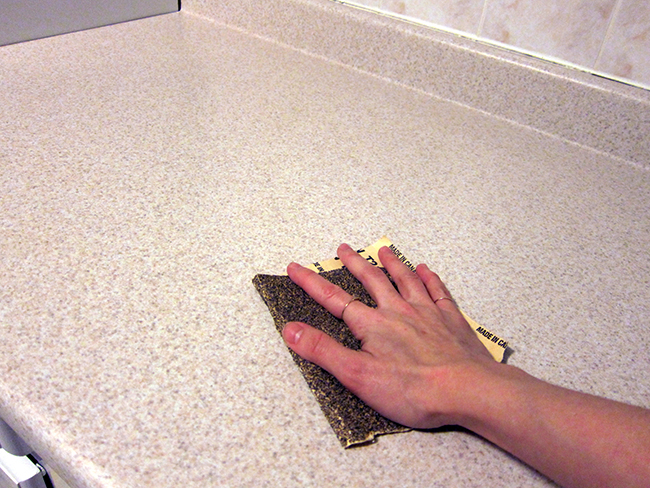
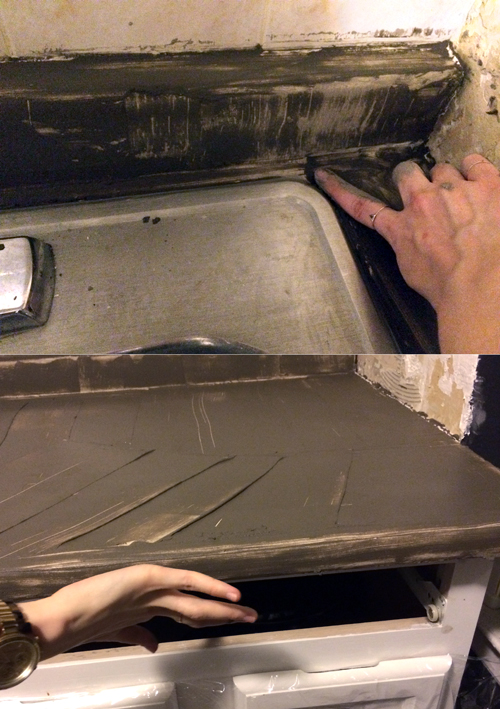
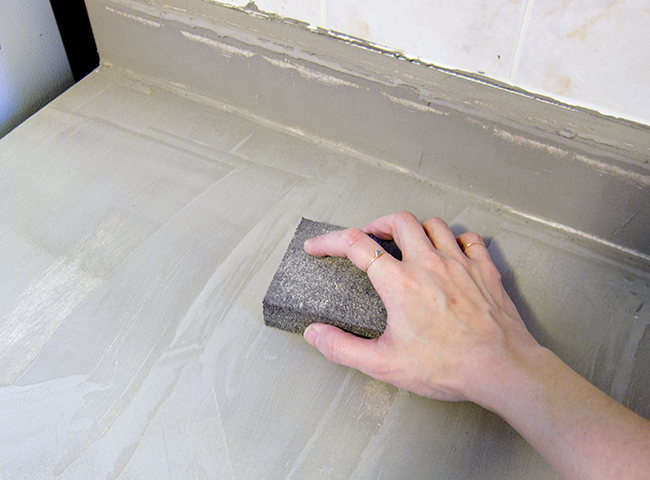
First Let’s take a look at what my countertops used to look like (below). They were a pinky-beige speckled formica that looked extremely out of date to me. The worst thing was that the section right next to the stove had yellowed over time – gross. I love cooking and prepare dinner almost every night so this was really starting to wear on me. Below you can see me prepping them for resurfacing by sanding and cleaning all surfaces. A strong degreasing cleaning agent is highly recommended for anything in the kitchen where there might have been oil splatter over the years.
To prepare the cement, just add water. Jenny suggests adding enough water that the cement has the thickness of gravy. Then you let it sit for 10 minutes and mix again. At this point the consistency should feel a little more like peanut butter. BTW, peanut butter seems to be the key word for all of the kitchen projects I did. You’ll see in my next post how almost everything to be spread, spreads like peanut butter. IMPORTANT NOTE: please wear a mask for this whole project. There will be a lot of dust, and I’m pretty sure cement dust is really bad for the lungs.
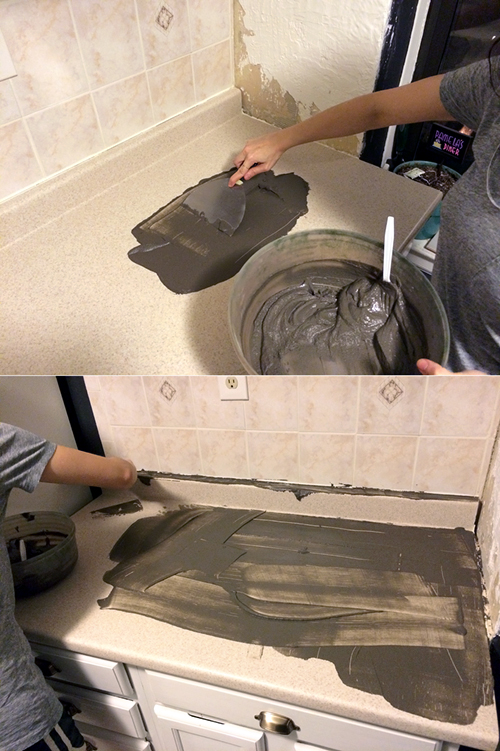
Spread a nice thin layer directly onto your countertops (just like peanut butter!). I used a 6 inch joint knife, but a concrete trowel would be great too. I recommend working in small sections. Its better to mix a little cement, do one continuous section of countertop, then mix more for the next continuous section. It takes about 5 hours for the cement to totally set up, but it hardens quickly and you’ll find it harder and harder to spread if you try to do everything all in one batch. It becomes almost clay-like rather quickly. We had two sections of countertop, so I did all my layers in two batches. Again, they should be CONTINUOUS sections. Don’t just do half a countertop. You’ll want to do 4 thin layers, sanding between each layer (I used a coarse grit sanding sponge).
I also found it very difficult to use the knife/trowel to apply the concrete to narrow or curved surfaces. In such areas, it was easiest to just use my fingers. I’d slather it on as if I was finger painting. It was much easier that way. But it did ruin my fingerprints for a good two weeks and could no longer use the fingerprint sensor on my iphone 5S (this stuff really does stick to everything)! Rubber gloves may be wise.
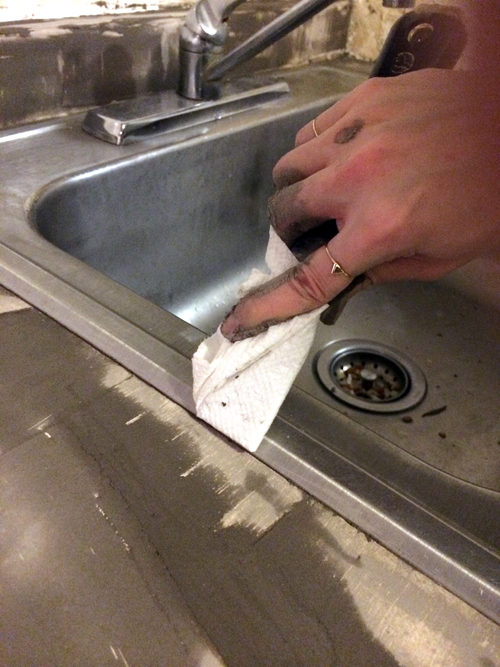
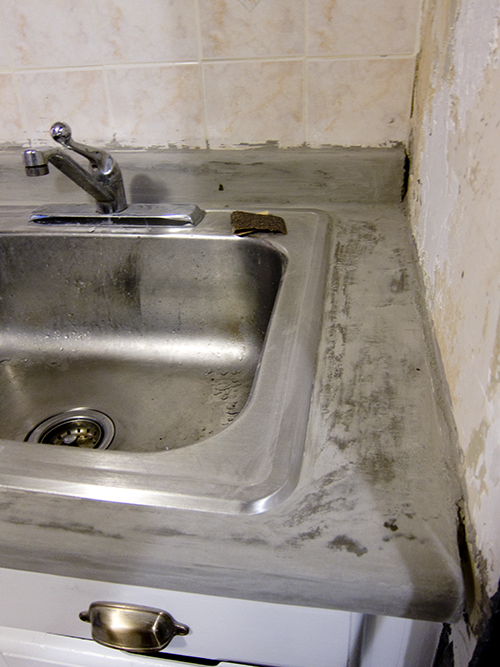
Another tricky spot was getting a clean edge around fixtures such as the sink. I found that the easiest thing was not to worry about getting in on the sink. I just came back with a rag wrapped around a putty knife and wiped it off for a nice clean edge (before it all dries of course).
I was also not very careful about keeping it clean against the walls. I was planning to re-tile the whole back splash, so I knew I’d just be covering up these messy spots. If you are wondering, we decided to keep things simple and just tile right on top of the old tile against the back wall. But we removed all the tile on the side wall where you’d be able to see the thickness of the back splash. You should do any tile removal BEFORE starting on the concrete countertops. If you are not re-tiling, then clean the edges the same way I did with the sink.
Your first layer will look a bit like this with the countertops still showing through in spots. It may show even more after you sand it down a bit, but that’s totally OK. Each additional layer will go on much more easily and fully.
Here are a few notes on layering that the the other blogs didn’t mention. I timed it and each layer takes about 5 hours to dry fully (depending on the temperature in the room and how thickly you lay it down.) So plan out your days accordingly. This whole thing will take at least two days to finish just because of drying time. Also, The layers seem to be what actually create the stony look of the concrete. My first layer went on looking like a very flat grey, but each additional layer seem to create more lights and darks for that stone-like look. The lights and darks seem to be determined by the direction of my trowel marks, the thickness of my layers, and the wetness of the concrete when applied. For this reason, I recommend varying the direction of your trowel marks on each layer to keep it more natural looking.
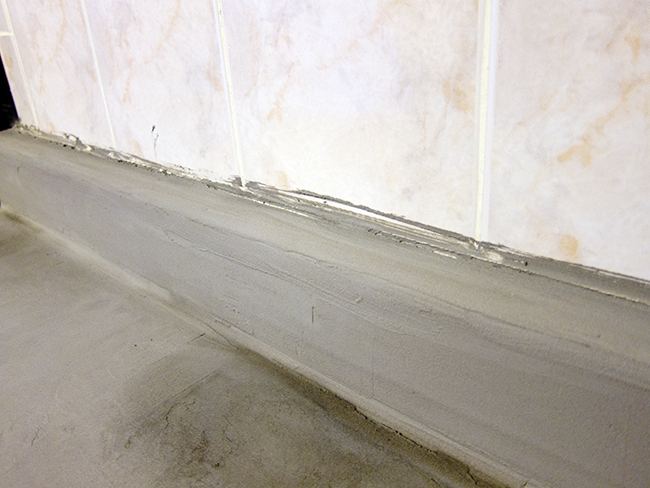
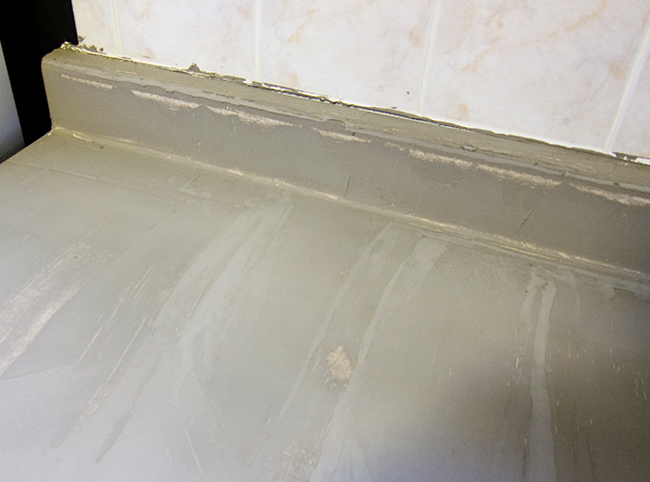
Here’s what the concrete looked like after all four layers had dried. Check out that beautiful texture! (note the tiles removed from the right side wall, but not the back wall)
Now, give the whole thing a really good sanding to your desired texture. You can go super smooth, or leave some trowel texture for a more organic look. I chose to go somewhere in the middle. mostly smooth with a little texture remaining. I really wanted a polished concrete look.
At this point the concrete will still be porous and it will be prone to staining and damage, so you’ll want to seal it somehow. Jenny from LGN used a lighter sealer that still allows some moisture to get through in favor of keeping the lighter color of the unfinished concrete. I chose to use a stronger, more permanent, water-tight, satin finish sealer since a kitchen counter would encounter a bit more abuse. Plus it would give me more of that polished concrete look that I want. You can use an acrylic concrete sealer to do this, but it was only sold in gallon sizes at my local hardware store and that was WAY more than I could ever use. So I decided to use a quart sized satin finish polyurethane sealer instead. The guy at the hardware store said it should work just as well.
EDIT 7/10/2014: For those considering this project, I’ve discovered that polyurethane will yellow over time. The more layers you use, the more it will yellow. I regret not using a genuine acrylic concrete sealer. I’ve also recently discovered this food-safe concrete sealer (also via LGN). It’s a little more expensive, but may be worth the investment. I will definitely use this for future projects!
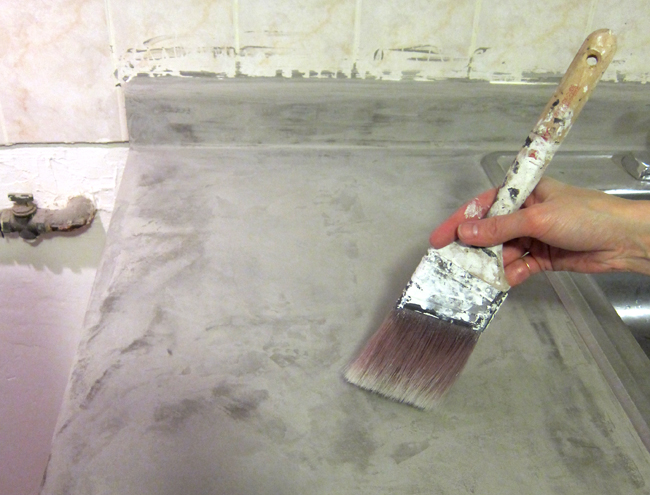
Before applying sealer, make sure to clean off any dust left behind by sanding. I used a dry paint brush to sweep everything off and then finished off by wiping it down with a rag. Make sure it is all totally dry before applying the sealer.
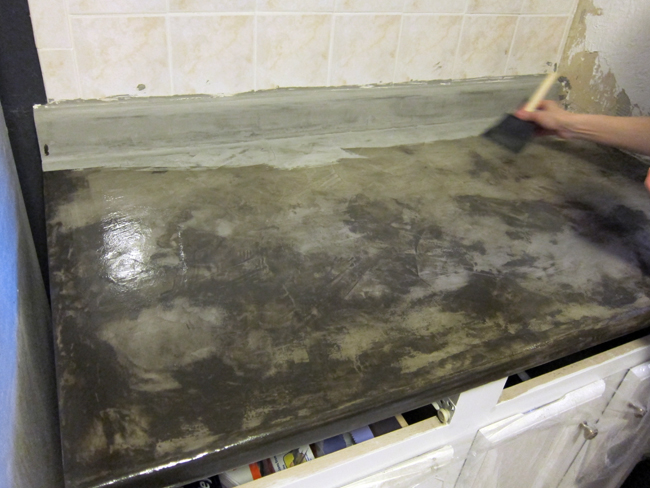
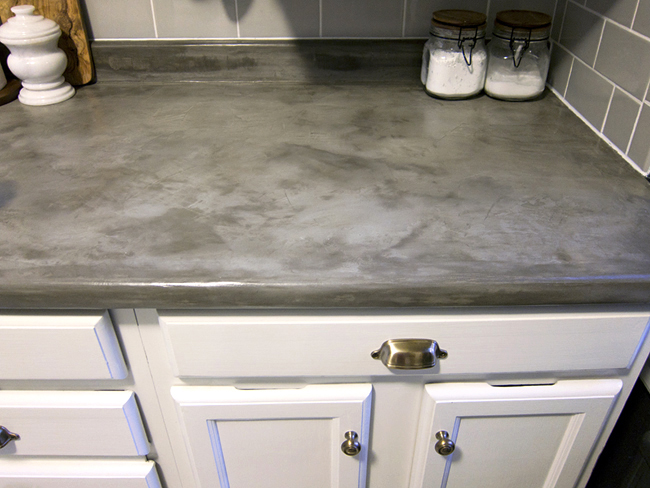
I applied it in two coats and sanded after the first coat dried for an extra smooth finish. Notice the color difference between the painted and unpainted sections. Once everything dries, the color will look somewhere between those two colors. Also, if you are using satin finish sealer, it will dry looking much less shiny than when it’s wet. I love how the sealer really brings out that stony coloring!
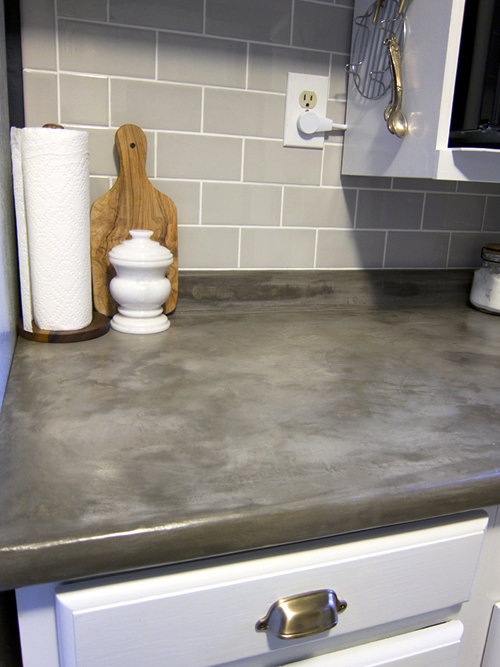
And here are the finished countertops! What an improvement! If you ask me, it looks way more expensive than other resurfacing techniques even though it was dirt cheap! I love the stylish industrial look. Stay tuned for the full before and after reveal where you’ll get to see them in the context of the whole kitchen.

Hello. Wondering if this method would work over existing sealed concrete counters? I had someone make them and they turned out very rough looking and I was wondering if I could fix them on my own? Thank you!
How are they holding up?
I am so happy that I found this anout the counter top in cement.I will check it out on Ebay or other places, thank you.
can it be use on top of stone tile?
I am about to tackle this project! Your information has helped me and inspired me so much. This may be a silly question, but what did you use to sand between the layers of cement? And again silly question, do you wait until its fully dried to sand it?
I live in India and can’t figure the cement I should use here . I want to use this method everywhere in my house. I wish I could figure the equivalent in India. Love your work!!
Your countertops look amazing! Do you know if these products can be used over stone countertops (limestone)? If so, how would I prep them before using these products? Thanks so much! Love reading all your tips and updates.
The question is: why our interior project on interest lead to a blog where our picture do not appear and with no credit? (Your article is from 2013 and pur interior from 2019….)
I’m so sorry, I don’t see the image you are talking about. I’ve never used your images in my articles. I do have a link to thumbnails on pinterest. Is that what you are talking about? Pinterest sometimes links images to your website
I actually really love your design studio and have never linked and image from your site to my site. I do have some of your images saved on my pinterest, but they always link back to your site. I’m not sure if someone else did something weird like linking your photo to my site??
did you look at who created the original pinterest pin??