
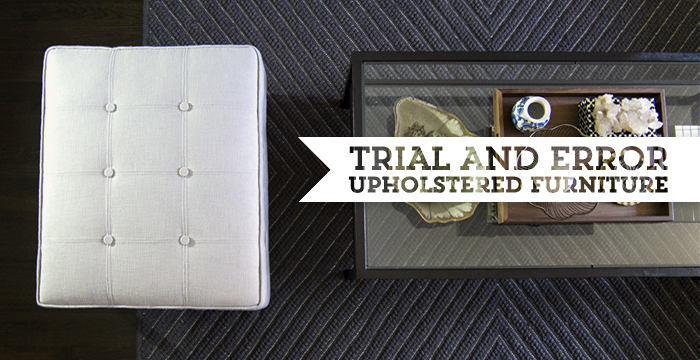
I really wanted a brand new ottoman for our livingroom. We wanted to add more seating to our tiny space, but a chair with a high back just seemed like it would feel too suffocating. So I thought an ottoman would have been a good solution since its low height would feel less imposing. As usual, I had a very specific look in mind, but was having trouble finding what I wanted for the price I wanted. The more I thought about it, the more I felt like I could make what I wanted for the fraction of the price.
Originally, when I first set out to tackle this project, I had intended to make this a DIY tutorial for the blog. I had never built furniture before (let alone upholstered furniture) but I’m usually really good at figuring things out and I was sure I’d be successful. And yes, I did end with success, but I made A LOT of mistakes along the way. So instead, this post will be more of a documentation of my process, rather than a step by step instruction manual.
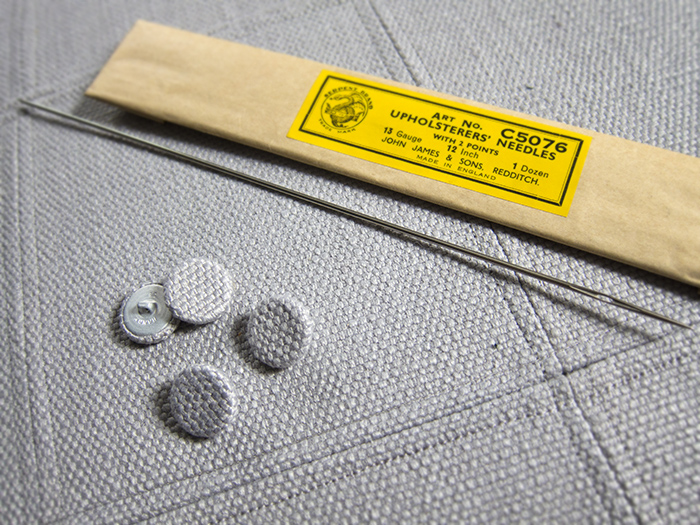
I got most of my supplies from diyupholsterysupply.com which is just a wonderland of everything you’d ever need to tackle a DIY furniture project.
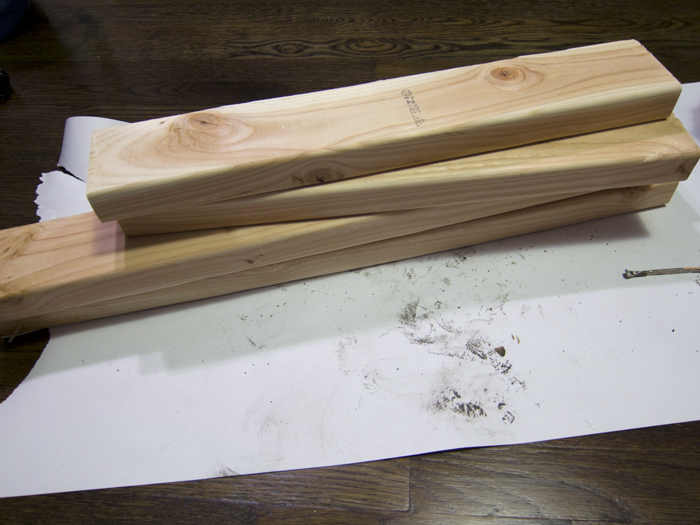
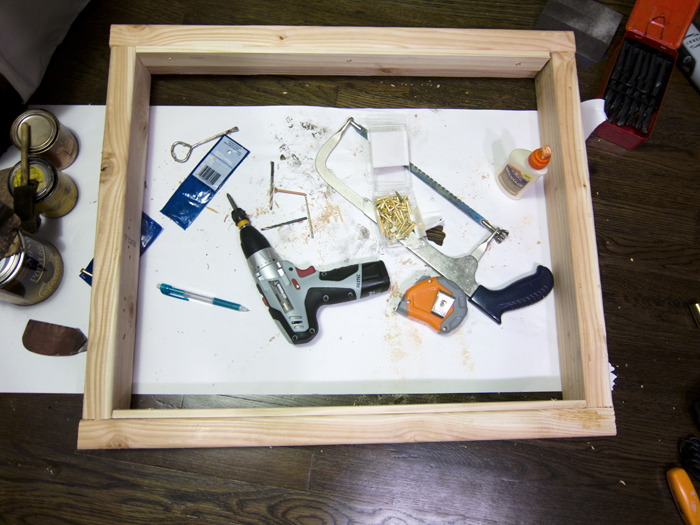
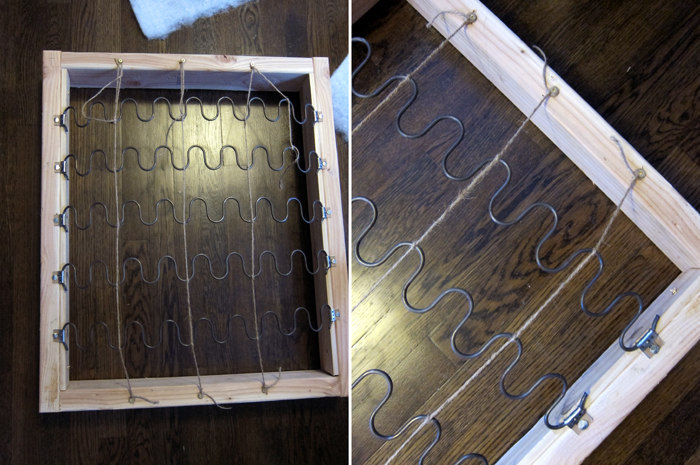
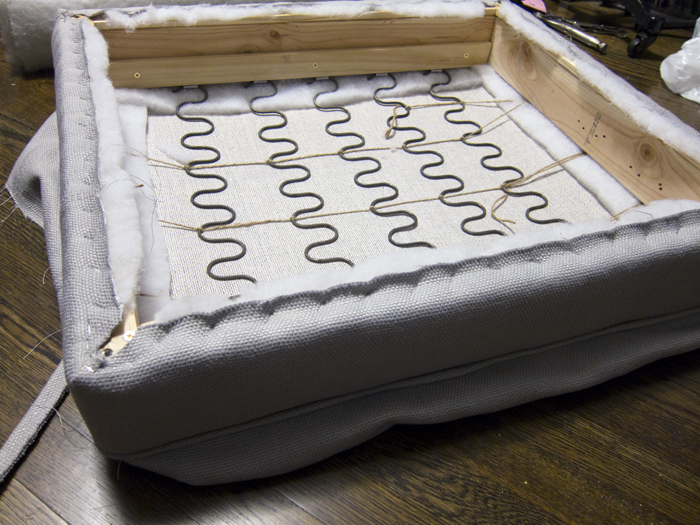
My first step was to build the frame for the ottoman. I got a few pre-cut two by fours from Home Depot and roughly attached it with some wood screws. It didn’t have to be perfect since the whole thing would be covered with stuffing and fabric. The important thing was just that the dimensions were correct. I decided to go with a 24″X28″ frame since that was the smallest standard size in stock at diyupholsterysupply.com.
The next step was to attach the seat springs. Unfortunately this is where I encountered my first hiccup. I bought the 20 inch zigzag springs, but the opening in my frame was about 21 inches wide (a 2X4 is narrower than 2 inches). I made up for that by adding extra strips of wood to the inside of the frame to make it narrower.
Also, I was too cheap to buy a spring stretcher and thought I could improvise with what I had around the house. This was a big mistake because attaching zig-zag no sag springs is way harder than it looks. They come bent into a half circle that you have to straighten out across the frame. Maybe its because I have very little upper body strength, but they are VERY hard to stretch and have really strong resistance. I ended up using this complex system of locking pliers and slowly tightening a C-clamp to attached them (nailed in with spring clips). Also, DEFINITELY wear safety goggles for this portion of a project like this. The springs have a tendency to fling into the air if you are not stretching them properly. I was dumb and caused myself a lot more trouble than I should have.
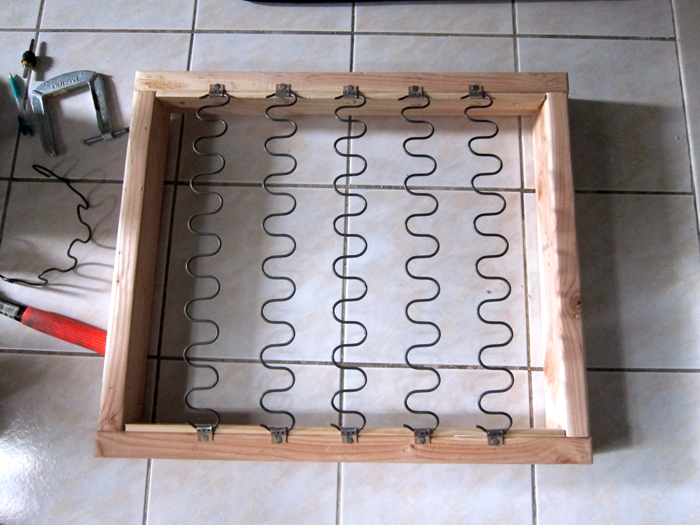
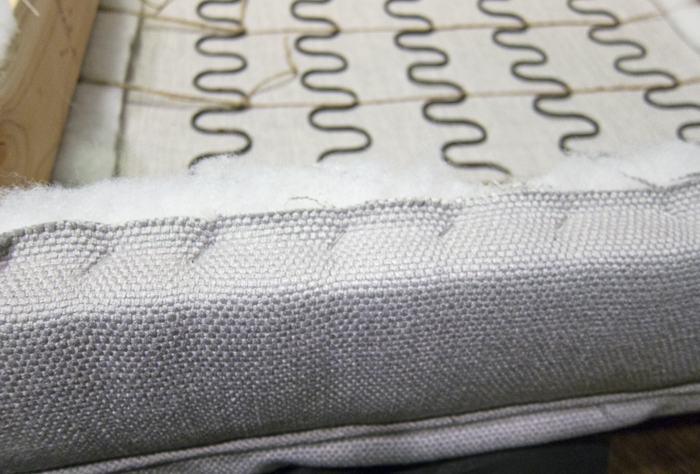
Anyway, they were eventually attached successfully after many hours and very much sweat. Next I tied twine across the springs to act as sort of a stabilizing element.
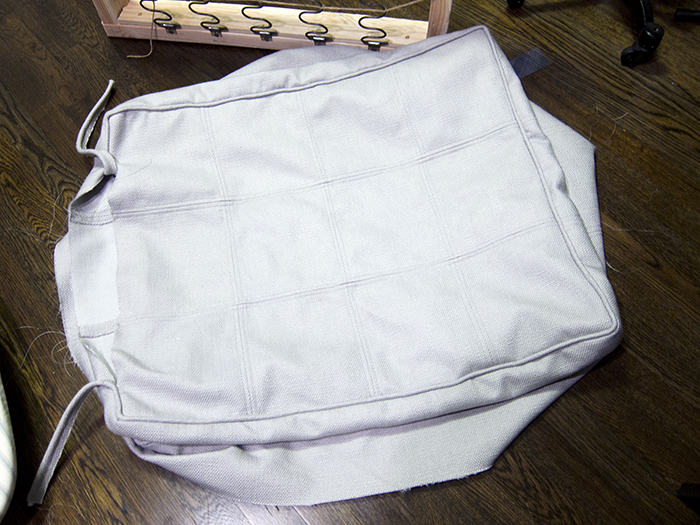
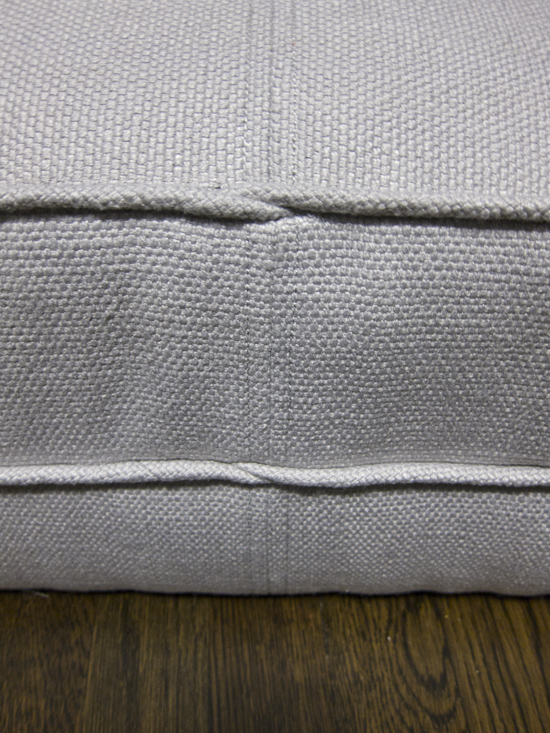
I bought my upholstery fabric from Mood in the city. Their lower floor is just full of amazing upholstery fabrics. I bought this beautiful, heavy, mesh-backed, basket weave fabric in pale grey. I love the texture and it totally matches the mid-century vibe that I was going for. I thought that something more clean and modern would balance out some of the more traditional pieces I already have in the space. This was the intuitive part or the project for me, since I have tons of experience with fabric and sewing. I sewed together the basic shape of the ottoman, making it so that the foam would fit inside nice and tightly. I also left one edge open in order to stuff it later. Another note is that I used upholstery thread which is much stronger than standard sewing thread.
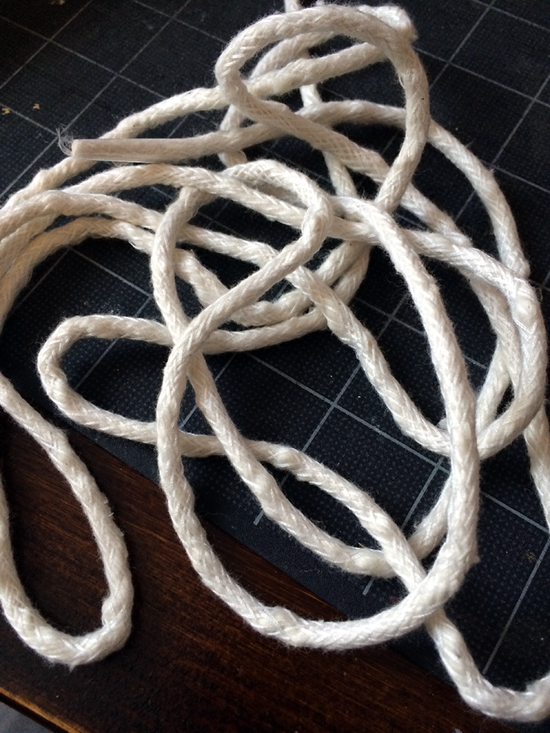
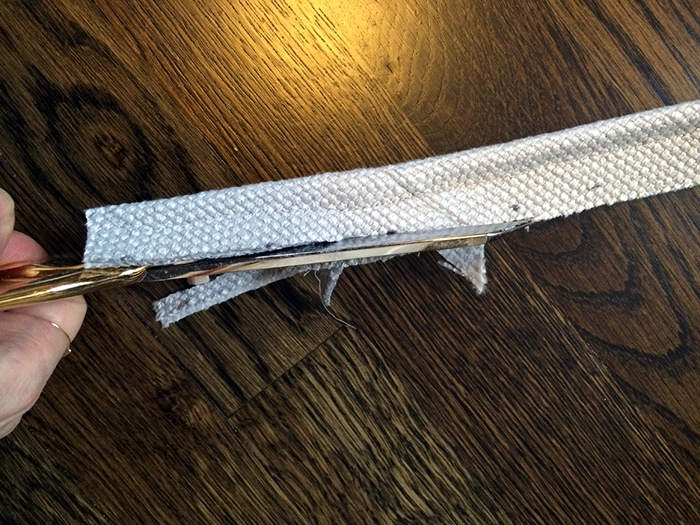
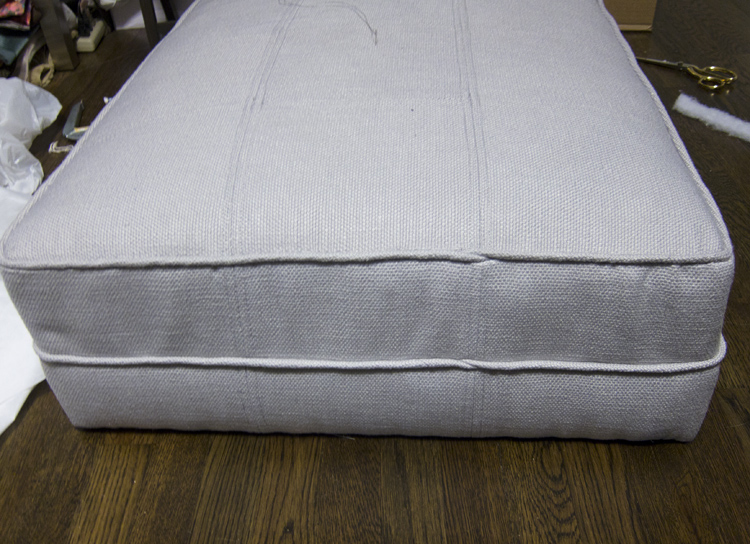
The piping was made from cotton cord wrapped with extra fabric cut on the bias.

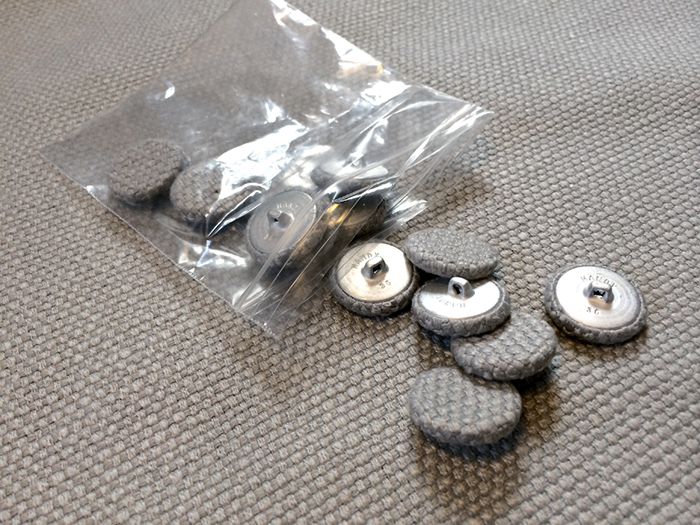
I also had covered buttons custom made from the fabric I bought. 3G in the fashion district (NYC) is a great resource for this and their prices are very fair.

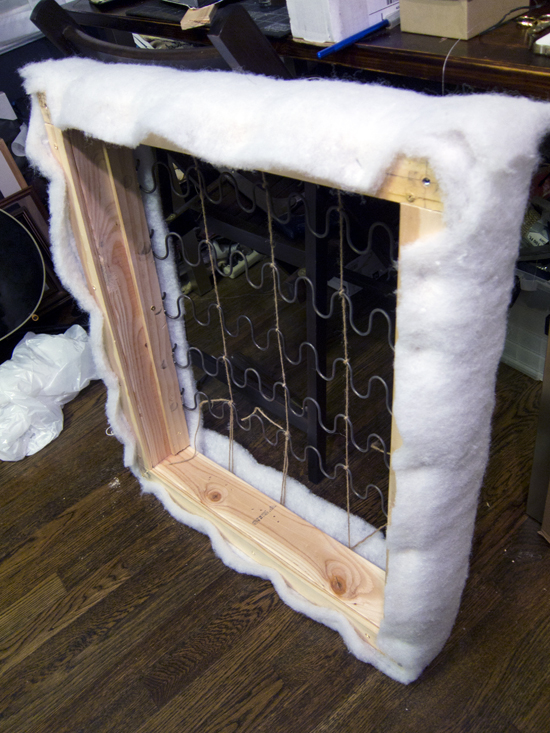
Next I wrapped the wooden frame with sheets of bonded Dacron, attaching it with staples.

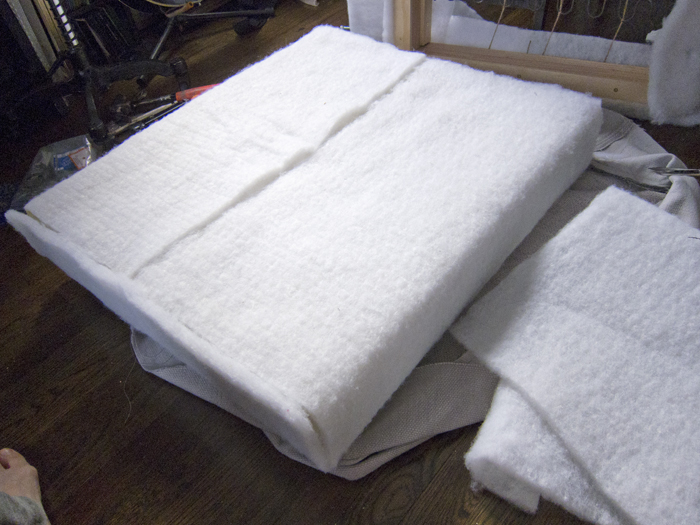
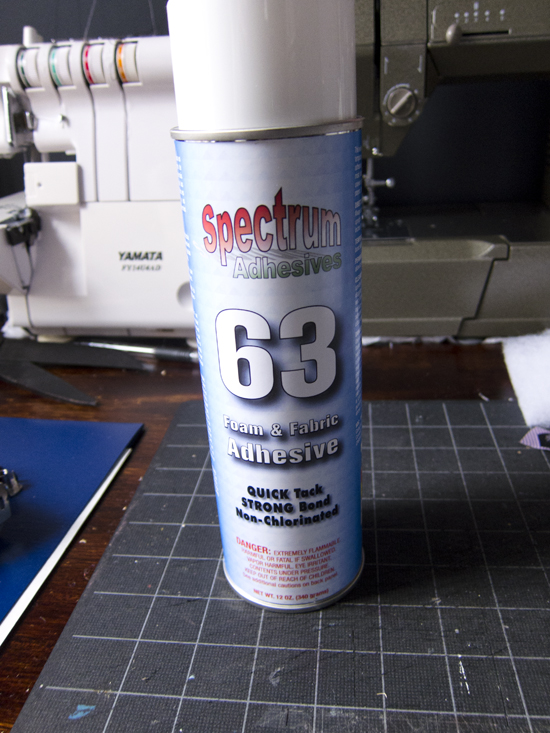
I also covered the big block of upholstery foam with Dacron using spray-on foam adhesive. Apparently this gives the cushion a smoother look.
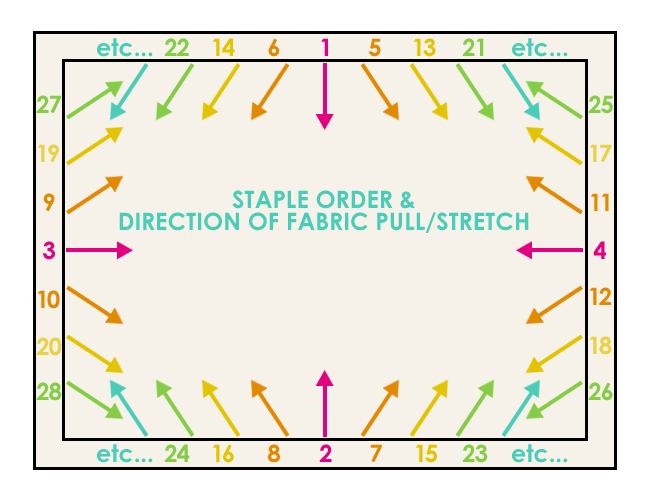
Then I started stapling the fabric to the frame using the same stretching technique that I would use for stretching canvas for a painting. You want your fabric stretched tightly and evenly.
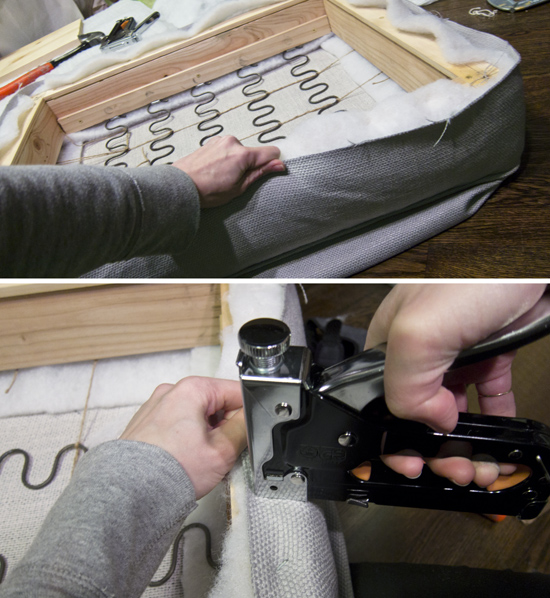
I was also too cheap to buy an upholstery staple gun (which seems to shoot finer staples.) I just used my regular $16 staple gun with standard staple gun staples. I seemed to work just fine!
Note: the spring side of the frame is facing towards the fabric. The springs are what support the cushion.
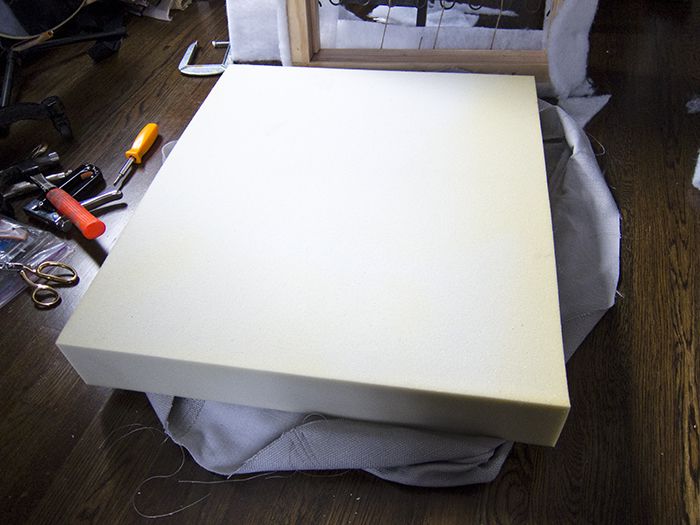
This is what the other side looks like. That hollow sack will house the big block of upholstery foam (I used medium firmness foam).
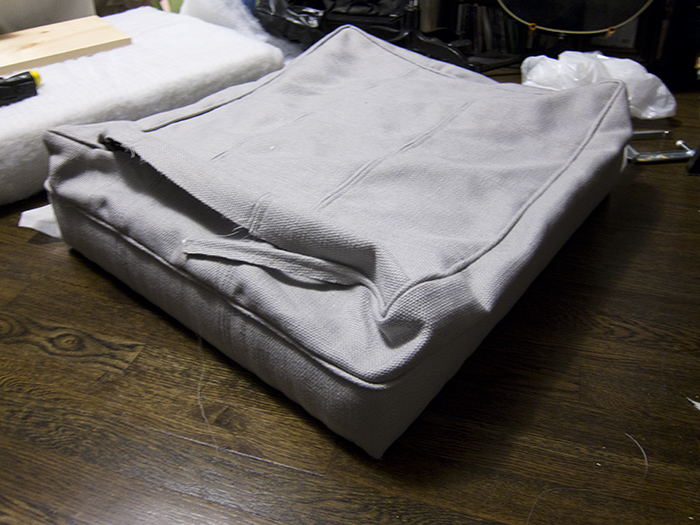
This next part required a little muscle and patience again. Since the fabric was sewn to allow a tight fit for the foam, it took a little doing to get that thing inside there. I found that it was important to reach my hand inside and smooth the Dacron as I went along – and especially when I was finished – since it had the tendency to buckle and cause a lumpy texture.

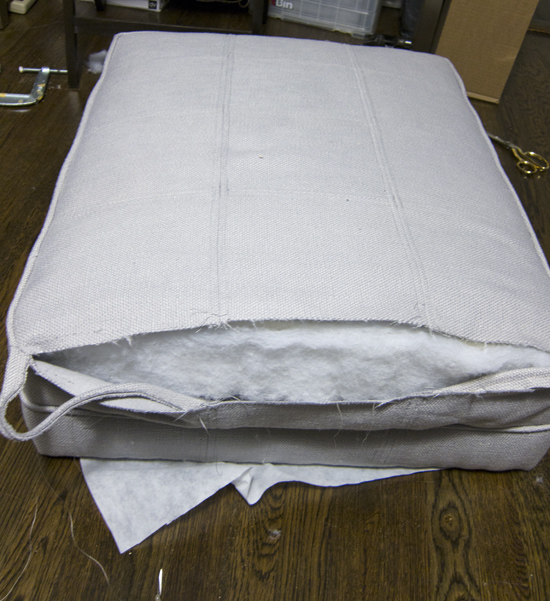
Then I hand stitched the open edge, again using upholstery thread. The piping was finished by tucking the ends into the seam.
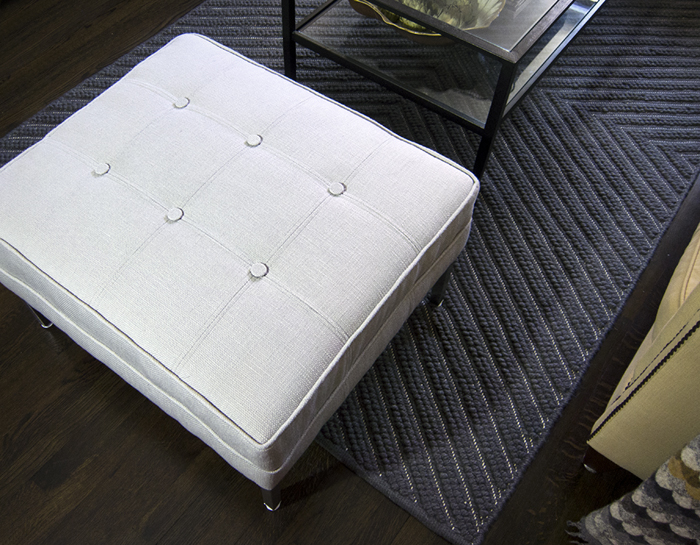
Once the fabric is properly in place and sewn up, it was time to attach the covered buttons. I had to buy a special, extra long upholstery needle for that. I needed one that was long enough to reach all the way through my foam so that I could tie my thread nice and tight. Adding some tension to the buttons gave it that minimally tufted mid-century look.
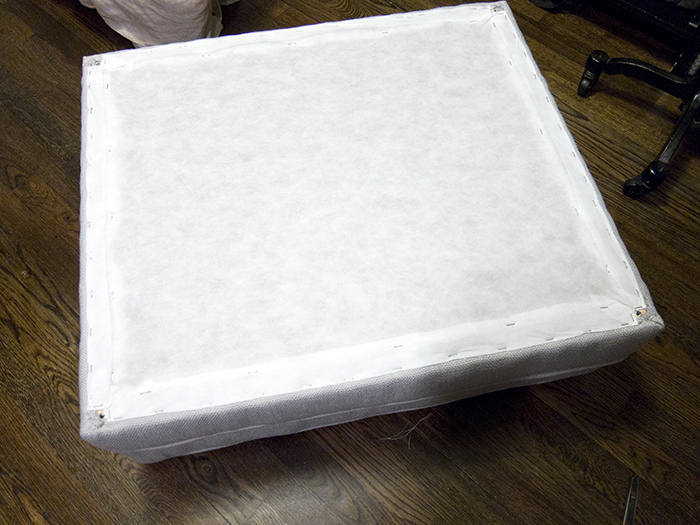
Next I flipped the whole thing over again and attached a dust cover using my staple gun. I stretched this in a similar fashion to stretching canvas as well. Even though it is unlikely that anyone would ever look at the bottom side of the ottoman, adding the dust cover hides the messy look of the springs and just gives the piece that professional touch.
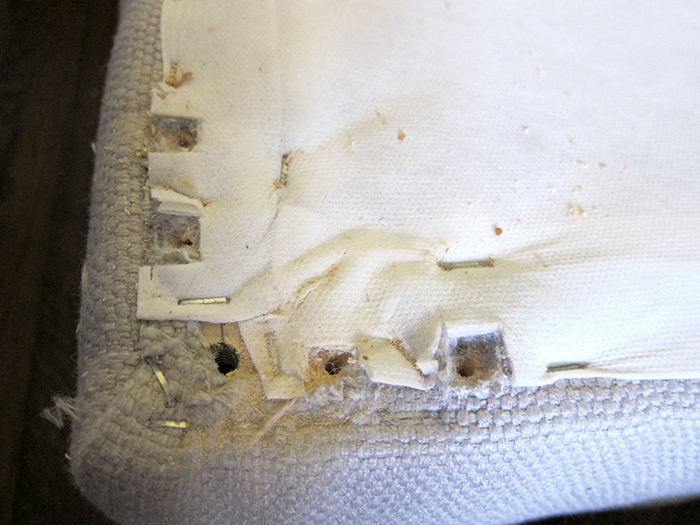
OK, so here is where more mistakes happened. Originally I had planned on using vintage mid century wooden legs that I bought from ebay. I had re-finished them and added brass caps and they were beautiful! They came with hanger bolts and were to be attached with T-nuts that I had installed when I made the frame.
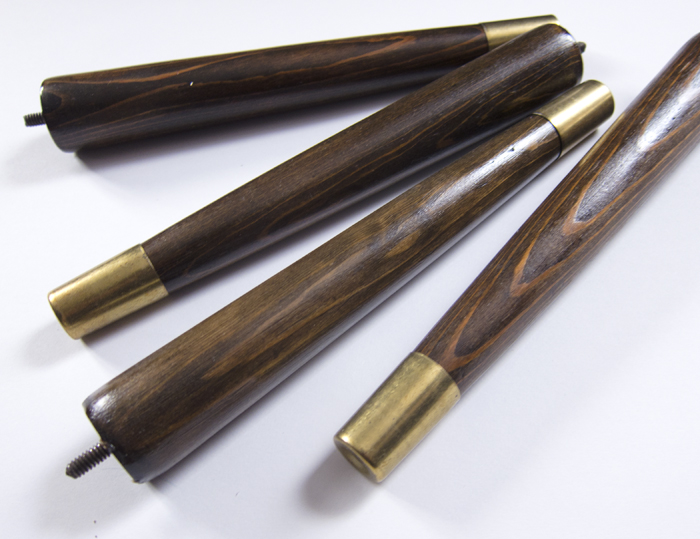

It worked just fine before I added the fabric, but there were a bunch of problems with this when I finished. The hanger bolt / T-nut combo was a little too thin and slight of a guage for an ottoman of this size, it just didn’t support the weight of a person all that well and probably would have been more well suited for an end table. Also I placed it much too close to the edge and the staples and fabric got in the way. It did not allow for very even attachment and made the legs very wobbly. So scrap that idea.
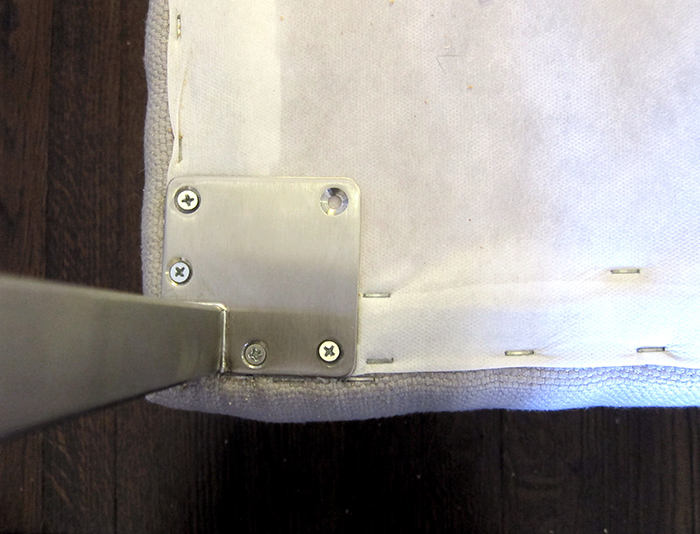
Instead I decided to go with a plate mounted chrome leg. They were much stronger and still had that clean modern look – and they were affordable. I had to cut away some of the upholstery to screw it in properly, but you don’t even see it when it’s attached. I don’t love this look quite as much, but it works for now. In the mean time I’ll keep my eyes open for more vintage legs on ebay. Maybe I’ll find a nice plate mounted gem that will have the look I originally wanted. Fortunately this is easy to swap out at any time.
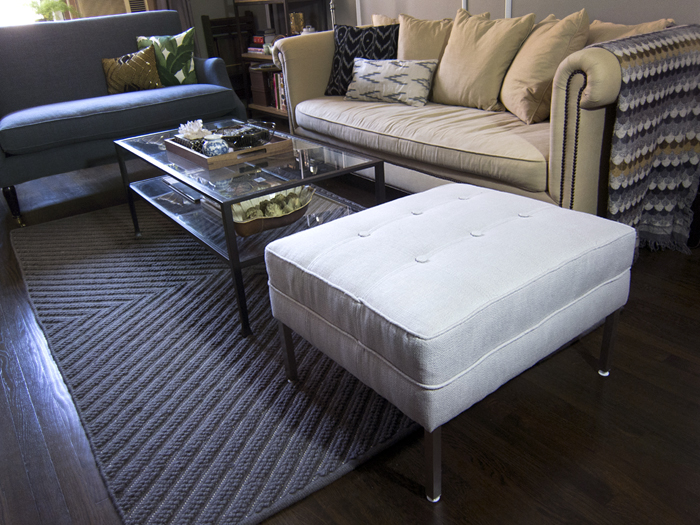
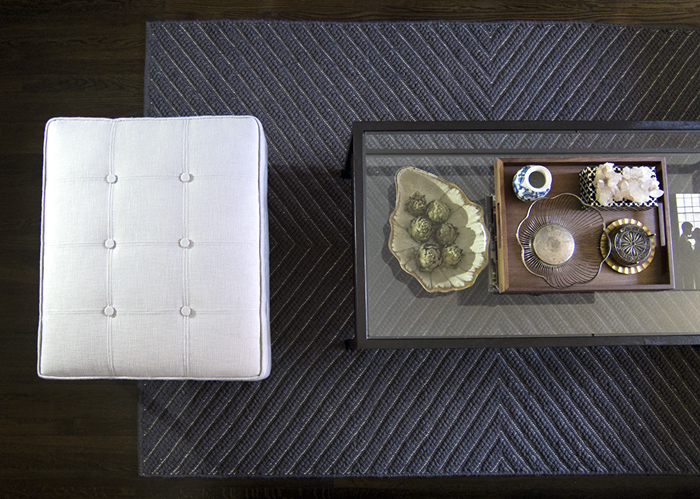
And here’s how it looks in our livingroom! I was mad at my mistakes and my perfectionist self was not totally happy with it, but I like it more and more as time goes on. Joe is also just amazed that I made any sort of furniture at all. I guess it’s not too bad for my first try.

OMG AMAZING!!!!
you really need to be discovered
Amazing, you are the most talented!
Beautiful!!! I can’t wait to see it in person! So freaking talented!
Very nice! I really like the texture and color of the fabric in the photos too, definitely adds a lighter, airier presence to the space. And I hope you can find another use for those vintage wooden legs–you did a great job with the finish and caps. Lastly, I really like the seams and covered buttons. Love that you know of a place to get these kinds of accessories custom made too.
Where did that love seat come from? I cannot believe all the things that’ve changed since we’ve moved away. 🙁 😉
haha, Janina, our home is constantly evolving. We got that love seat at a black friday sale (but wasn’t shipped until January). We really needed the extra seating for when we have people over. The little french bergère chair was moved to a corner in our bedroom.
Nicely done ! It has become my clash of clans game ottoman while charging my phone !
I’ve waited months to read about it. I am so inspired by your work.
this is AHHHH-MAZING!
Amazing job, Cheryl! I am very impressed.
wow, so much work and sweat put into this. great job! I’d totally buy it.
I just stumbled upon your blog and WOW! Great work and dedication on making it work! You’re very inspiring; I’ll be checking out your blog regularly for sure!
WOW, CHERYL! That’s amazing! 😀
Wow I am impressed what a beautiful job you have done. I wish I was up to trying something like that. anyway you did a beautiful job
This is so impressive! I’d love to try making an ottoman, I need one badly! This helped a lot helping me plan in my mind for my pillow chair reupholstery, thanks!
Lauren
Sparrow & Urchin
Is the top of the ottoman 12 separate pieces?