Follow Me on Pinterest follow us in feedly like us on facebook

Email Subscription

Enter your email address:

Delivered by FeedBurner


Alexis’s First Birthday

You may remember my post about Judy’s baby shower last year.  Well, she and I teamed up again for her baby daughter’s first birthday!!

Alexis's Confetti Themed First Birthday Party - << joeandcheryl.com >>

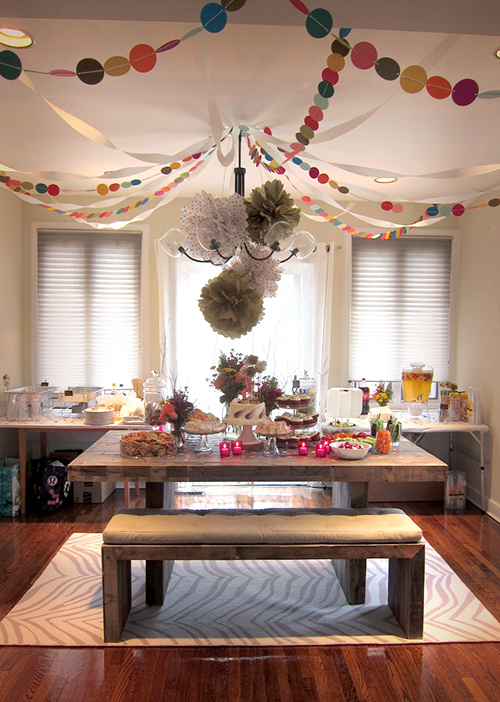
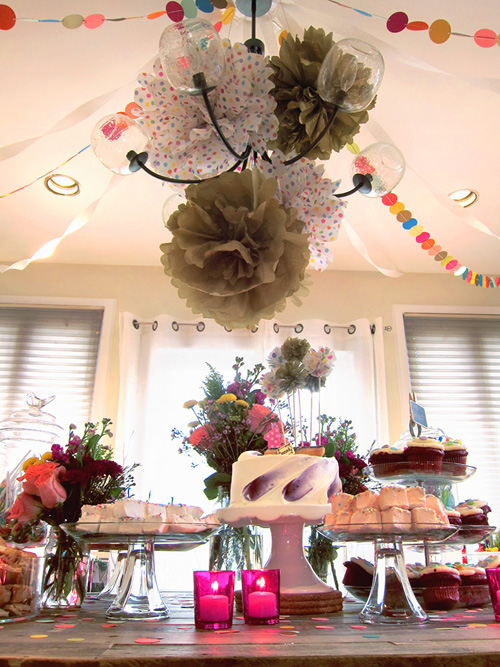
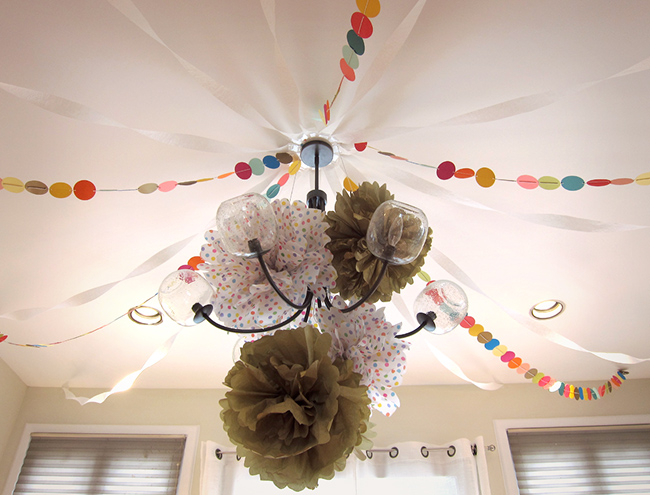
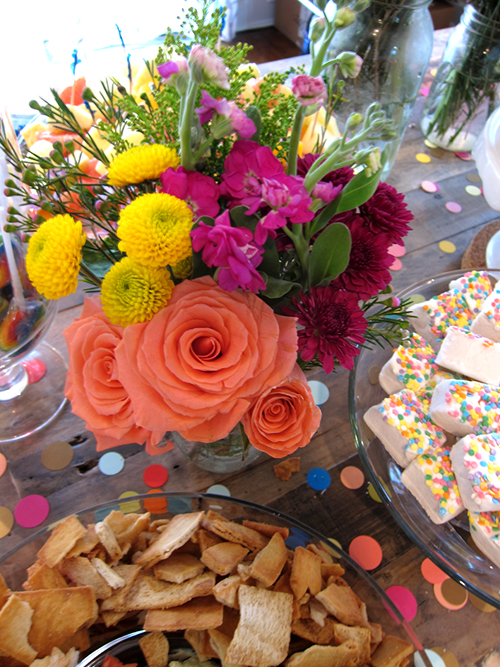
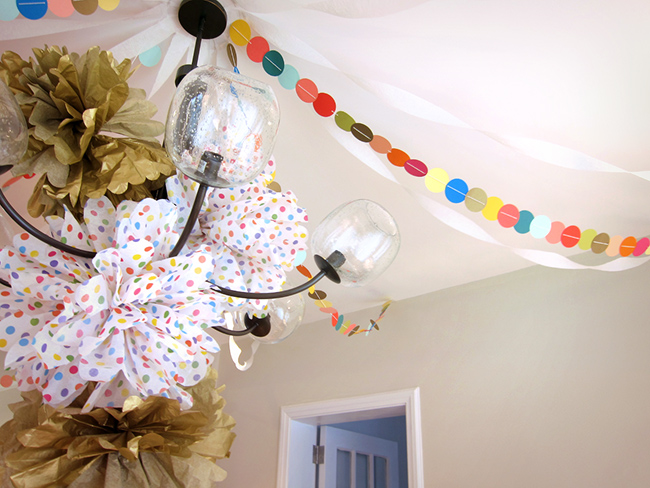
This time we decided to go for a confetti theme.  It was such a fun theme because you can involve so many colors and just polka dot everything!  I even tried to create a confetti effect with the flower arrangements by using flowers of several bright colors.  The little yellow mums even had the circular shape of confetti!

Anyway, I think the photos speak for themselves, so enjoy!!

Alexis's Confetti Themed First Birthday Party - << joeandcheryl.com >>

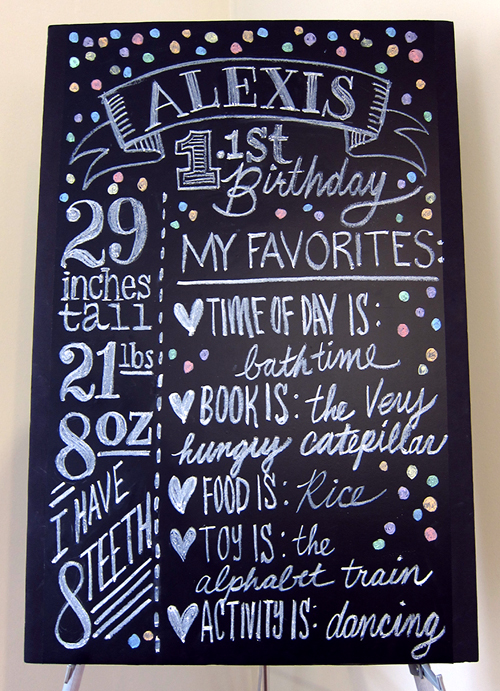
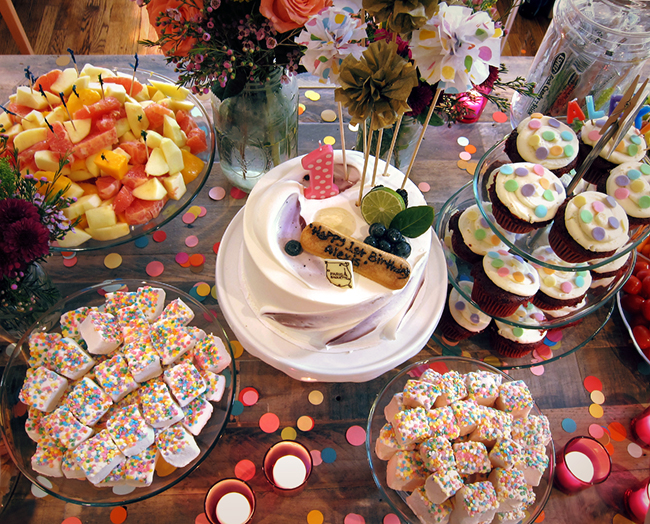
Its her 1.1st birthday since we celebrated about a month late!

Alexis's Confetti Themed First Birthday Party - << joeandcheryl.com >>

Alexis's Confetti Themed First Birthday Party - << joeandcheryl.com >>

Alexis's Confetti Themed First Birthday Party - << joeandcheryl.com >>

Alexis's Confetti Themed First Birthday Party - << joeandcheryl.com >>

Alexis's Confetti Themed First Birthday Party - << joeandcheryl.com >>

Alexis's Confetti Themed First Birthday Party - << joeandcheryl.com >>

Alexis's Confetti Themed First Birthday Party - << joeandcheryl.com >>

Alexis's Confetti Themed First Birthday Party - << joeandcheryl.com >>

Alexis's Confetti Themed First Birthday Party - << joeandcheryl.com >>

Alexis's Confetti Themed First Birthday Party - << joeandcheryl.com >>

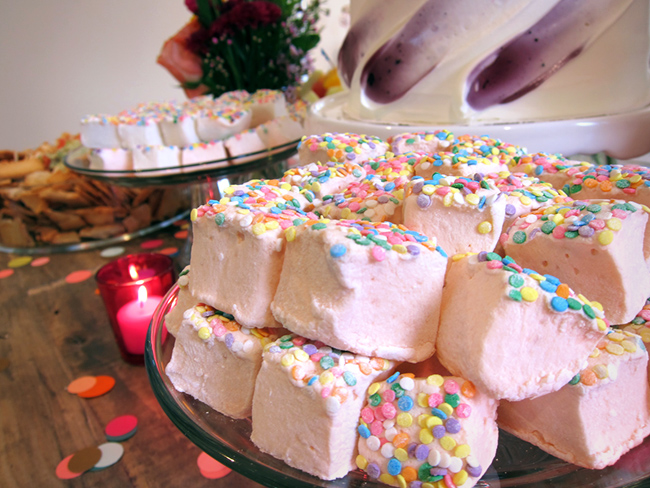
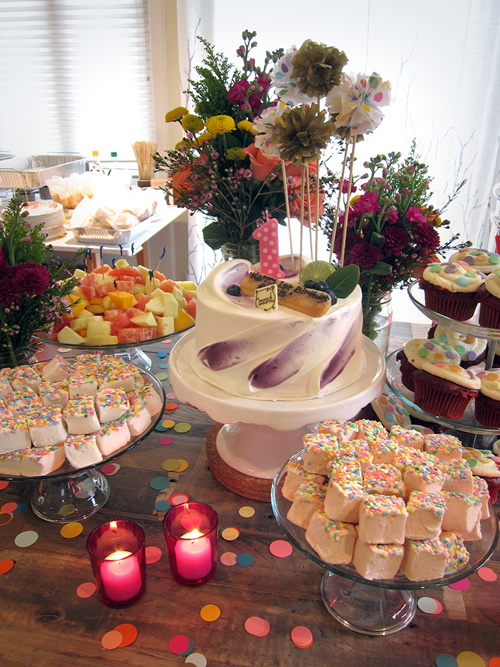
We made these marshmallows from scratch. The white ones are almond flavored, and the pink ones are orange blossom flavored!

Alexis's Confetti Themed First Birthday Party - << joeandcheryl.com >>

Alexis's Confetti Themed First Birthday Party - << joeandcheryl.com >>

Alexis's Confetti Themed First Birthday Party - << joeandcheryl.com >>

Alexis's Confetti Themed First Birthday Party - << joeandcheryl.com >>

Alexis's Confetti Themed First Birthday Party - << joeandcheryl.com >>

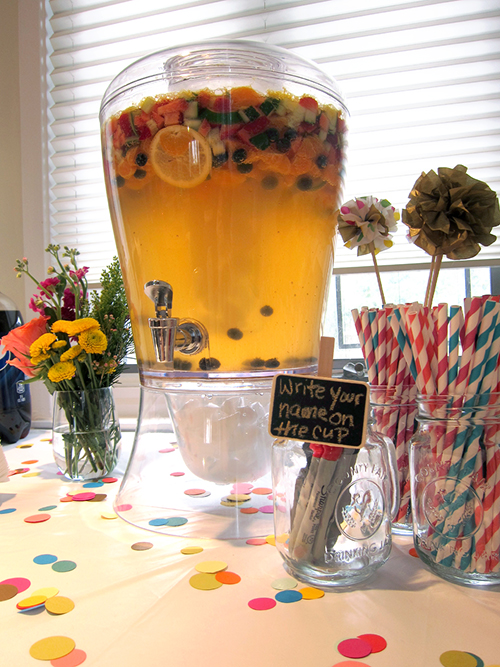
Signature mocktail! You’ll have to ask Judy if you want to know what’s in it, but cut up fruit echo the confetti theme =)

Alexis's Confetti Themed First Birthday Party - << joeandcheryl.com >>

Alexis's Confetti Themed First Birthday Party - << joeandcheryl.com >>

Alexis's Confetti Themed First Birthday Party - << joeandcheryl.com >>

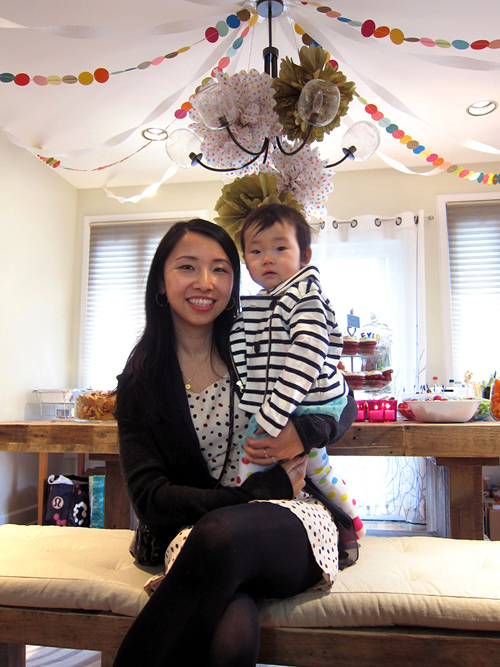
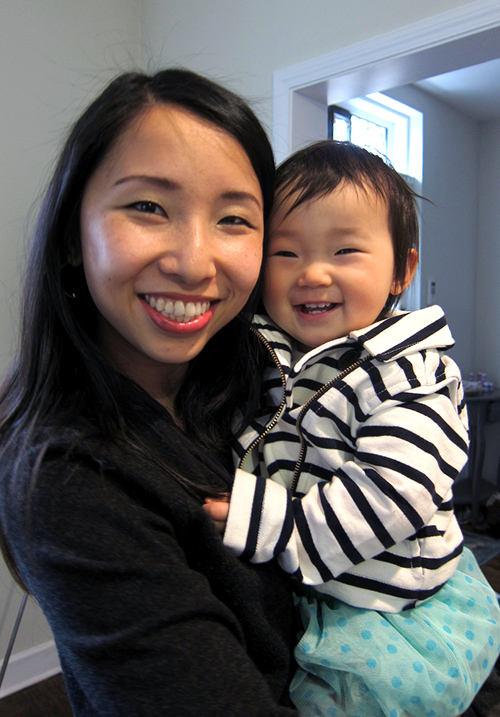
Happy mommy and baby!

Alexis's Confetti Themed First Birthday Party - << joeandcheryl.com >>

Decorating Our Foyer

Decorating Our Foyer - << joeandcheryl.com >>

Lately Joe and I have been on a little bit of a decorating kick.  While I’m the one who generally initiates most of the projects around the apartment, this time it was Joe who pushed to make the front door hallway more functional.  I think it’s part of the OCD neat freak side of his personality, rather than any sort of desire for beauty.  First we got this west elm rug in an effort to track in less dirt in from our shoes.  Then we got the salvaged wood bench (from etsy) for two practical reasons – for the putting on and off of shoes, and to visually make the whole shoe area look a little neater and fenced in.

These two additions worked out great for a little while. But we constantly found ourselves putting our bags, and mail, and other junk on the bench, rendering it unusable for sitting upon.  This drove Joe crazy and he started pushing me to install a shelf and hooks.  At first I wanted to keep things simple and just get a floating shelf, but Joe did not trust that it would hold much weight without brackets.  So then I dragged my feet for a long time while I looked for brackets I liked.  I’m so picky, I just couldn’t find anything that fit the image I had in my head.  Finally Joe found out about custommade.com.  We had SUCH a positive experience with this site.  Basically, you put up your project idea and set your price, then different artisans that are connected with the site can submit proposals to you.  You pick the one you like most, and in a few short weeks, you have exactly what you want!  We went with a metal worker in Maryland called Moonlight Forge.  I have nothing but good things to say about the experience. The brackets we ended up with may not seem like anything special to you, but they are EXACTLY what I wanted and that’s what matters.

Decorating Our Foyer - << joeandcheryl.com >>

Anyway, we went to Home Depot to buy a piece of wood to go with the brackets, and I stained and finished it myself.  I bought pine because I was feeling cheap, but I don’t recommend this to anyone else.  I’m happy with how it turned out, but Pine takes stain really strangely.  It tends to go on too darkly, unevenly, and unpredictably.  For example, I used the same stain on the shelf as for the bench (which we bought unfinished) and on our hardwood floors. All three types of wood turned out completely different from each other.  But while the floor and bench (which are both hardwood) remained more dark brownish, the pine shelf stained an uneven black black black-ish…greenish?? No biggie though, luckily I like how it looks. But if you want to do something like this for yourself, avoid pine and get some sort of hardwood.

Here are some pics from my process. A while back I posted about finishing an Ikea table using Minwax Polyshades stain and polyurethane in one.  I still like this product for quick, cheap projects; but since then, I’ve preferred using stain and sealer separately.  I find that it gives you a little more control.  Just my personal preference.

Decorating Our Foyer - << joeandcheryl.com >>

Decorating Our Foyer - << joeandcheryl.com >>

1. raw wood, 2. stain applied, 3. sealer half applied

Once my shelf and brackets were all ready, we spent quite a bit of time one Saturday installing everything.  Since we wanted this shelf to be able to handle substantial weight, we needed to make sure the brackets were firmly sintalled into the studs in the wall. So we found two studs using a handy dandy stud finder, marked their locations, and measured the distance between them.

Decorating Our Foyer - << joeandcheryl.com >>

Then I positioned the brackets onto the shelf, centering them according to the distance between the studs.  I also used a flat piece of wood as a guide in positioning them so that they would sit against the wall properly.

Decorating Our Foyer - << joeandcheryl.com >>

As much as I don’t recommend pine, the great thing about it is that it is SO soft, that you don’t even need to pre-drill any holes.  You can just screw right in with your wood screws.

Decorating Our Foyer - << joeandcheryl.com >>

Now for the next step, it helps to have two people.  Joe held the bracket/shelf combo up to the wall, while I lined everything up properly and used a level to make sure it was level.  Then I used a pencil to mark the screw holes on the wall.

Finally we drilled holes, inserted plastic drywall anchors, and screwed in the screws. Similar steps were applied to the hooks, minus the stud finding.  One thing we had to be careful about was not drilling into any of the wiring in the fuse box which is on the same wall.  It took a bit of strategic positioning to make sure everything was centered, lined up with the studs, but also NOT lined up with the fuse box.

Decorating Our Foyer - << joeandcheryl.com >>

Oh yeah, in case you are wondering where we got the cast iron hooks, I actually bought them from Anthopologie about four years ago and never used them.  They are no longer available, but you can find the same ones in brass here, or similar ones in cast iron here!

Decorating Our Foyer - << joeandcheryl.com >>

So here are more pics of the finished update.  Nothing dramatic, but I love how it turned out.  Unfortunately, I kind of hate our call box and the fact that it was installed crookedly.  I also don’t like that the fuse box doors are so ugly, but what can you do.  Maybe someday I can find a way to creatively cover them up in a way that is still functional?

Decorating Our Foyer - << joeandcheryl.com >>

Decorating Our Foyer - << joeandcheryl.com >>

Decorating Our Foyer - << joeandcheryl.com >>

Decorating Our Foyer - << joeandcheryl.com >>

Decorating Our Foyer - << joeandcheryl.com >>

Decorating Our Foyer - << joeandcheryl.com >>

Decorating Our Foyer - << joeandcheryl.com >>

Decorating Our Foyer - << joeandcheryl.com >>


Hand Made Wet Felted Puppets

Wow, it has been quite a while since I’ve updated the blog. Summer is always just so packed full of activity and travel. On top of that, my responsibilities at work have nearly doubled causing me to feel a lot more swamped and tired out by the end of the day. Hopefully, now that its fall and my schedule is less packed, I’ll be able to post more often (although maybe not quite once a week like I had tried to in the past).

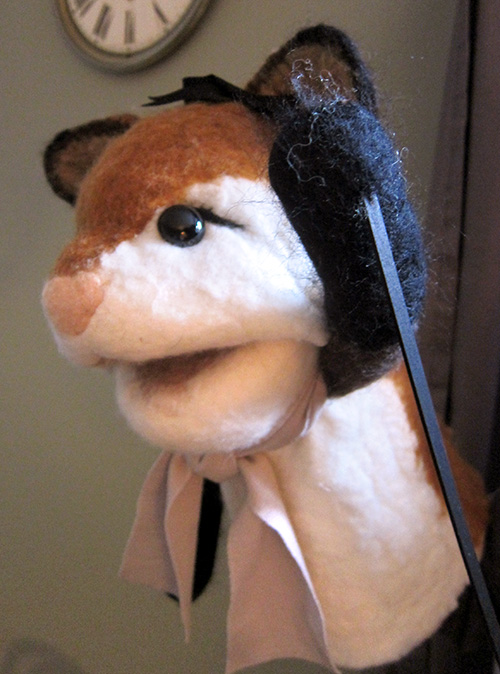
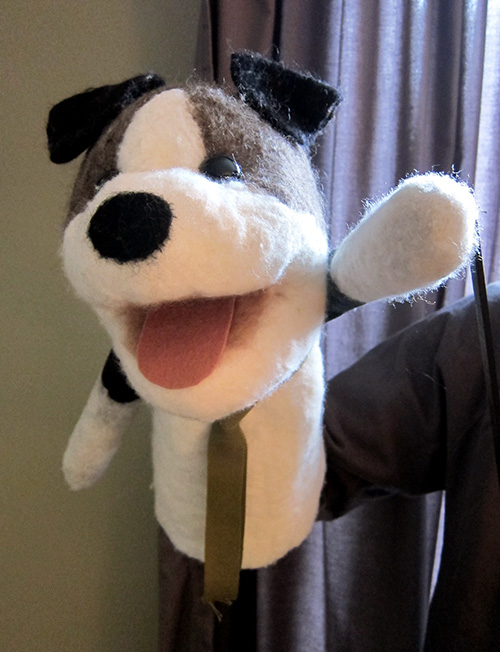
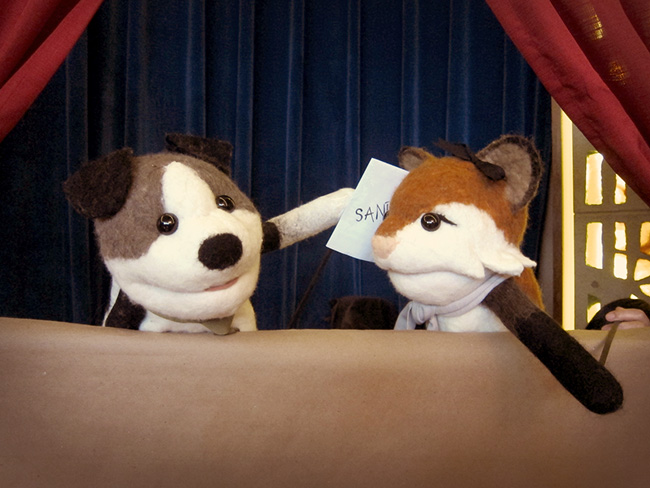
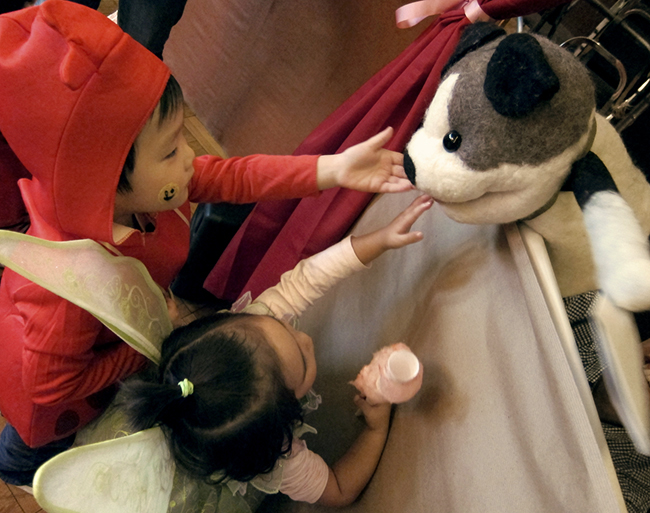
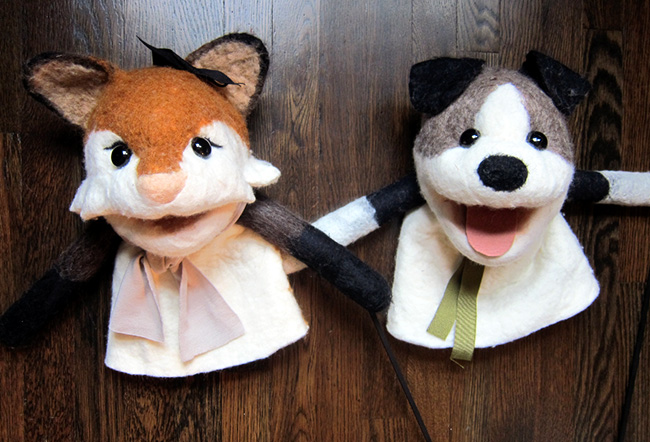
So this past weekend, my church held it’s annual “Harvest Fest” – a Halloween celebration for the children, full of fun and games. My group was in charge of putting on a puppet show, so I eagerly volunteered to make the puppets (much to my husband’s chagrin – my projects always create a HUGE mess!) Here’s the final result!
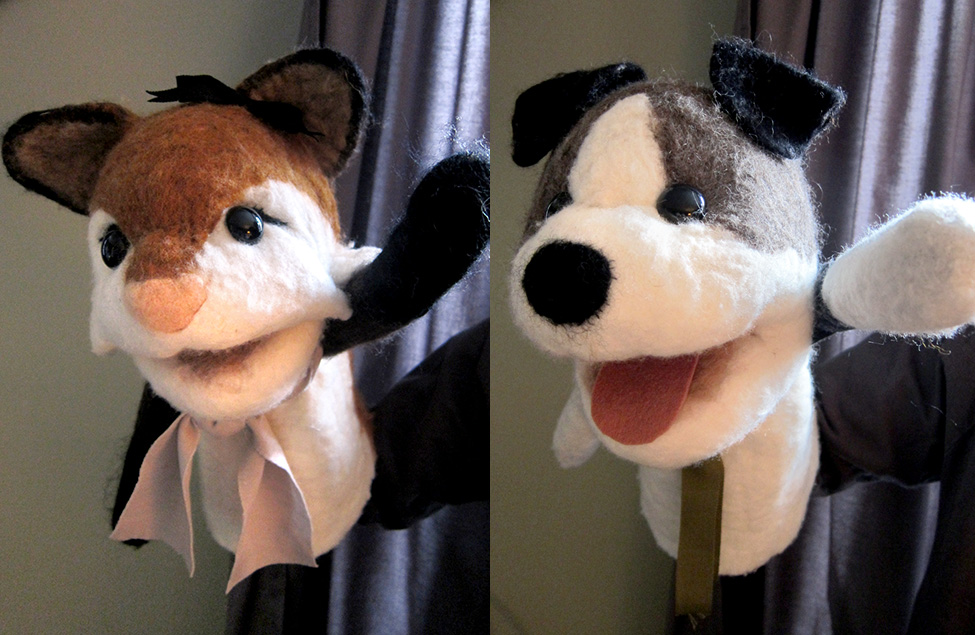
Hand Made Wet Felted Puppets - << joeandcheryl.com >>

For these puppets, I decided to try “wet felting” for the first time ever. Wet felting (from what I’ve read) is one of the oldest forms of textile making. I decided that wet felting to a mold – a similar process that hat makers use – would be the best way to make a clean, seamless puppet while giving lots of character. After my past needle felting experiences, I figured, how hard could it be?  Actually, its significantly more difficult than needle felting. haha.

Hand Made Wet Felted Puppets - << joeandcheryl.com >>


SUPPLIES

1. 1 lb wool roving (this was enough for two puppets. Finer seems to work better)
2. Assorted packs of multicolor wool roving
3. Felting Needles
4. Felting Foam
5. Soap (for felting – I used laundry detergent because that’s what I had lying around, but I’ve seen tutorials that use olive oil soap bars)
6. Hot water
7. A small bowl
8. Styrofoam Balls cut in two pieces
9. Aluminum foil
10. Saran wrap
11. A mesh laundry bag
12. Needle and thread
13. Any type of woven fabric
14. Polyester stuffing or fiber fill
15. Clear packing tape
16. Mat board or something flat, stiff and cuttable
17. Other optional extras like buttons for eyes, ribbons, etc.

The first step is to create a mold from the styrofoam ball(s). I used a bread knife to saw it into two pieces. The two pieces are about 70% and 30% of the whole. 70% for the upper part of the head, and 30% for the lower “jaw.”
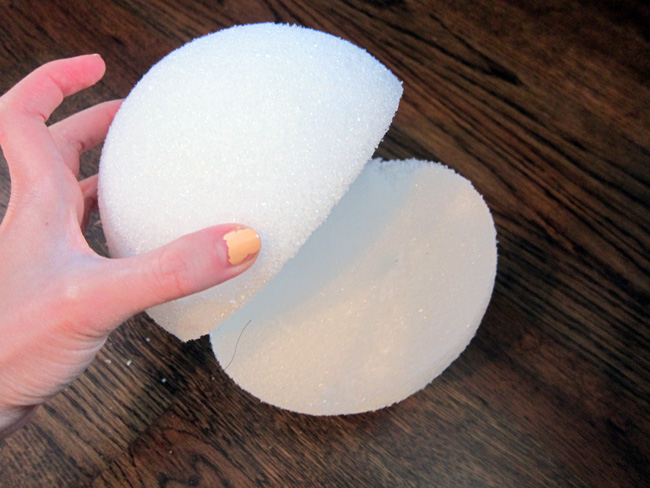
Hand Made Wet Felted Puppets - << joeandcheryl.com >>

Next I used aluminum foil to sculpt a snout and add shape to the “skull.”
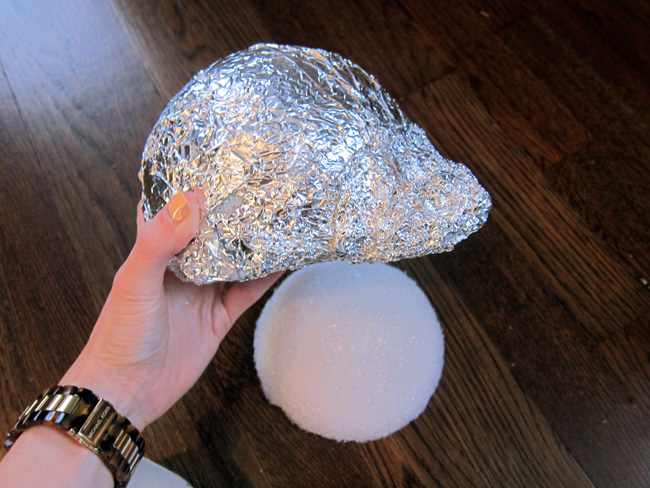
Hand Made Wet Felted Puppets - << joeandcheryl.com >>

When I was happy with the shape, I tightly wrapped up both halves separately with saran wrap and secured it with clear packing tape. Then attached the upper half to the lower half with the packing tape, but only in the back so that you can still open and shut the “mouth.”
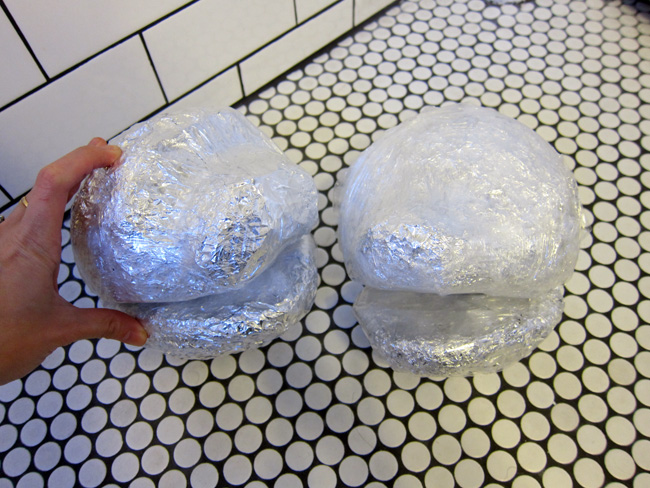
Hand Made Wet Felted Puppets - << joeandcheryl.com >>

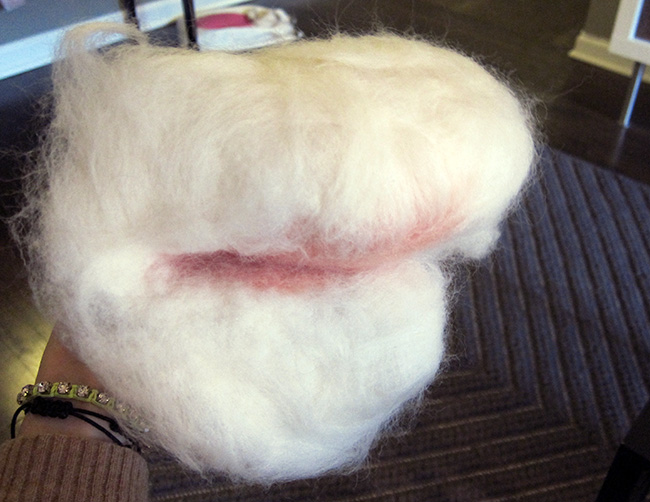
Now that the molds are done, we can move on to the felting. Normally if you are wet felting a flat sheet, needle felting is not necessary, but since I was felting to a 3D mold, I had to first roughly needle felt a hollow shape. I started with a diamond shape for the “mouth” that would fold in half to create movable jaws. You can follow my needle felting tips from this old post.

Hand Made Wet Felted Puppets - << joeandcheryl.com >>

Then I added on extra white roving to create the top part of the head and the lower jaw.

Hand Made Wet Felted Puppets - << joeandcheryl.com >>

Hand Made Wet Felted Puppets - << joeandcheryl.com >>

An important thing to keep in mind is criss crossing your strands of roving (as pictured below). It will add strength to the felting by kind of weaving the fibers together. Strands should go in all directions (0 degrees, 90 degrees, 45 degrees, etc.)

Hand Made Wet Felted Puppets - << joeandcheryl.com >>

Just as I did, you’ll also want to needle felt and attach any “protrusions” you might have and would prefer not to sew on later – such as ears.

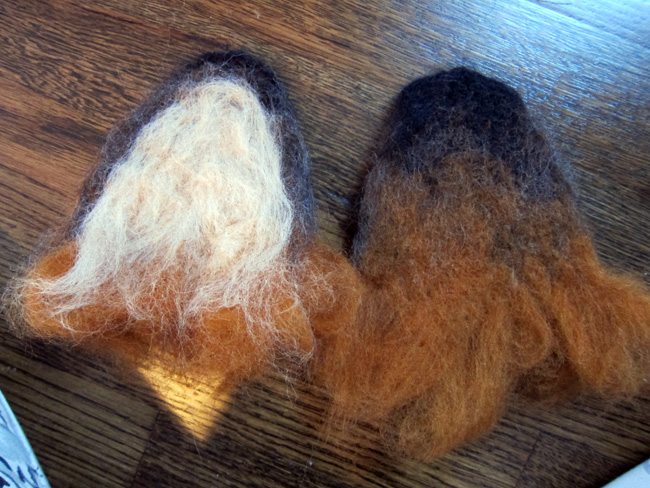
Hand Made Wet Felted Puppets - << joeandcheryl.com >>

Hand Made Wet Felted Puppets - << joeandcheryl.com >>

I slowly added to and built up the head. Keep in mind the size and rough shape of the mold, and remember that everything will shrink about 20%. It doesn’t have to be perfect though, wet felting it to the mold will refine the shape a little closer to perfection. As you can see, my head looks a little deformed at this point. Its just big enough for the mold to loosely fit inside.
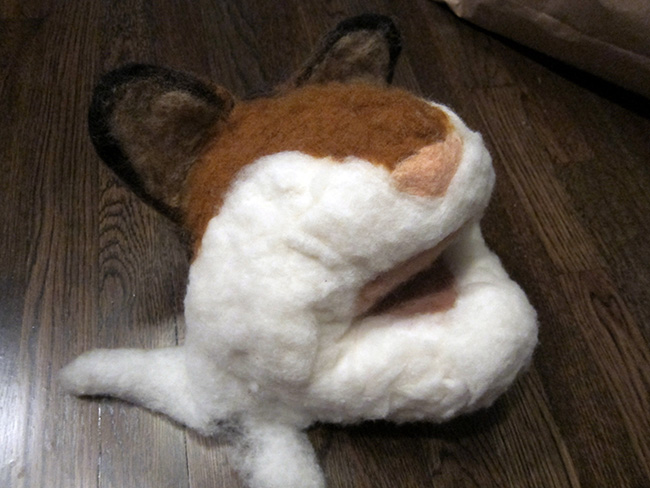
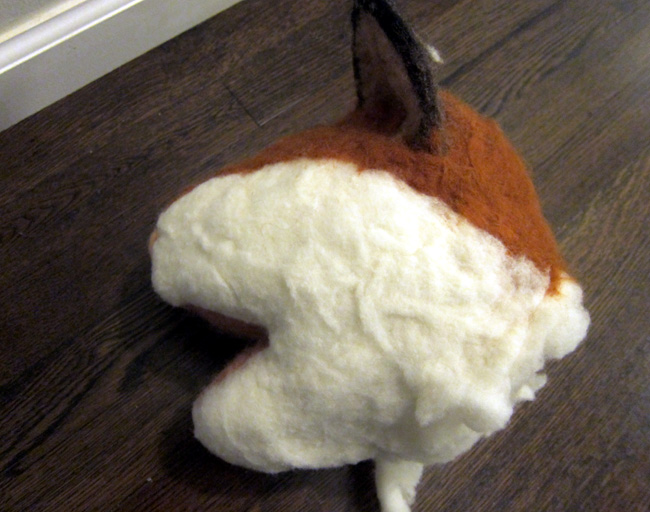
Hand Made Wet Felted Puppets - << joeandcheryl.com >>

Hand Made Wet Felted Puppets - << joeandcheryl.com >>

On to the “wet” part of wet felting… I think this is best done in a sink where you’ll have some sort of drainage. I filled a small bowl with water as hot as I could bear skin contact with. I also mixed in a small amount of soap – probably one or two teaspoons?
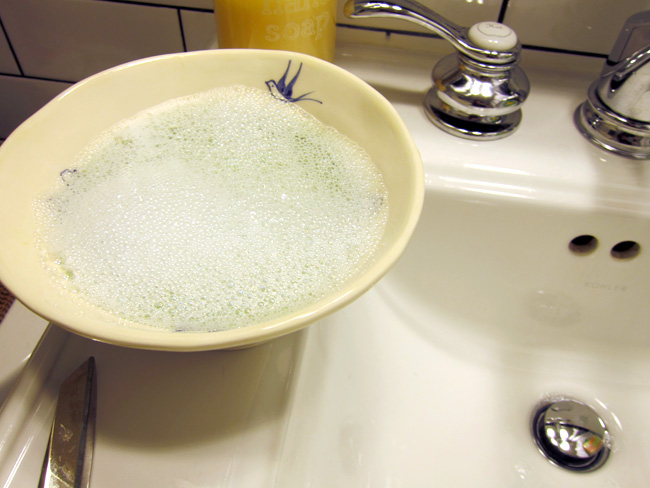
Hand Made Wet Felted Puppets - << joeandcheryl.com >>

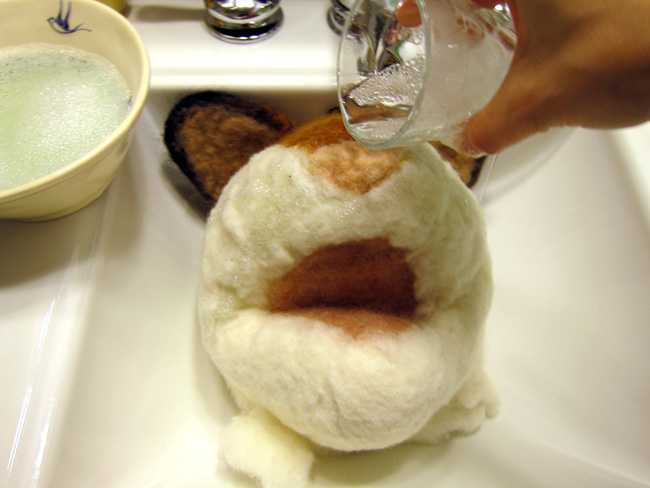
I stuffed my mold inside my hollow-needle-felted head and placed the whole thing in the sink. I then slowly scooped small amounts of the hot water mixture onto it. I did this until it was fully saturated, but not dripping soaking wet either. It may seem strange, but the soap actually acts like a glue that holds everything together. On my first attempt I hastily neglected to add soap and all of my wool just melted off the mold in an oozing mass. Soap is very important!
Hand Made Wet Felted Puppets - << joeandcheryl.com >>

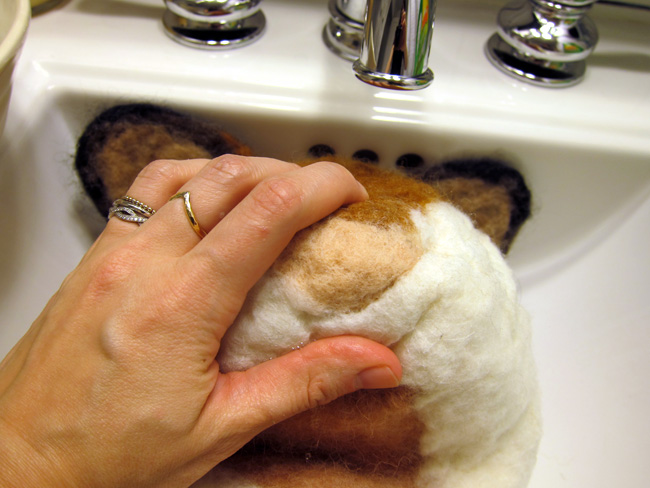
Now I gently massaged every part of it to encourage it to take its shape and add to the “tangling” effect. Make sure to shift features like ears and nose to their appropriate locations as they will be sliding around a bit. You’ll already notice that the wool is slightly shrinking. In the photos below, you’ll see that I created a little fold of excess felt at the corners of the mouth. You don’t have to do this and I did not do this for the second puppet I made. I added this detail for the fox character to create a furry fringe which you’ll see later.
Hand Made Wet Felted Puppets - << joeandcheryl.com >>

Hand Made Wet Felted Puppets - << joeandcheryl.com >>

Hand Made Wet Felted Puppets - << joeandcheryl.com >>

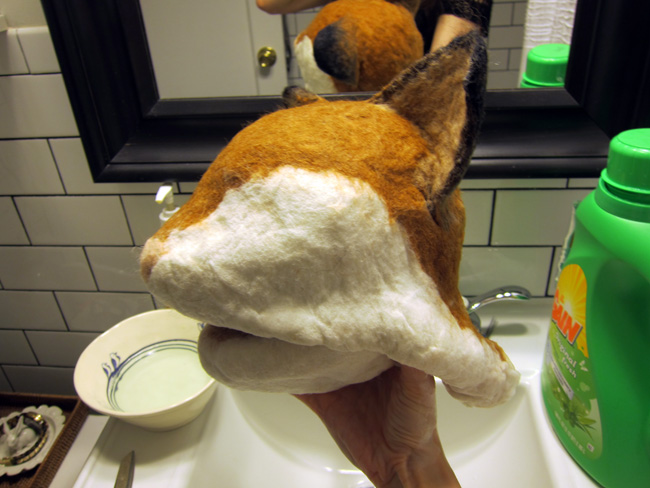
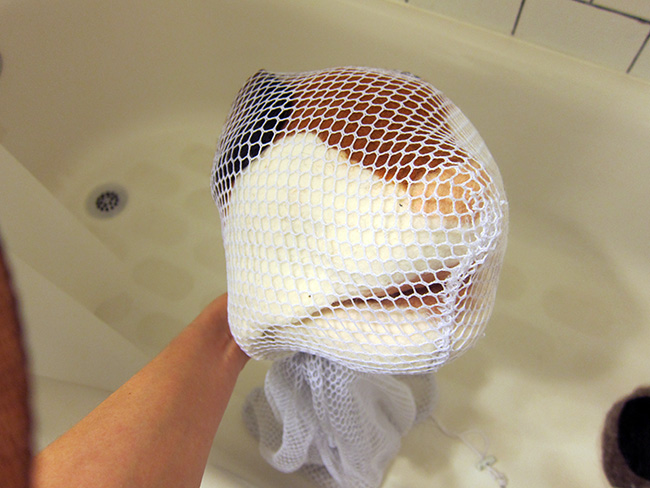
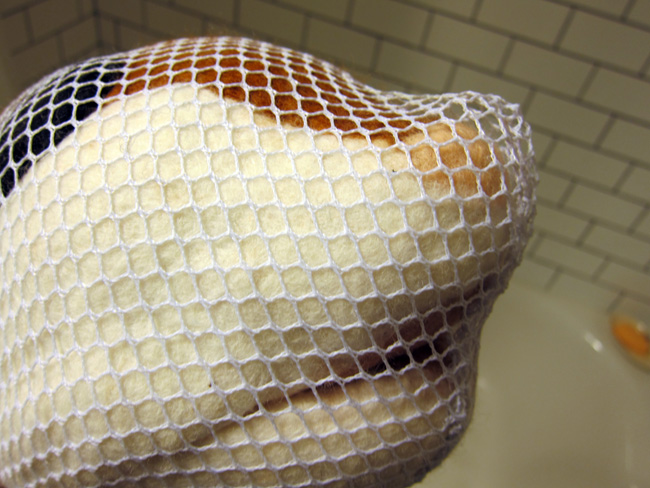
After about 10-15 minutes of molding and sculpting, I folded the ears down and tightly tied a mesh laundry bag around it. The snout tends to fit nicely into the corner of the bag. Make sure you tie it tightly enough that it starts to wring out the water. You can even use a little hot water to rinse off the excess soap since the mesh will hold everything in place, which is what I did.
Hand Made Wet Felted Puppets - << joeandcheryl.com >>

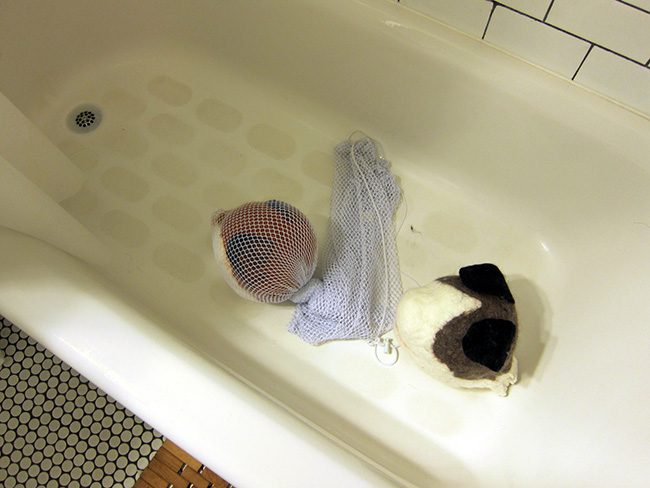
At this point I just left it in the tub over night to dry, but it doesn’t hurt to help it along with a hot blow dryer. In fact, it can only help with the felting/shrinking process.
Hand Made Wet Felted Puppets - << joeandcheryl.com >>

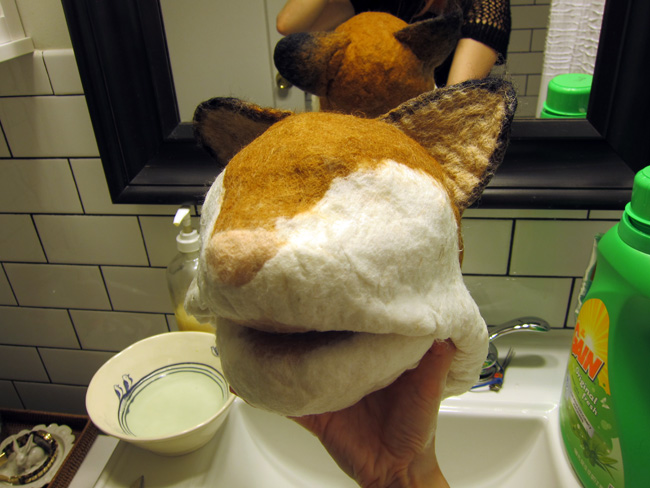
When it was totally dry, I removed it from the laundry bag. In the picture below, you can see just how much the wool has shrunk by the empty pocket of the laundry bag by the nose.
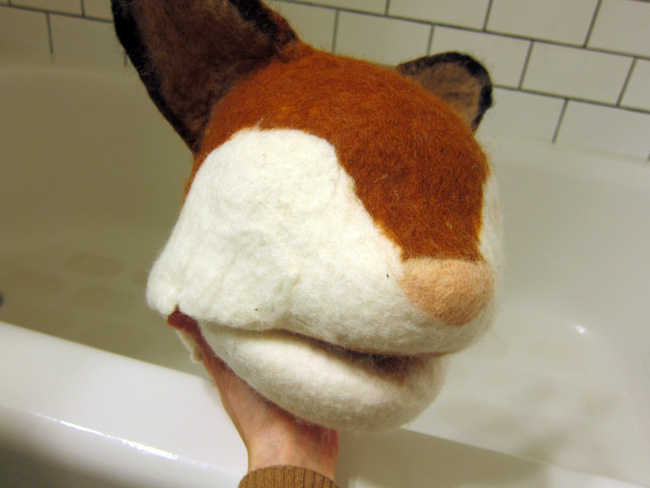
Hand Made Wet Felted Puppets - << joeandcheryl.com >>

Hand Made Wet Felted Puppets - << joeandcheryl.com >>

I then removed the mold from the felt exterior.
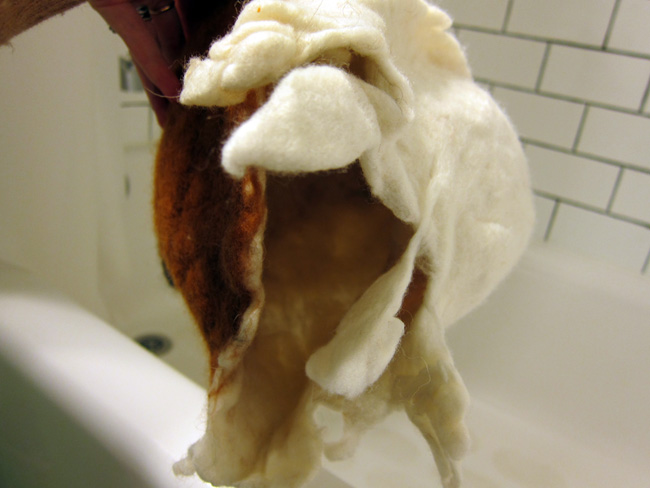
Hand Made Wet Felted Puppets - << joeandcheryl.com >>

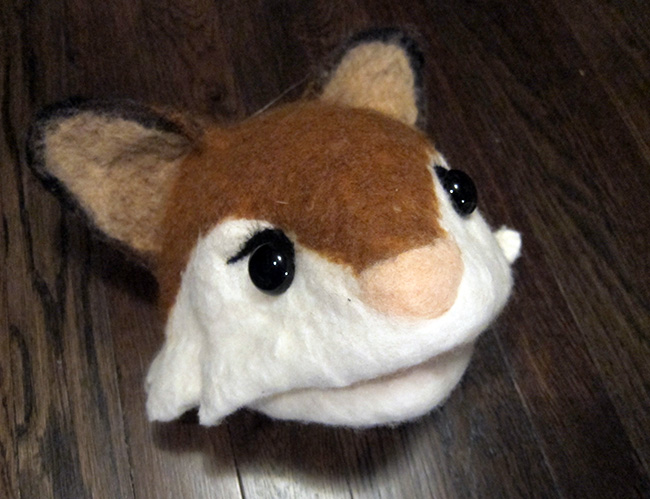
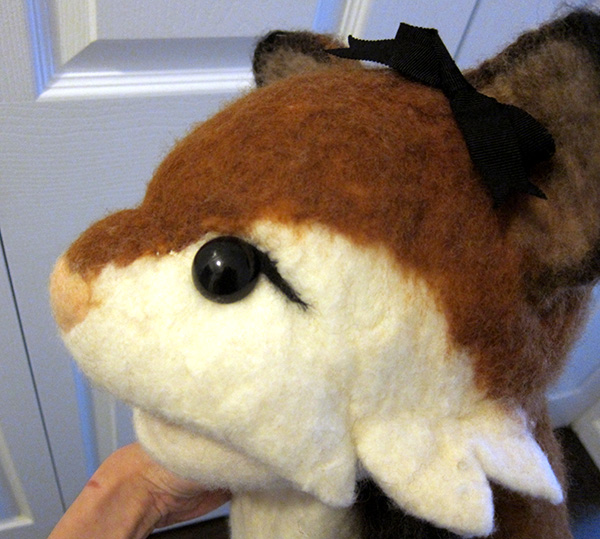
I trimmed off the excess ragged felt from the neck and went back and needle felted in extra details. For the fox, I trimmed that fold at the corner of the mouth into a spiky fur fringe shape and needled it into a smoother shape. I also stitched it with needle and thread so that it would hold together better. I also needled in little eye lashes and sewed on buttons for the eyes. For the boxer pup puppet, I needled on a black nose and sewed on a pink tongue.

Hand Made Wet Felted Puppets - << joeandcheryl.com >>

Hand Made Wet Felted Puppets - << joeandcheryl.com >>

Hand Made Wet Felted Puppets - << joeandcheryl.com >>

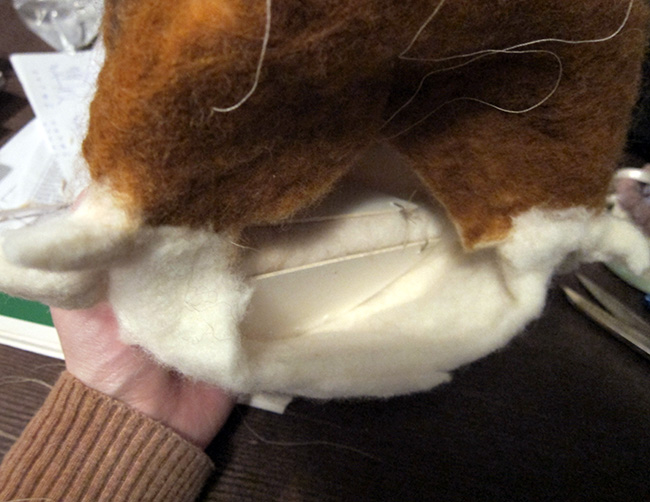
Next I cut out pieces of mat board to sew into the top and bottom parts of the mouth to create stiffness.  Bookmaking cardboard or some sort of plastic might have been even better and stiffer, but this is what I had around.
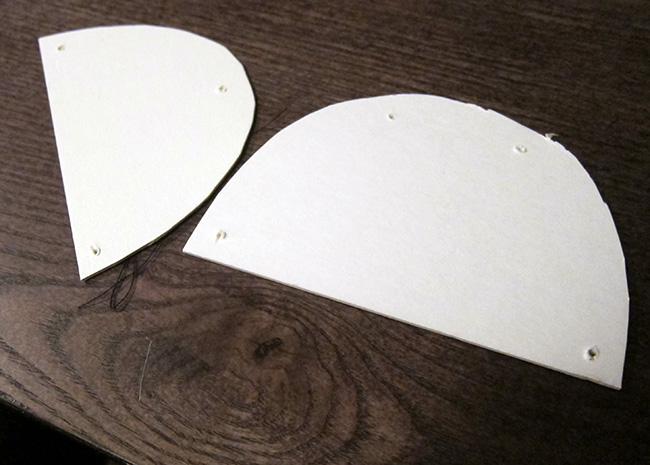
Hand Made Wet Felted Puppets - << joeandcheryl.com >>

Hand Made Wet Felted Puppets - << joeandcheryl.com >>

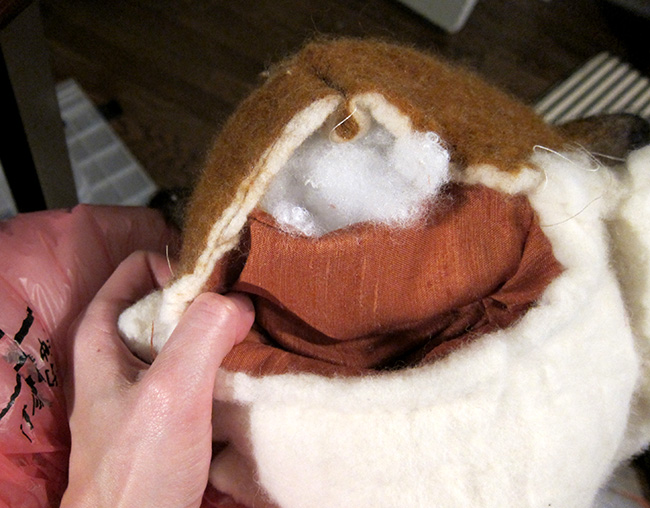
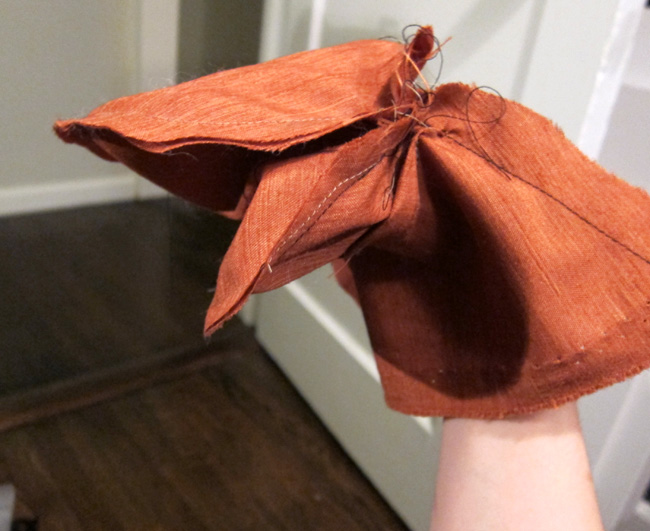
The head will eventually be stuffed with stuffing, but you’ll need to stick your hand in there somehow to operate the puppet. So I made a duck-billed mitten sort of thing to sew into the head using whatever fabric I had lying around. Make sure the glove opening is the same circumference as the opening of the head. I attached the finger part of the glove to the cardboard of the mouth. Then sewed the glove opening to the opening of the head, leaving a small hole for the stuffing to go into.
Hand Made Wet Felted Puppets - << joeandcheryl.com >>

Hand Made Wet Felted Puppets - << joeandcheryl.com >>

Hand Made Wet Felted Puppets - << joeandcheryl.com >>

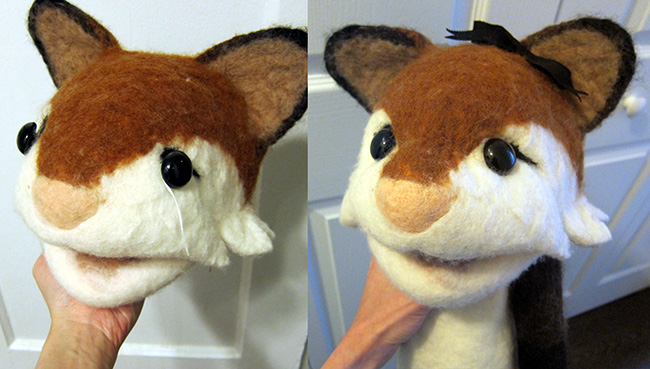
Once the glove was sewn in, I filled the head with stuffing and closed up the stuffing hole. You’ll notice that the stuffing will push the head evenly outward, creating a stupid bulbous look. You can correct this by sewing behind the eyes and anchoring the string to the back of the head and anchoring both eyes together. The tension will pull the eyes inward creating an eye socket look. Before and after pics are below:
Hand Made Wet Felted Puppets - << joeandcheryl.com >>

Hand Made Wet Felted Puppets - << joeandcheryl.com >>

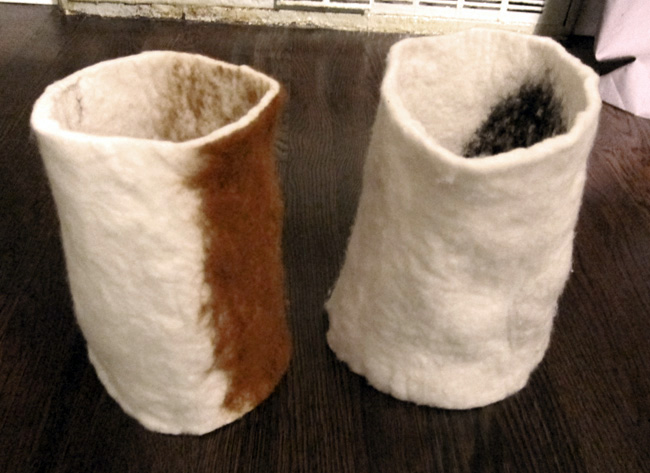
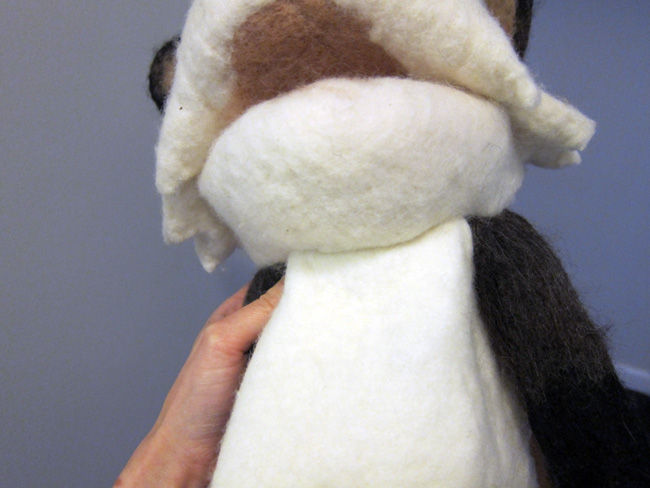
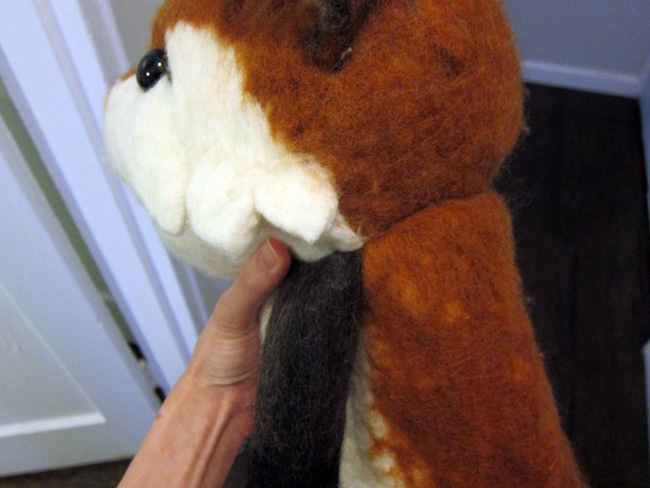
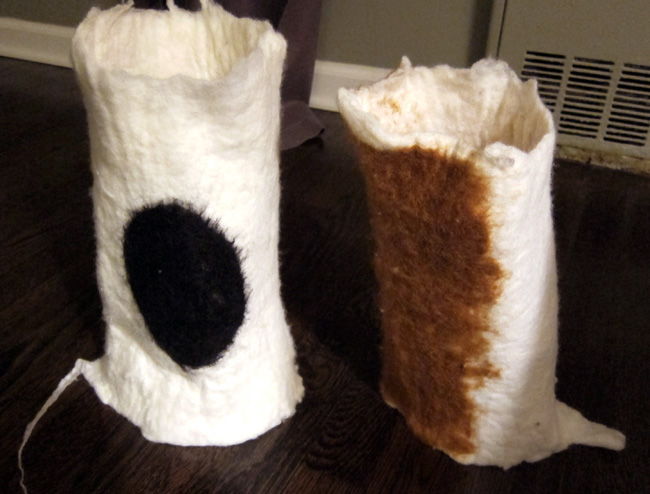
Now for the body. I used the same wet felting techniques that I used for the head and create two long-skinny cylinders for the arms, and one large cylinder for the body. I stuffed the arms and trimmed the body. Then I attached all three parts to the head.
Hand Made Wet Felted Puppets - << joeandcheryl.com >>

Hand Made Wet Felted Puppets - << joeandcheryl.com >>

Hand Made Wet Felted Puppets - << joeandcheryl.com >>

Hand Made Wet Felted Puppets - << joeandcheryl.com >>

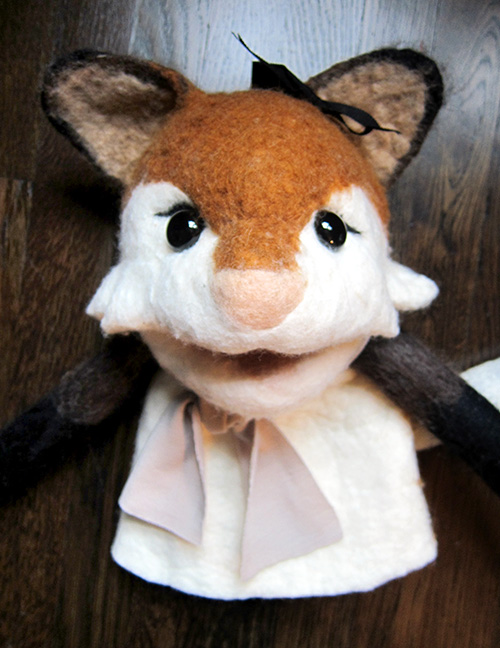
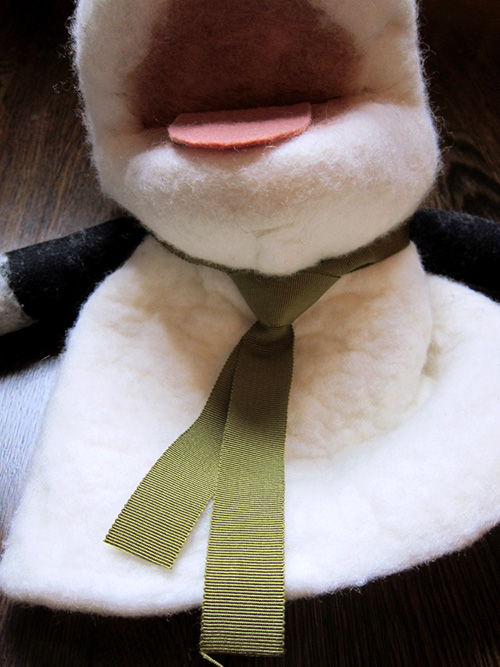
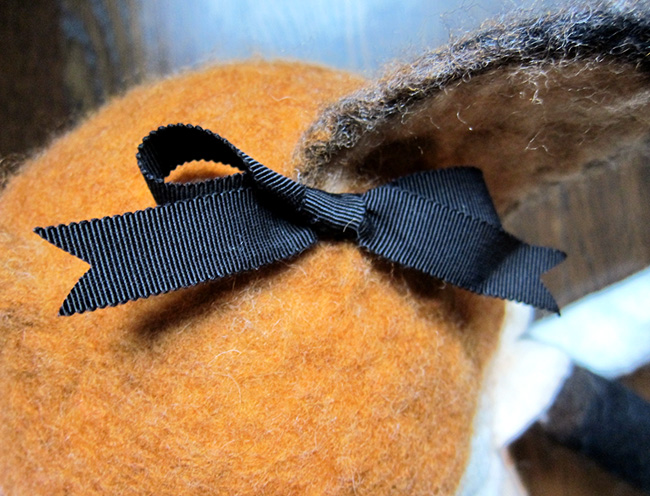
I kind of hated the look of this seam at the neck, so I gave the fox a scarf and the boxer pup a neck tie (Joe tied a fabulous double windsor knot for me). I also added a grosgrain bow for the girl. Then finally, I painted a dowel rod black and attached it to the left arm to make the arm movable too!

I’m pretty happy with the final results considering it was my first time ever trying this technique. In the future, I hope I can learn how to make it less fluffy/spongy but more dense/stiff like a brimmed wool hat. But ultimately, the important thing is that the kids absolutely loved them!
Hand Made Wet Felted Puppets - << joeandcheryl.com >>

Hand Made Wet Felted Puppets - << joeandcheryl.com >>

Hand Made Wet Felted Puppets - << joeandcheryl.com >>

Hand Made Wet Felted Puppets - << joeandcheryl.com >>

Hand Made Wet Felted Puppets - << joeandcheryl.com >>

Hand Made Wet Felted Puppets - << joeandcheryl.com >>

Hand Made Wet Felted Puppets - << joeandcheryl.com >>

Hand Made Wet Felted Puppets - << joeandcheryl.com >>

Hand Made Wet Felted Puppets - << joeandcheryl.com >>

Hand Made Wet Felted Puppets - << joeandcheryl.com >>