Follow Me on Pinterest follow us in feedly like us on facebook

Email Subscription

Enter your email address:

Delivered by FeedBurner


brb

Its been difficult to blog on a regular basis with the busy-ness of the upcoming holidays and with being preoccupied by a freelance project that I’m working on. Well you’ll have to bear with me a bit longer as Joe and I finally get to go on our honeymoon!  We are leaving for Iceland as we speak!  This is actually the first time Joe and I have ever traveled without a group so I’m really excited about it!  I’ll also have a chance to fulfill one of my life long dreams of seeing the northern lights.  Happy early Thanksgiving everyone! And I’ll post all about it when we get back =)

DIY Maternity Dress

The ability to sew is a great skill to have, especially when you want something you can’t afford.  Recently I was reading one of my favorite blogs, Oh Joy, and came across a dress that instantly reminded me of my friend Judy.  She is pregnant and as a true fashionista, has been trying to develop her maternity style.  I thought this dress would make such a chic maternity dress for her (but a great dress for a non pregnant person too)!

Judy loved the dress when I showed it to her and looked into the price, but it costs around $350!  So we decided that it would be the perfect sewing challenge!  Side note: I’m going to use some sewing terminology in this post, so if you are confused, definitely refer to this great site which has a great sewing glossary of terms!

First we went to Mood to buy fabric.  We found the perfect silk crepe for the job, but needed about four yards for a dress. So at $30/yard, it was way too expensive for our budget.  No wonder the original dress costs so much!  Instead, we opted for some sort of poly substitute with a similar hand and drape at $6-8/yard.  We chose one navy fabric and one purpley-taupe fabric so that we could make two dresses.

I’d say this project took about 10 hours total.  I was pretty confident that I’d know how to make this dress because the drape is really similar to my wedding dress.  We started by draping muslin, which I had plenty leftover from my wedding dress.

It was actually really simple.  We never looked at the original dress in person, but from what we can tell from pictures there are no darts or anything, and the whole thing is made out of two pieces of fabric, four seams, and a few pieces of facing.  The strap area is cut on the bias to contour the bust, and that cool drapey effect on the side of the skirt is made by creating a rectangle that sticks out to the side.
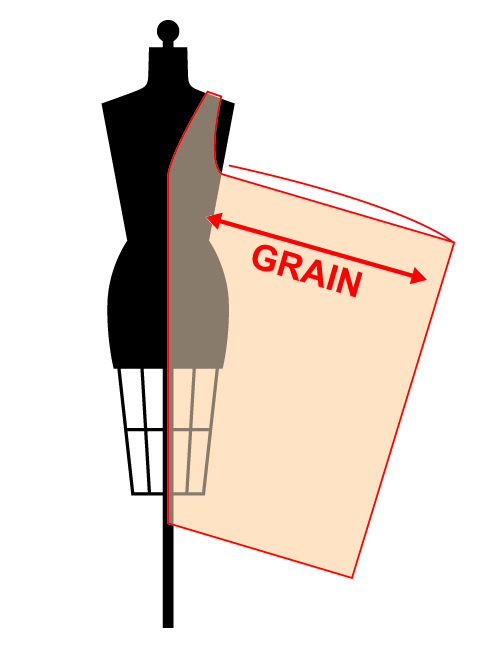
Once we finished making the pattern (including a 3/8 inch seam allowance), we cut the fabric.  We used random household objects as weights to hold everything in place.

this is a pile of facing for the armholes and neckline that we also cut.

Meanwhile the husbands patiently occupied themselves with the football game, the internet, and videogames =)

You can see our messy pile of cut fabric in the corner on the stacking chairs, haha.

Cutting was relatively easy since there were so few pieces to the pattern.  After cutting we decided to serge all of our edges first.  We only had one serge machine between the two of us, and we really didn’t want to have to change the thread colors back and forth.  Threading a serger is a huge pain in the butt!  Normally, on other projects, I’d do most of the serging at the end.

here I am serging every raw edge... you can see that we still have not totally unpacked all of our boxes yet

a finished edge with a serge stitch

Next we just sewed everything together.  This isn’t really a tutorial, so I won’t go into the step by step.

Judy, hard at work!

Here I'm sewing a pre-serged seam with a 3/8 inch seam allowance.

Half way through sewing we hung everything onto the dress form just to make sure it was coming together properly.  The pictures below show the fabric just roughly pinned into place.  It has not been pressed or finished yet.

the dress is just roughly pinned onto the dress form. We have not sewn the center front seam at this point yet.

The keyhole back, also unfinished, roughly pinned to the dress form.

Finally, once we did all of our sewing, we tacked down some facing and pressed all of our seams.

We decided that it looked better on us belted.  I might wear it unbelted if a had a cute fitted jacket over it.  But I think it looks way better on Judy because she is so much taller than me.  I need to hem mine a few inches shorter if I ever want to wear this in the future.  Judy is totally rocking it though!  You can just barely see her baby bump now =)


How to Make my No. 2 Match Box for Number Two

How to Make my No. 2 Match Box for Number Two - >> joeandcheryl.com <<

Photo: Albert Cheung Photography, www.albertcheungphoto.com

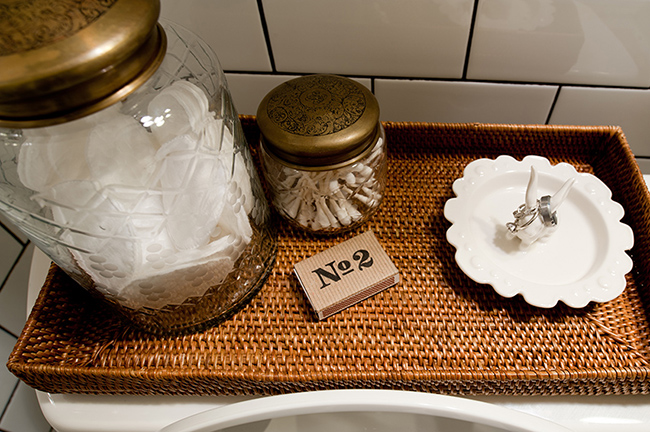
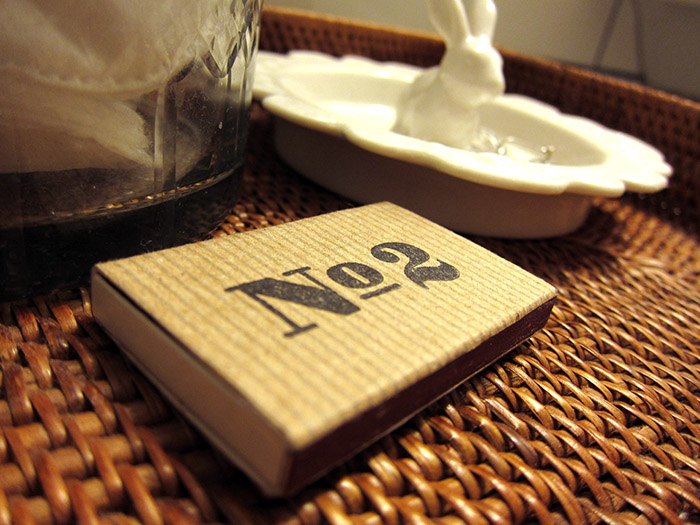
Back when I posted about our apartment renovations, I posted pics of some of the accessory styling that I did in the bathroom – including my “No.2” match box.  I made it because I love the old fashioned monogrammed number trend that is in right now.  But it was also kind of a joke to myself that most people don’t seem to get… It’s obvious isn’t it?  You light a match when you number two!!

AAAANYWAY… my original match box got pretty destroyed over time and use, so I decided to document the process of making my replacement “No.2” match box.

For this project, I actually had a rubber stamp custom made for my “No.2” monogram.  I’ve used rubberstamps.net many times for custom stamps and have been really happy with their service. For the original matches, I actually drew the “No.2” by hand, but I decided that using a stamp would be a lot easier if I’m going to constantly be making replacement match boxes.

How to Make my No. 2 Match Box for Number Two - >> joeandcheryl.com <<

You’ll also need a nice matchbox.  They are usually sold at most grocery stores but this time I used one that I got from a restaurant that Joe and I went to for our first Valentines Day together =)

How to Make my No. 2 Match Box for Number Two - >> joeandcheryl.com <<

The other supplies you’ll need are scissors, glue, and some nice paper. I used brown wrapping paper for mine, but you can use any sort of pretty hand made paper or stationary you want.

How to Make my No. 2 Match Box for Number Two - >> joeandcheryl.com <<

The first step is to measure the width of the match book and to cut a strip of paper to that width. It can’t hurt to make the strip longer than you think you need it to be. You can always trim things down later. I also like to put a little fold into it so I know the exact dimensions of the box for stamp placement.

How to Make my No. 2 Match Box for Number Two - >> joeandcheryl.com <<

How to Make my No. 2 Match Box for Number Two - >> joeandcheryl.com <<

Next ink up your stamp and carefully position it.  I actually messed up three times before I got it right.

How to Make my No. 2 Match Box for Number Two - >> joeandcheryl.com <<

How to Make my No. 2 Match Box for Number Two - >> joeandcheryl.com <<

Next put a line of glue along the front edge of the box, next to the lighting strip.  Glue down the front edge of your paper and smooth it down neatly over the edge.

How to Make my No. 2 Match Box for Number Two - >> joeandcheryl.com <<

How to Make my No. 2 Match Box for Number Two - >> joeandcheryl.com <<

How to Make my No. 2 Match Box for Number Two - >> joeandcheryl.com <<

Next wrap the rest of the paper around the box by gluing along the edges.  Be sure NOT to glue paper on top of the lighting strip.  You still want that part to be functional.

How to Make my No. 2 Match Box for Number Two - >> joeandcheryl.com <<

How to Make my No. 2 Match Box for Number Two - >> joeandcheryl.com <<

Trim off any excess paper.

How to Make my No. 2 Match Box for Number Two - >> joeandcheryl.com <<

Again, smooth down the end of the paper around the edge.

How to Make my No. 2 Match Box for Number Two - >> joeandcheryl.com <<

And there you have it!  The more stylish way to cover up bathroom odors!

How to Make my No. 2 Match Box for Number Two - >> joeandcheryl.com <<

How to Make my No. 2 Match Box for Number Two - >> joeandcheryl.com <<

How to Make my No. 2 Match Box for Number Two - >> joeandcheryl.com <<