Follow Me on Pinterest follow us in feedly like us on facebook

Email Subscription

Enter your email address:

Delivered by FeedBurner


A Little Love for the Second Bedroom and an Ikea Frame Update

EDIT – 2/4/2012 – If you are interested in purchasing a print of this artwork, please visit my new Etsy shop!

Our second bedroom had finally been getting a little love after being a storage room for boxes for about 6 months.  We recently purchased this West Elm Desk and have unpacked the majority of our boxes. In the process of unpacking I came across some old Ikea frames that I bought when I had just graduated from college.  I was in the purging mood so I was about to throw them away when Joe stopped me.  He hates being wasteful and he was right, there was still life in them yet.

A Little Love for the Second Bedroom and an Ikea Frame Update - >> joeandcheryl.com <<

A Little Love for the Second Bedroom and an Ikea Frame Update - >> joeandcheryl.com <<

I love how colorful they are now!  Here’s what the room looked like after we bought the desk, but BEFORE we added the frames:

A Little Love for the Second Bedroom and an Ikea Frame Update - >> joeandcheryl.com <<

Nothing wrong with this room, but it just felt empty and dark to me.

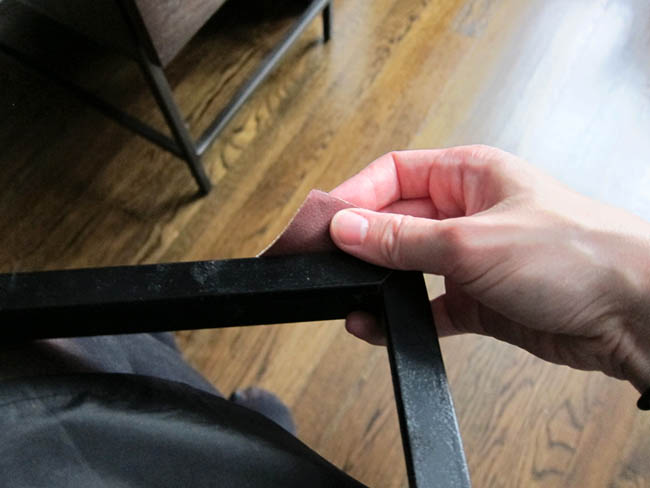
First I took the frames apart.  I removed the photos, the mat, the glass, and the backing.  Next I lightly sanded it down to rough up the surface for painting.

A Little Love for the Second Bedroom and an Ikea Frame Update - >> joeandcheryl.com <<

A Little Love for the Second Bedroom and an Ikea Frame Update - >> joeandcheryl.com <<

Next I painted a coat of primer meant for glossy and previously painted surfaces.  Its the same stuff I used on my kitchen cabinets!

A Little Love for the Second Bedroom and an Ikea Frame Update - >> joeandcheryl.com <<

After the primer dried, I painted on a thin but solid layer of opaque tan paint.  I’m using this as a base because metallic paints can sometimes go on a little translucent.  This way I don’t have to paint quite as many layers.

A Little Love for the Second Bedroom and an Ikea Frame Update - >> joeandcheryl.com <<

Once this layer dried I used a thin layer metallic gold acrylic paint.  Its very important to paint all layers of paint as thinly as possible to avoid ugly brush strokes.  Its better to have more thin layers than a couple thick layers.  So I actually thinned out my paint with some acrylic gloss medium and a little water.  I probably ended up painted about 5 layers in the end when I felt like I had good coverage.

A Little Love for the Second Bedroom and an Ikea Frame Update - >> joeandcheryl.com <<

At this point I already had an idea of what type of art I wanted to frame.  Since the second bedroom has those dark blue-grey walls, I decided I needed to infuse some lighter brighter color.  I’ve been on a watercolor kick so I decided to invest in a tube of Opera Pink paint.  This is a special water color that has a fluorescent pink pigment.  A little pricey for a single tiny tube, but it mixes some of the most beautiful, vibrant purples and oranges and range of reds and pinks between.

A Little Love for the Second Bedroom and an Ikea Frame Update - >> joeandcheryl.com <<

I decided I didn’t want to do anything too ambitious and chose to do more of a color study.  I’d like to think it evokes a herring bone or a knit fabric or something.  I kind of think its perfect for a room that will be my sewing/painting studio and work space.

A Little Love for the Second Bedroom and an Ikea Frame Update - >> joeandcheryl.com <<

A Little Love for the Second Bedroom and an Ikea Frame Update - >> joeandcheryl.com <<

V color study 1

A Little Love for the Second Bedroom and an Ikea Frame Update - >> joeandcheryl.com <<

V color study 1

Now how to hang them… When we moved that large brown bookshelf into the room, it was always my intention to hang two smaller frames onto the side of it.  However, I definitely don’t want to hammer nails into the wood so I turn once again to my trusty 3M command strip hooks!

A Little Love for the Second Bedroom and an Ikea Frame Update - >> joeandcheryl.com <<

I love these things!!  They are strong and do not damage your surface at all! TIP: If you use them, be sure to let them set for a few hours before you hang anything on them. It really makes a difference in how well they stick to the surface.

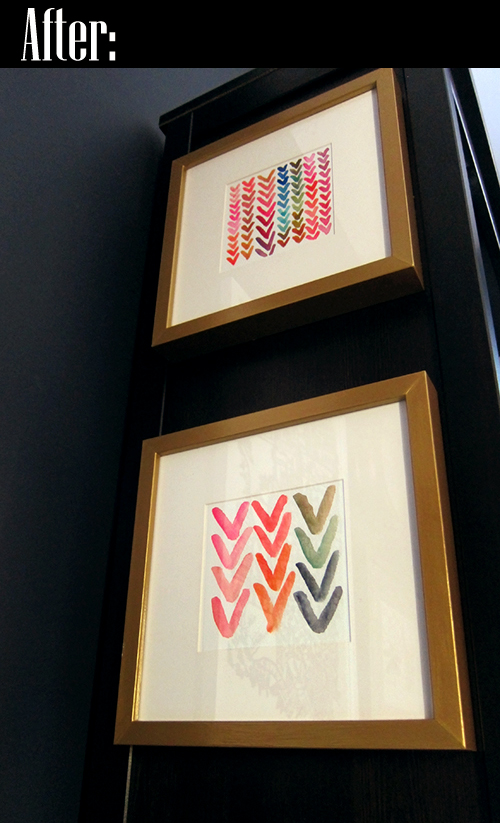
So here is what everything looks like after mounting and hanging!  I love how colorful it looks next to our NYC map print which was a wedding gift from my good friend Jenni =)

A Little Love for the Second Bedroom and an Ikea Frame Update - >> joeandcheryl.com <<

A Little Love for the Second Bedroom and an Ikea Frame Update - >> joeandcheryl.com <<


Dining Area Update

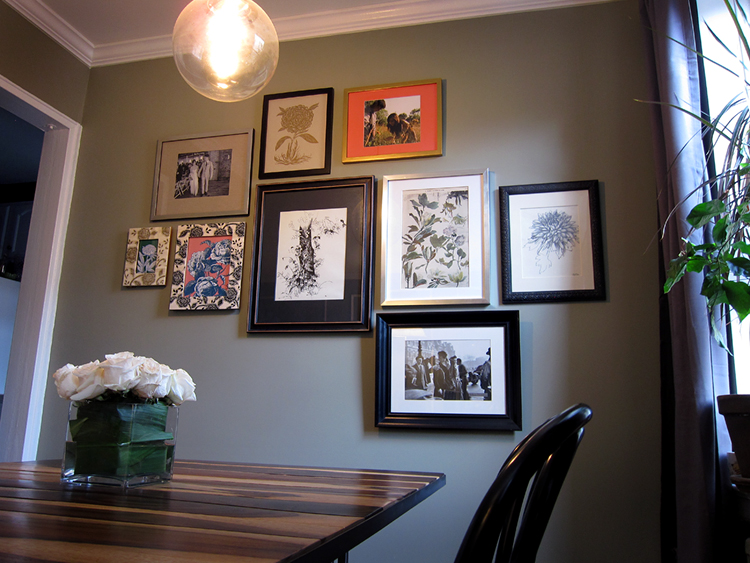
So we finally replaced my crappy college Ikea chairs in the dining area! I love how such a small touch can make such a big difference.  I also swapped out some of the artwork to add a bit more color. My old apartment had this mustard and grey color scheme that I was starting to feel look a little too cold.  So I removed some of the green and yellow and added in touches of salmon and peach.  This is exactly why I love decorating with neutrals, because the colored accents can easily be changed when my fickle self is into a new pop color.  The picture wall will probably continue to evolve as time goes on.


These are the Vienna Black Side Chairs from Crate and Barrel (a replica of the Thonet Bentwood Chairs)!  We found them on Craigslist for $87 each!!  Oh yeah, we got new curtains too!  But visually, I feel like the dining area is still missing something.  I think it needs some sort of woven rug… maybe kilim. But it always worries me having a rug under an area meant for food… might get messy.  hmmm

Blazer Alteration – Before and After

I’m kind of obsessed with this Helmut Lang Blazer.

Blazer Alteration - Before and After - >> joeandcheryl.com <<

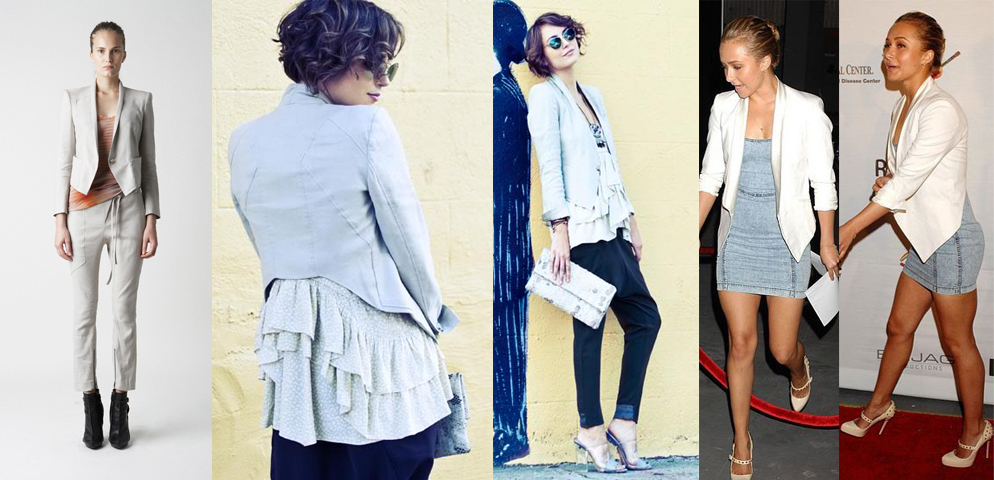
Photo Credit (left to right): Helmut Lang SS11, The Glamourai, Hayden Panettiere at the Rock N Reel event

It retails for around $540.  Sigh. The cheapest I’ve found it is for $329 on ebay and for $250 at the Theory outlet at Woodbury.  I MIIIIGHT have splurged on the Woodbury blazer, but they didn’t have my size!  But let me just say, seeing it in person at the outlets only fueled my obsession with this jacket and I began a mad internet search for a knock off version with nothing to show for it.  I’m so surprised that none of the discount sites are copying it yet!

So it looks like its time for another alteration project (my first apparel project since the wedding!)

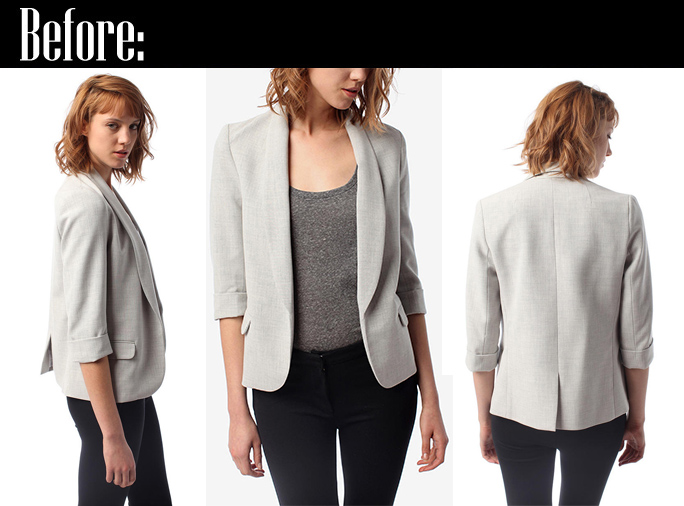
I bought this blazer last Fall about a year ago back when the boyfriend blazer thing was huge. I loved it and wore it all of the time.  But after a year it has started to look boring and generic to me and I have had no interest in wearing it lately – so it seemed like the perfect candidate for an update!  I decided to transform it into my dream Helmut Lang tuxedo blazer.  Unfortunately I forgot to take before pictures, but here are some images from the Urban Outfitters website where I bought it.

Blazer Alteration - Before and After - >> joeandcheryl.com <<

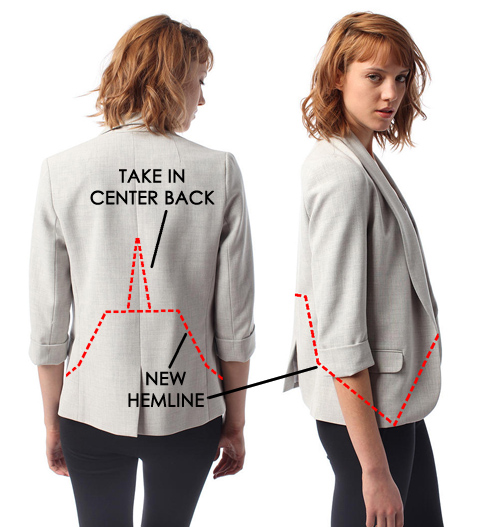
The transformation was actually really simple.  Just a matter of changing the hem line and taking it in a little to make it more fitted.


Blazer Alteration - Before and After - >> joeandcheryl.com <<

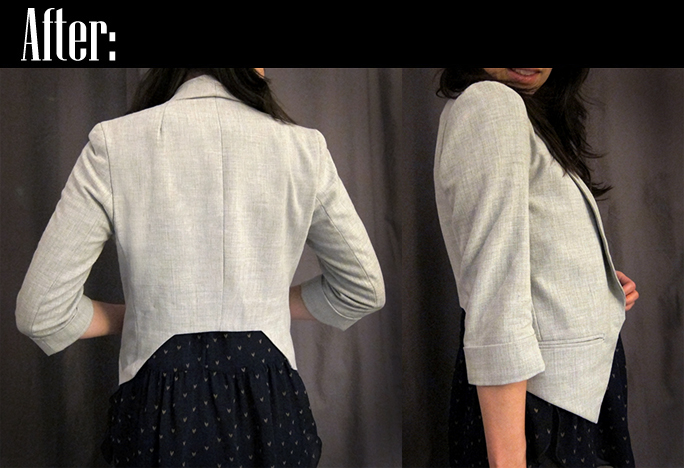
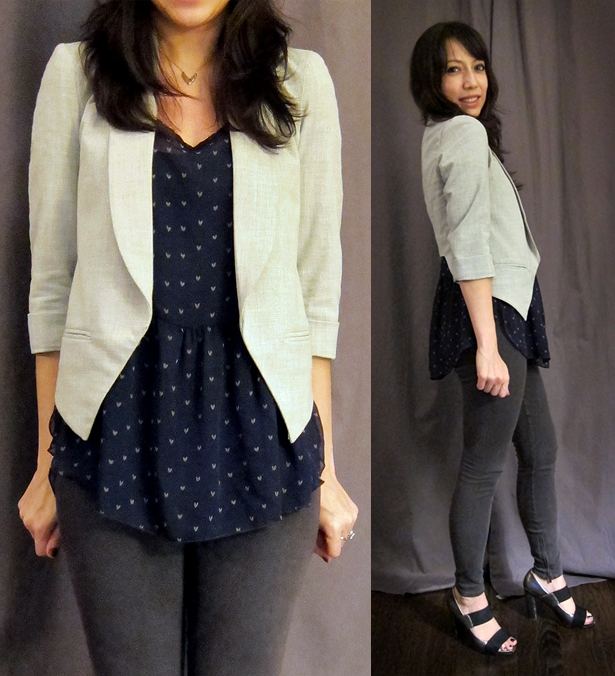
And here’s the result!  It doesn’t have beautiful seam detailing that the original Helmut Lang blazer has (also, I’m definitely no model), but I think it replicates the look really well! Oh, I also wanted to note that I tucked in the pocket flaps to give it a clean slash-pocket look like the original.

Blazer Alteration - Before and After - >> joeandcheryl.com <<

Blazer Alteration - Before and After - >> joeandcheryl.com <<

It kind of scares me how much I look like my mom in this pic.