

When Joe and I got married three years ago, many of our truest friendships were reaffirmed and grew in closeness through their helpfulness and encouragement. Their involvement in our wedding was truly a blessing and we will forever be grateful to those wonderful friends. So I carry that memory with me now when I am asked to help in other friend’s weddings. It truly is an honor to feel like you’ve contributed in some small way to a couple’s special day.
Recently I was asked to make custom ties for the wedding of our friends, Jon and Tracy. I hesitated at first since I have never made ties before, but that was only momentary. I was incredibly excited to help good friends and told them I’d do it – I’d figure it out – I’d find out how.
So this is how it all went down! I’ve outlined my process, but you can also follow these steps how to make your own custom skinny ties! Plus, I’ve included a downloadable pattern you can use!
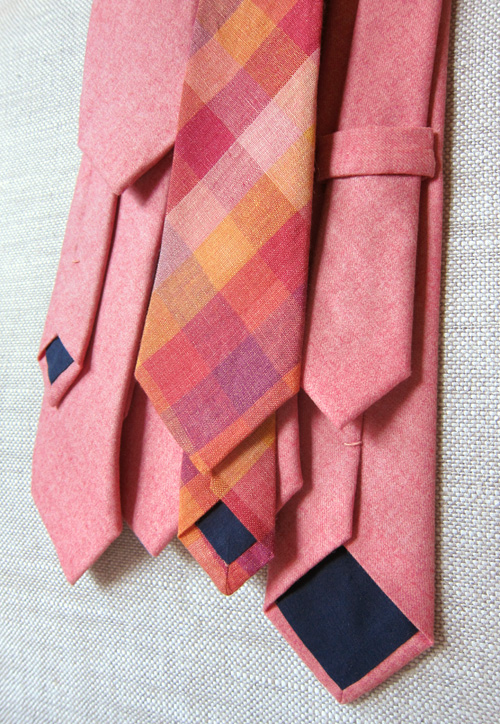
They told me coral was their primary wedding color, and the ties would be worn with navy suits. So I scoured various Fashion District fabric shops for swatches of potential tie appropriate qualities that would match the color theme. Mood has been a go-to for my fabric needs on many of my projects on this blog, but I actually ended up finding the most exciting swatches at Elegant Fabrics a couple blocks away. Ultimately, I ended up buying all of our final selects there.
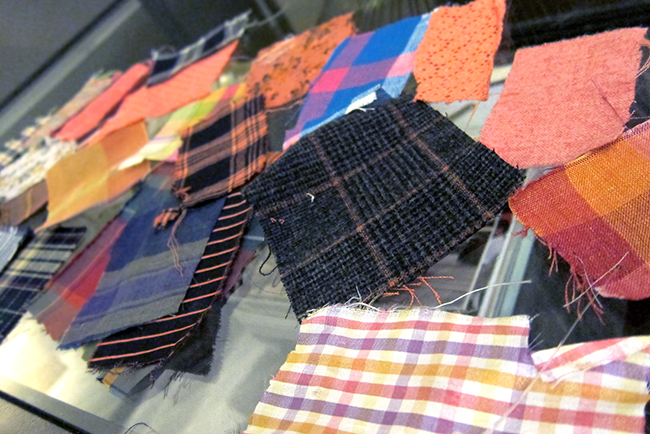
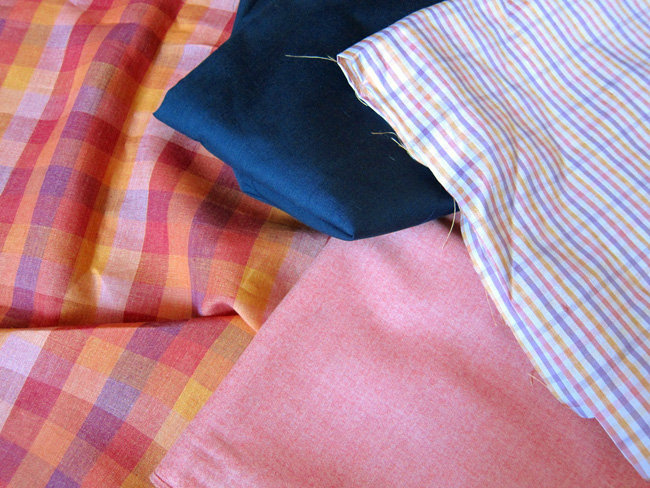
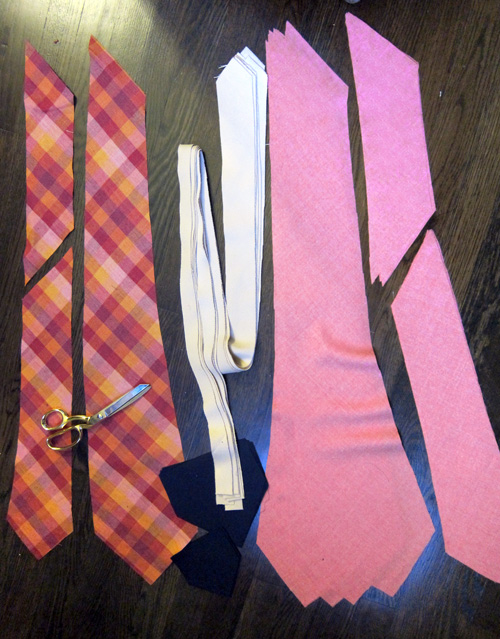
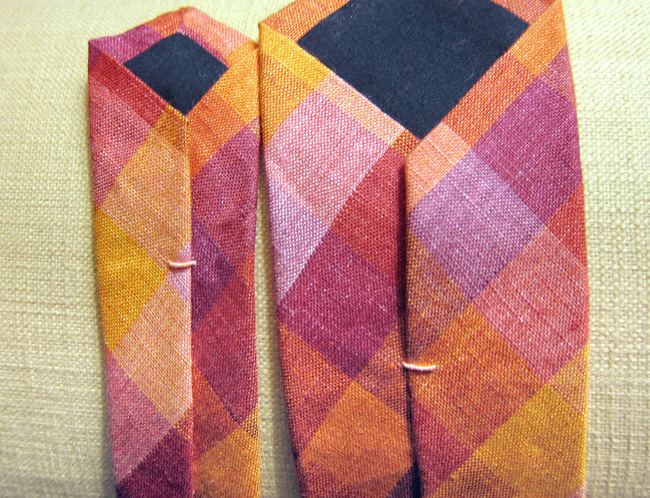
Jon and Tracy ended up loving the qualities shown below. A linen plaid for the groom and ring bearer ties, a fine woven wool in heather coral for the groomsmen, and a gingham silk dupioni for the pocket squares. I also picked up a navy cotton-poly blend to use for lining (tipping) and a heavy cotton canvas for the interlining.
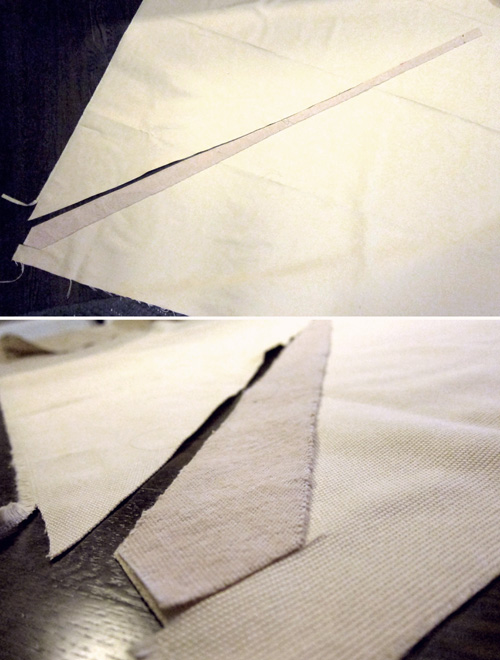
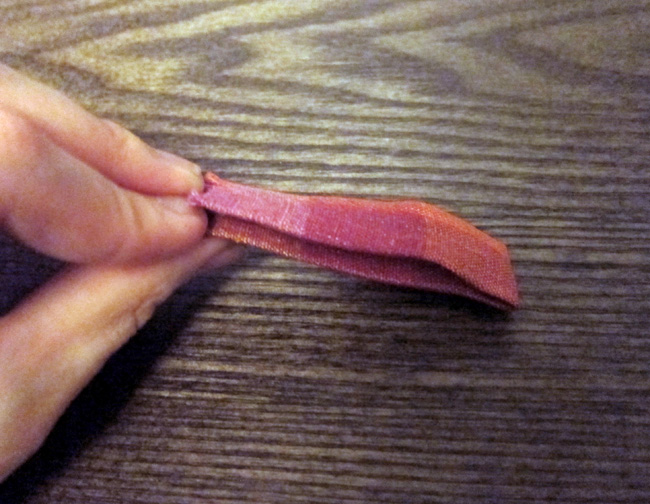
Like I said, I had no idea how to make ties, but I figured almost everything out by deconstructing one of Joe’s old unwanted ties (a 2.5 inch skinny tie, which is what the groom requested). I also did some google searches just to figure out some more specific terminology, or any step that I might have been confused by. Hopefully this post will combine the best of a lot of the tips out there. I think the results ended up looking VERY professional.
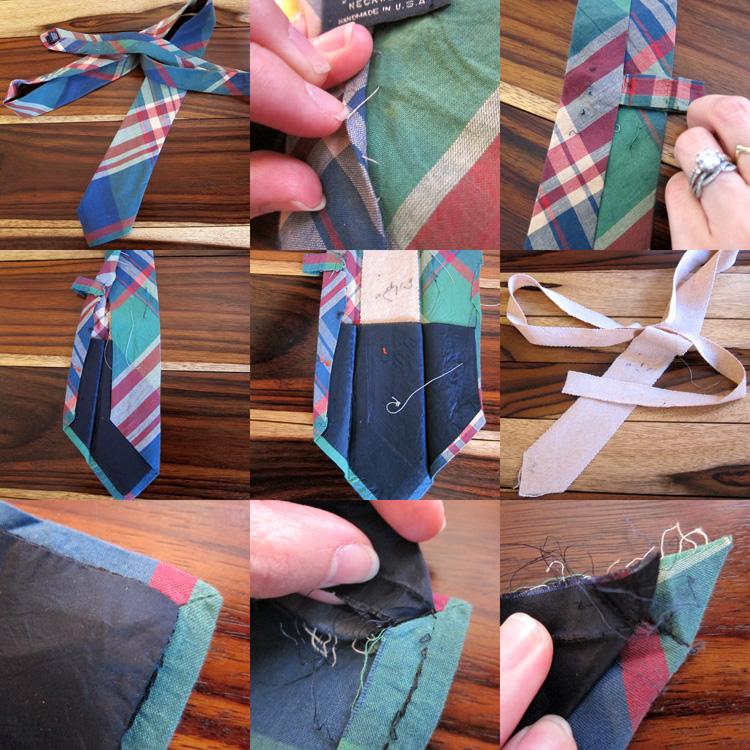
The deconstruction process! Took lots of pics so that I would not forget anything. This is a great way to learn how to make almost anything.
Now is probably a good time to let you know what you’ll be needing for this project:
SUPPLIES:
– 1 yard of your main fabric (called the “envelope”). You need 1 yard for 1-5 ties. You can NOT buy a shorter length for just one tie, and you’ll have to buy a whole extra yard for that 6th tie. This is because of the long length of the pattern, and the fact that you have to cut on the bias. Of course, this also depends on how wide your fabric is on the roll. I got lucky and was able to squeeze all 6 groomsmen ties onto 1 yard, but I think most qualities will only fit 5. Some narrower silk fabrics may only fit 3-4 ties.
– 1/2 yard lining fabric (called the “tipping”). You actually need less than this, but most fabric stores have a half yard minimum.
– 1.5 yards heavy cotton canvas for interlining. A lot of tie makers will use wool instead. This is what gives the ties its stiffness and thickness and allows it to hold its shape. Just like your main fabric, you can not get away with less than 1.5 yards since you have to cut on the bias. However, you can fit many more interlining pieces onto 1.5 yards of fabric. Possibly 8 or more?
– and finally you’ll just need the standard sewing supplies. Needle, thread, iron, sewing machine, etc.
So this is how you make it! I used Joe’s deconstructed tie pieces as my pattern. Just for all you readers out there, I scanned it all and traced it in illustrator. You can download the PDF here to do it yourself! Its quite large so you may need to print it out in section if you don’t have an industrial, large scale printer. Pictured below, the main tie pieces are on the left (3 sections), and the two pieces for the tipping are on the right. I did not include the interlining in this photo, but I saved that piece for pattern cutting also – and it is also in my PDF.

Everything must be cut on the bias, meaning cut on a 45 degree angle to the direction of the grain. When the fabric fibers are oriented in a diagonal manner, the fabric is able to flex and warp. This allows the tie to fall more evenly from the knot without any twisting, it increases elasticity, and facilitates the fabric’s return to its original shape (source).
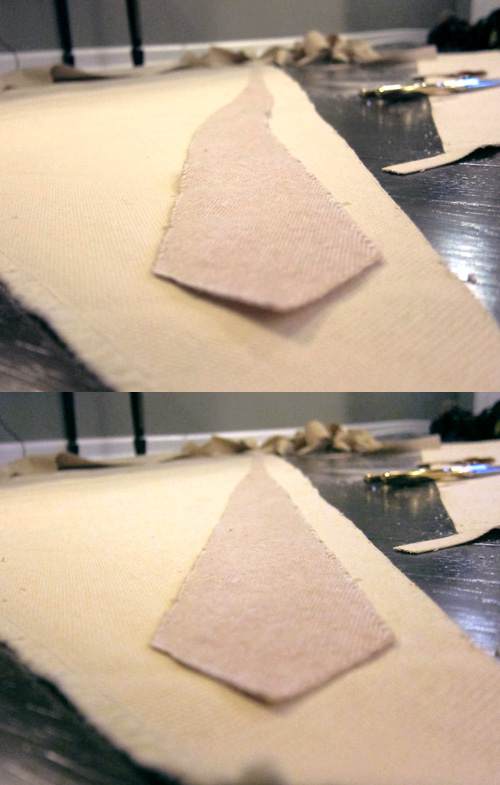
Here’s a shot of the interlining being cut. You can see how it is quite long and why you need to buy so much fabric for this.
A tip for cutting the interlining: its very long and narrow and since it is on the bias, it will have a tendency to warp when you lay it down for cutting. You want to keep it as straight as possible, so put your eye close to your cutting surface and view it in extreme perspective. this will make any bends in the pattern really obvious (see below). In art school we used this same technique when selecting straight pieces of lumber for building canvas stretchers.
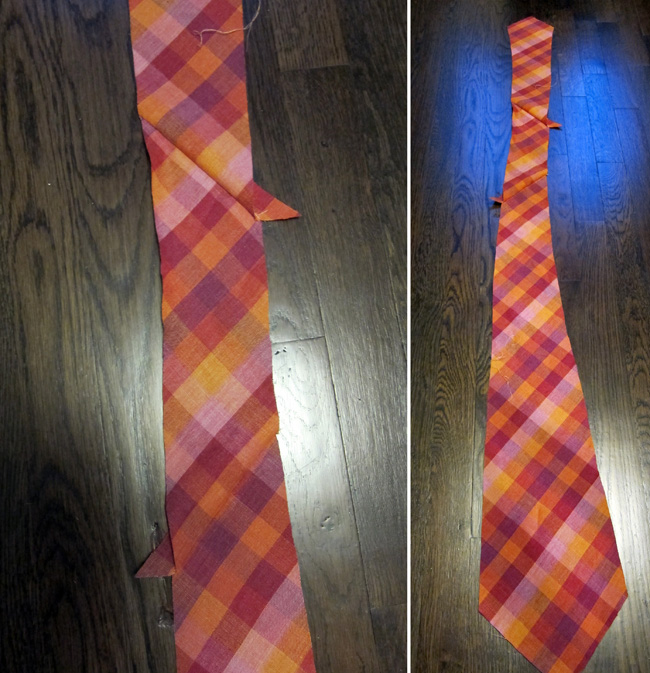
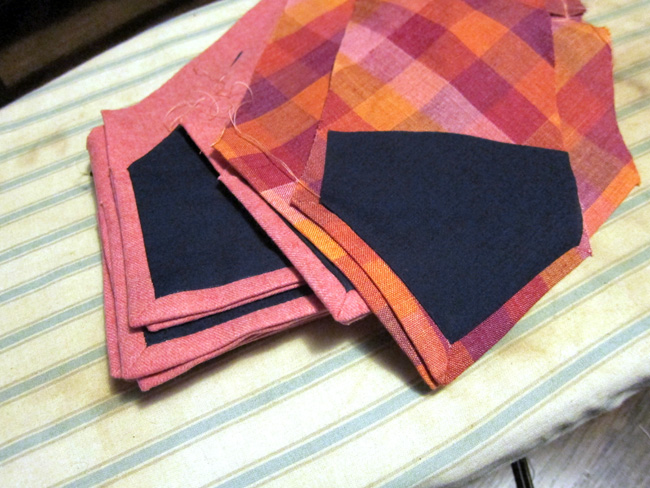
And here’s a shot of all of my cut pieces ready for assembly!
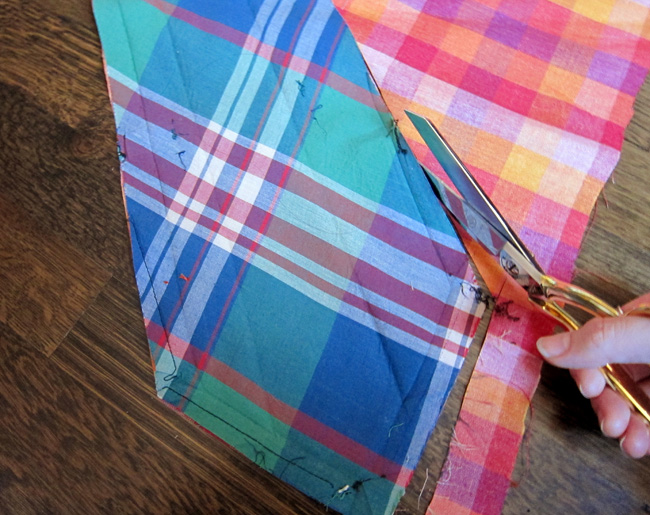
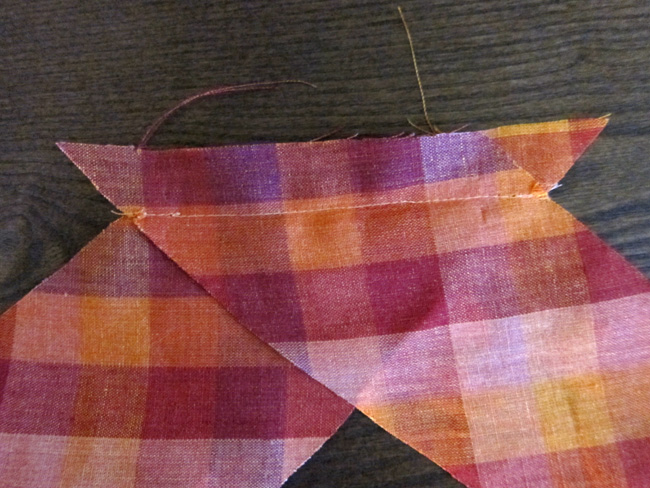
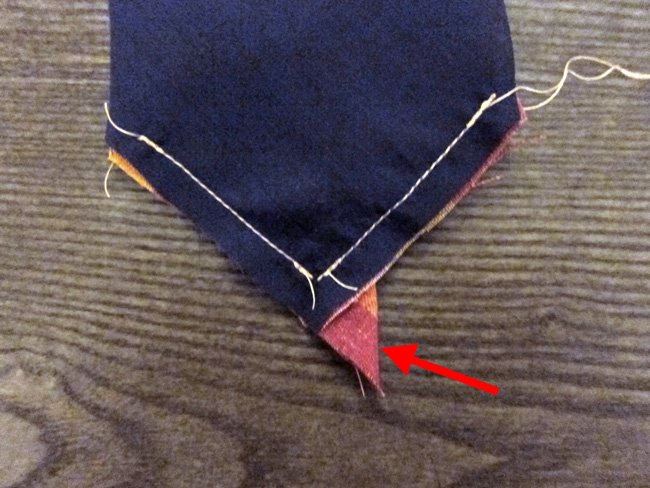
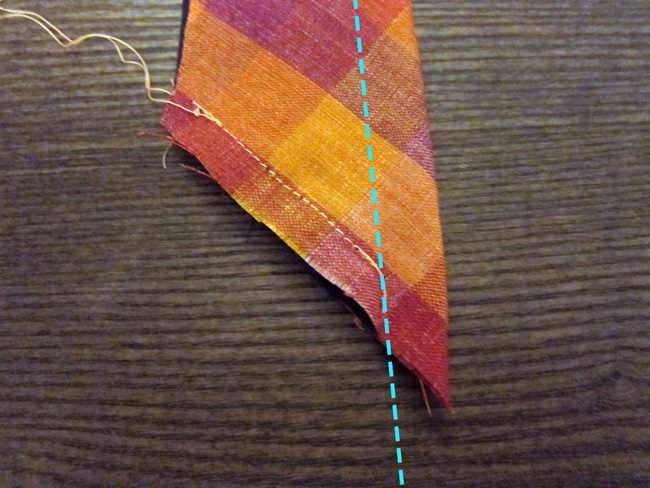
The first step is to join the three segments of the main tie fabric. Measuring Joe’s old tie pieces, I see that there is a 3/4 inch seam allowance where the three pieces are sewn together.
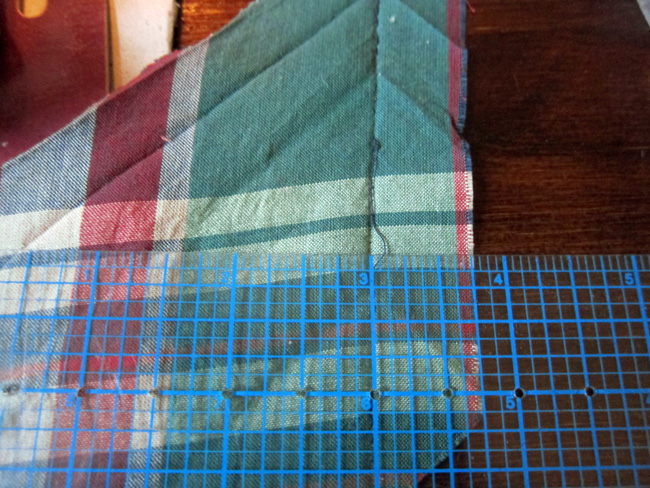
Since these seams are cut with the grain, they appear diagonally on the tie. You’ll have little triangles sticking out after you sew it. Just try to line it up so that the intersection of the two pieces lines up with your stitch line (again, 3/4 inch from the edge).
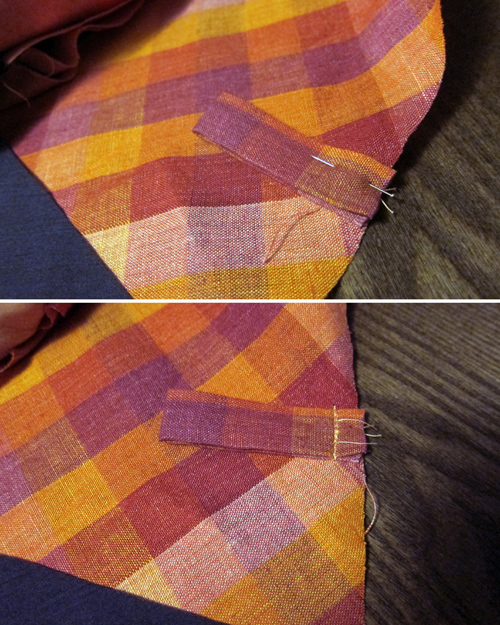
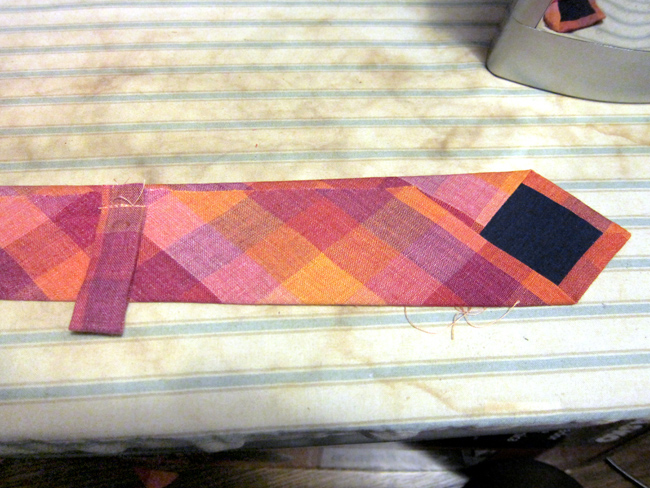
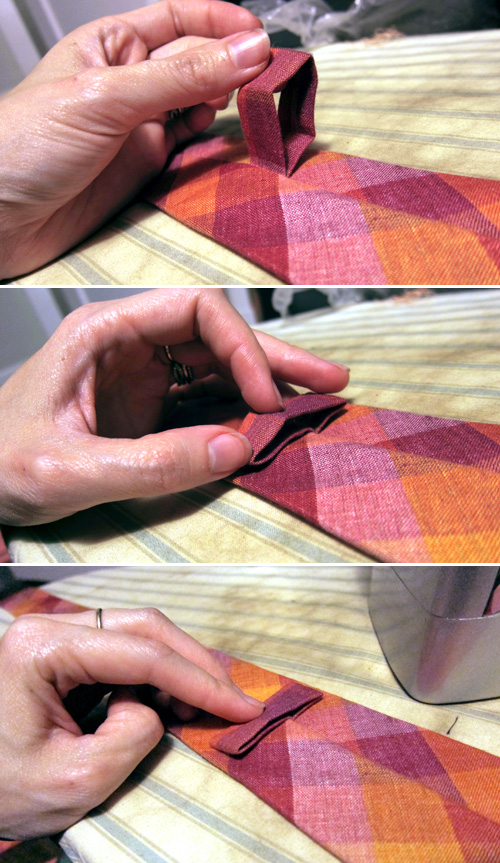
Now, before we do anything more fun, lets get the keeper out of the way (you know, the little band of fabric that keeps the little end of the tie in place?)
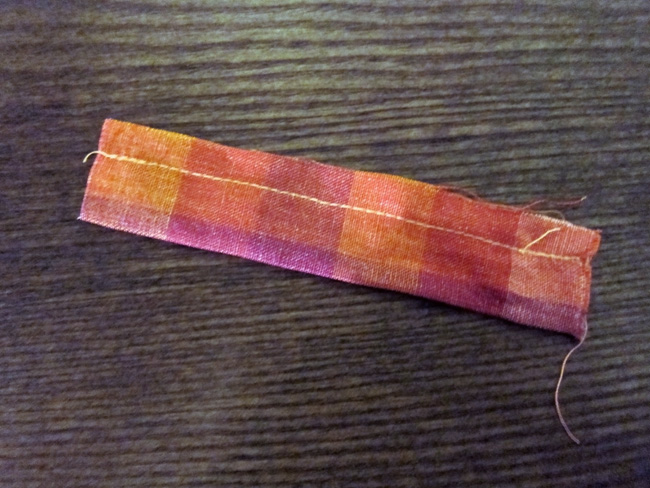
Start with a rectangle of fabric about 2.25 by 4.75 inches. This should be cut with the grain, NOT on the bias. Fold it in half the long way, then sew straight down the edge using a 3/8 inch seam allowance.
Then turn it inside out and press it flat with the seam positioned in the middle like so:
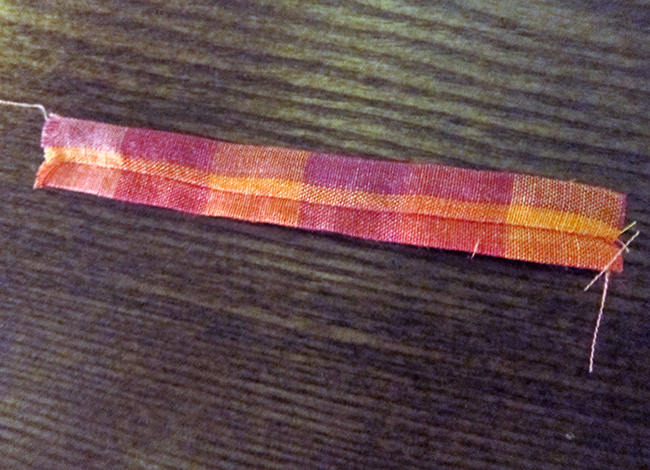
Next, fold this piece in half with the seam sandwiched in the middle.
Sew it to the edge of the tie, about 10 inches from the tip of the tie, but it doesn’t have to be exact. IMPORTANT: make sure that you sew it on top of the CORRECT side of the tie. Confused about what the correct side is (the side that will become the front of the tie)? Well, remember the seams you have just sewn when you attached the three segments of your tie together? The correct side is the clean side of these seams.
OK, now you don’t have to worry about the keeper for a while. But please do keep in mind which is the correct or “facing” side of your fabric, and which is the wrong side that will become folded into the interior of the tie.
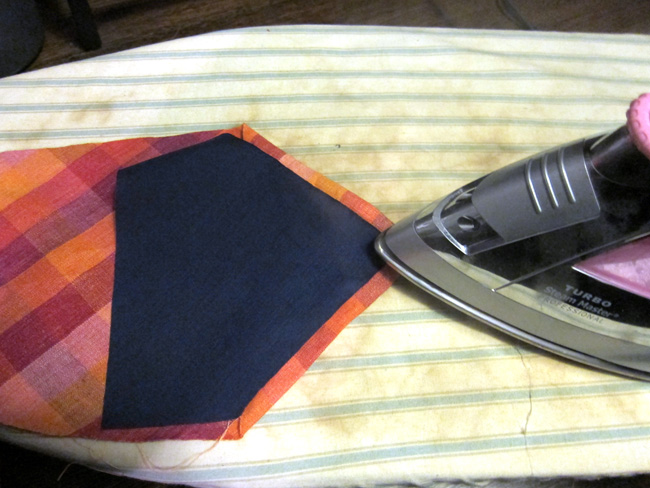
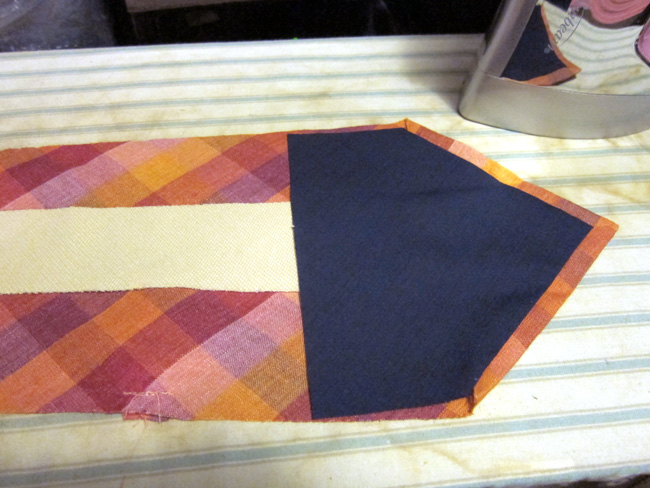
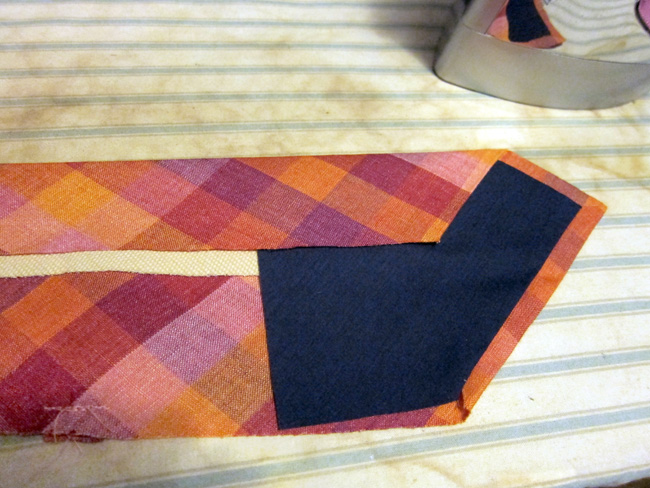
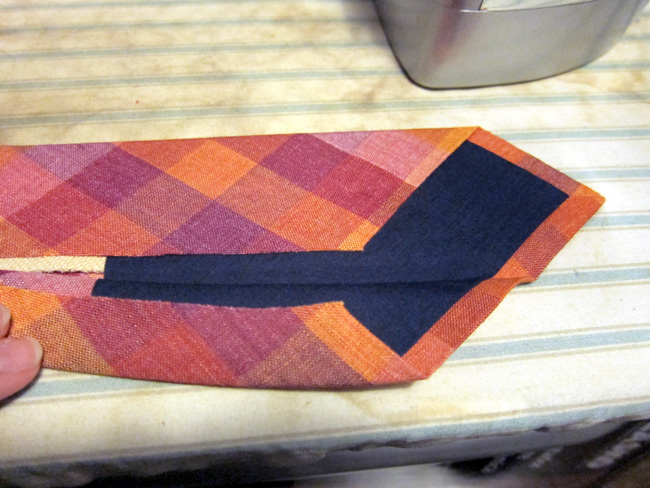
Next it is time to sew on the lining/tipping (you’ll do this twice, once with the big end of the tie, and once with the little end). This is a little tricky, but its not too difficult. Place the lining on top of the CORRECT side of the main envelope fabric. You’ll notice that the lining is slightly narrower. This is so that on your finished tie, you have a little space between the seam and the edge of the tie – you’ll see what I mean later. Start by lining up the outer edge of the lining with the outer edge of the main fabric (again, this should be on top of the CORRECT side of the main fabric). Sew a straight line to the imaginary center of the lining. Notice how the center axis of the lining is slightly off set from the center axis of the main fabric.

Then line the opposite edge of the lining with the same opposite edge of the main fabric. Sew this edge in the same way. You will end up with extra fabric in the middle section of the main evnelope fabric, but your stitches will meet in the middle of the lining fabric.
If you fold all of this in half along the center axis so that the lining is sandwiched in the middle, this is what it will look like. The dotted line represents where the lining fabric stops.
Next, keep the tie folded in half and sew a line that is perpendicular to the center axis. Its difficult for me to eyeball on the machine, so I drew a line that I measured precisely with a ruler. This line should intersect with the meeting point of the vertical axis of the lining and the diagonal seam that you previously stitched. Sew this the same way on little end of the tie.

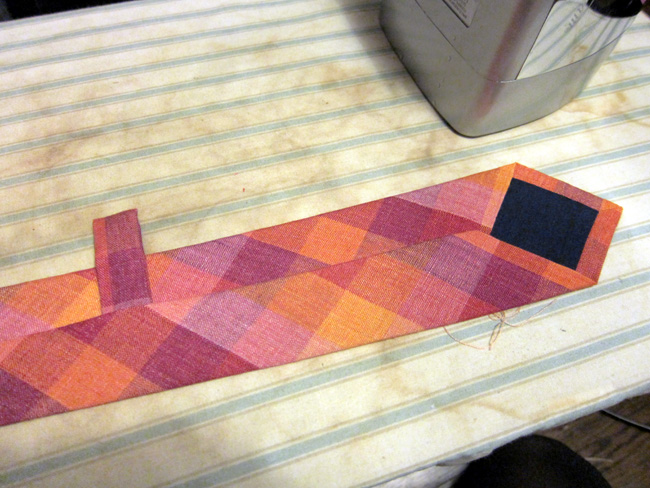
This is what everything should look like now (both big end and little end). Note that the lining and the keeper are sewn to the same side of the main fabric:
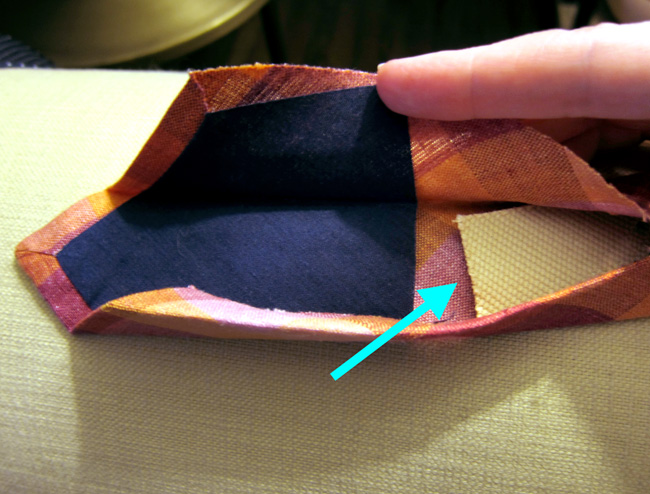
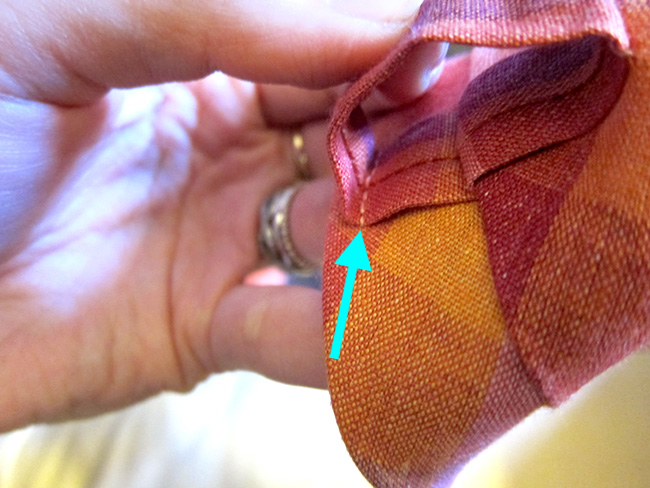
Now this part is a little bit magical. Take the two ends with the lining, and flip them inside out. I use my finger to keep that extra fabric at the tip laying nice and neat and flat.
Then use your iron to press both ends flat. Look at how clean and beautiful that seam looks. I just love it! This is what I was talking about earlier when I said there would be some space between the seam and the edge of the tie. Very professional looking!
While you are at it, press all the other seams flat too.

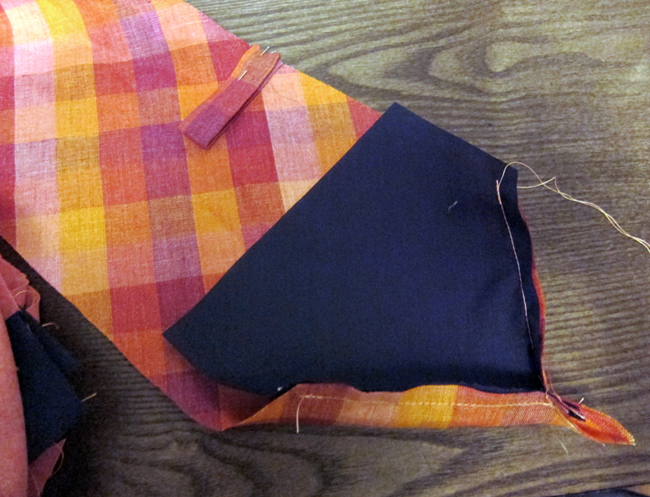
The next step involves the interlining, but don’t put that iron away yet! We are going to need it again in a second. Insert the interlining into the big end of the tie (between the envelope and the tipping). Center it along the length of the tie fabric.
Fold over one edge of the tie fabric and press it flat with the iron. You don’t need to do this too tightly or precisely. In fact, its better if there is a little breathing room between the interlining and the fold.
Then do the same with the other side.
THEN, fold over that top overlapping edge so that the fold runs along the center axis of the tie. This should be the same edge where your keeper is attached. Press this flat with the iron.

Do this for the whole length of the tie. When you get to the small end, you’ll see that the interlining does not go all the way to the tip. That’s totally OK and normal.
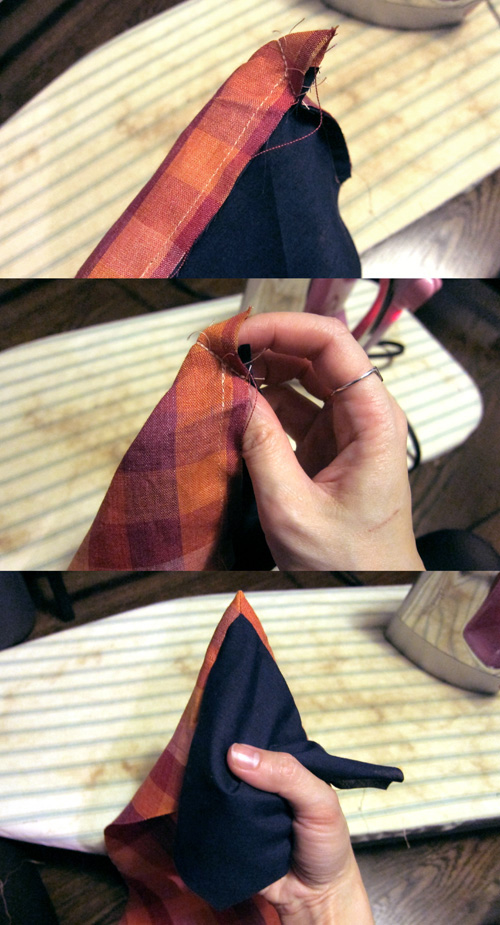
OK, back to sewing now. But this time you’ll be hand sewing, so get out your hand needle and thread.
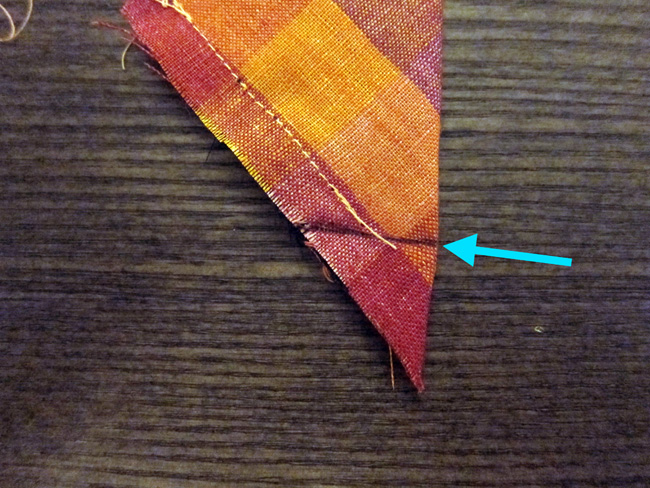
Have you ever noticed those decorative stitches at either end of a store bought tie?
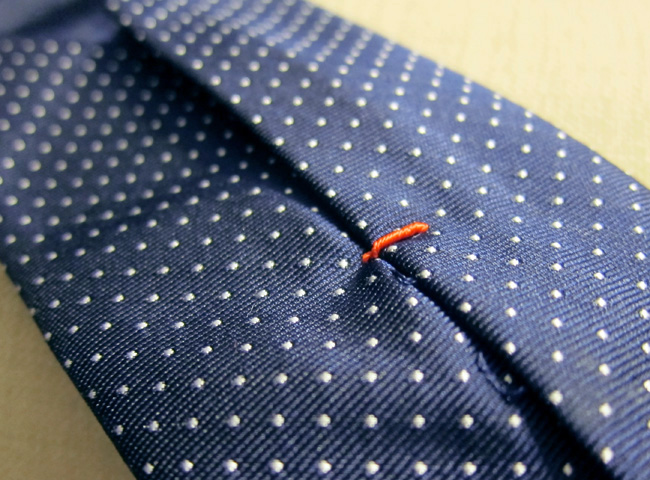
It looks like a really thick single stitch. To my eye, it looks a little like it might be wrapped with more thread? Well, I couldn’t really figure out how on earth they did that, so I came up with my own way. If any of my readers out there can direct me to a better way to do this, I’d love to hear it!
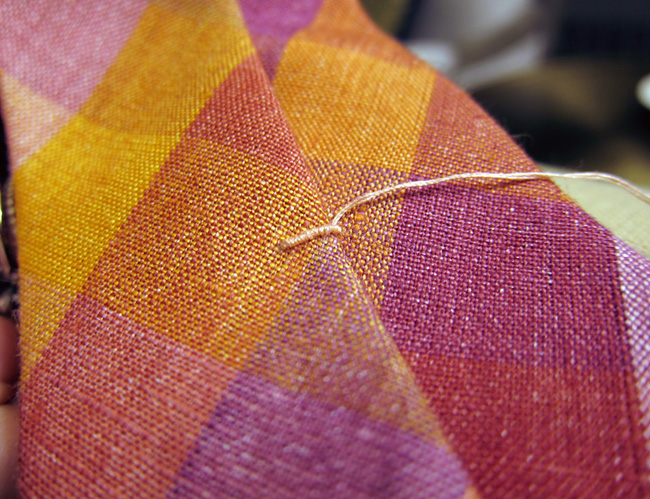
EDIT (11/12/13): A good friend of mine read this post and clued me in on the correct way to do this stitch. She’s married to a menswear designer, and I don’t know why I didn’t just ask him to begin with. Anyway, it’s call a “french tack.” Here’s a link to how you do it.

This stitch should be positioned a few inches up from the point of the tie. Secure the thread with a knot (and follow the instructions on the link above).
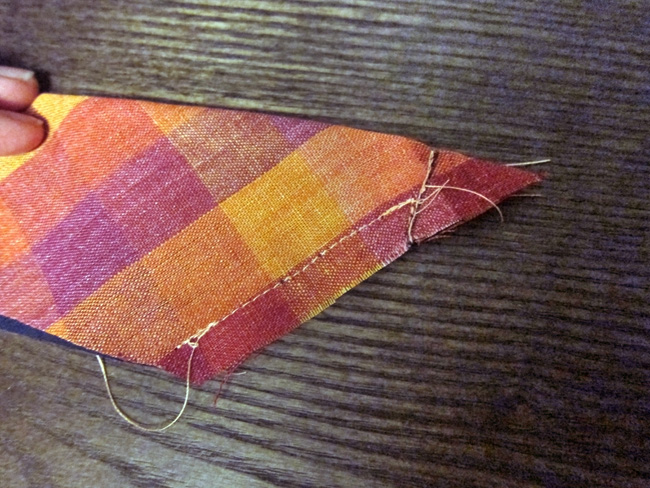
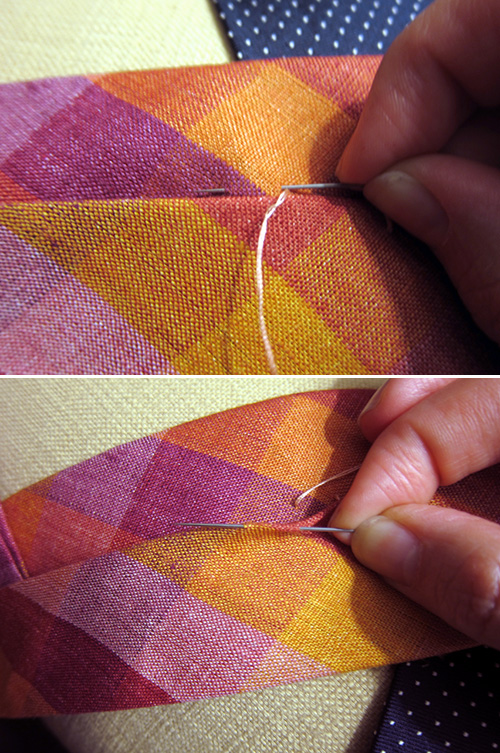
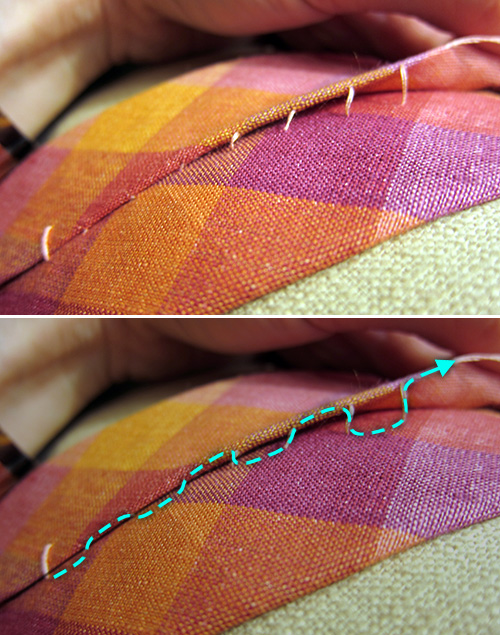
Then, return the needle to the fabric at the base of this stitch and begin your slip stitch. You’ll simply slip stitch the seam all the way down the length of the tie. Be careful not to sew through to the front side of the tie. Also every now and then, I’d pull along the length of the tie to keep the stitch nice and loose. You don’t want it ripping when the wearer is pulling the knot tight. Keep the stitches big, loose, and flexible.
It’ll look kind of like this:
Then, finish it off with the same decorative stitch at the other end of the tie, and secure it with a knot.
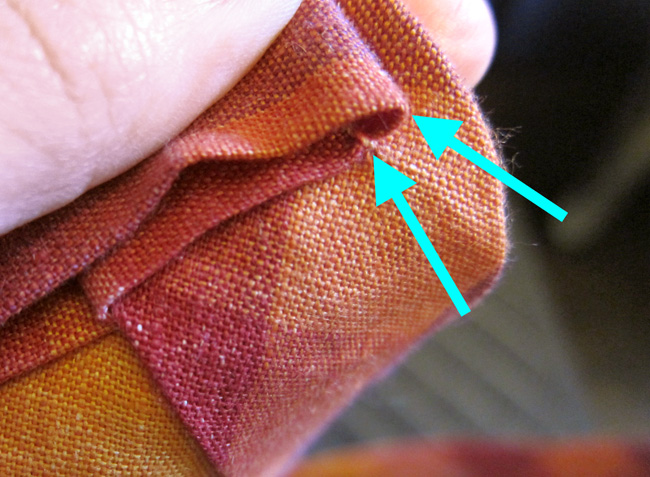
The last thing you’ll have to do is sew the keeper into place. I couldn’t figure out any other way to do this except to hand sew it, which was super annoying and tedious. A lot of the ties I’ve seen appear to be machine sewn in some way, but I cant figure out how that would work. Maybe professionals are just really neat with their hand sewing. Anyway, back to how I sew the keeper.
First, flatten out the keeper.
Then hand sew the ends, also taking care not to sew through to the front side of the tie.
Another tip: leave a little space between your stitch and the outer fold of the keeper. It will allow for more flexibility and will prevent the tie from buckling when you insert the “back blade.”
Press everything out one last time if you feel like you need it. And then there you go! All finished. Your very own custom tie! Joe really wants me to make him one now too.
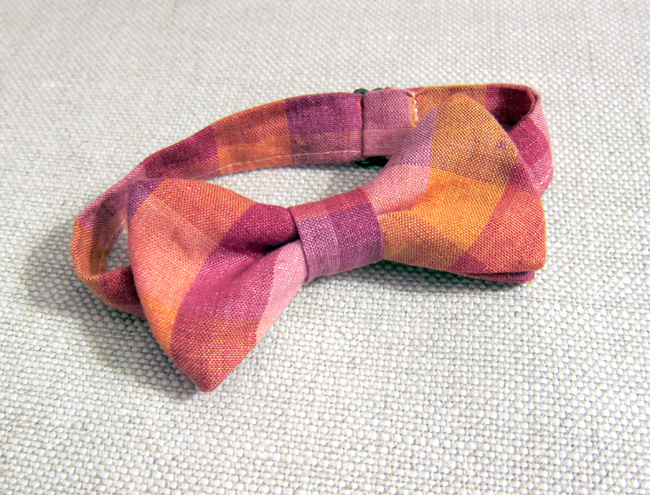
I don’t have a tutorial for this, but while I was at it, I also made a little bow tie for the ring bearer =)
Check back for final wedding photos with the bridal party actually wearing them! I’ll post those up soon =)
Edit: Check out the finished wedding ties here!

This makes me want a tie too! AMAZING!!
AWESOME ! Now I can get any tie I want for LIFE !
Thanks again Cheryl!!! I’m going to start borrowing joes ties!! Lol you’re awesome Cheryl!!!!
Well done! Maybe you should consider making some “Joe & Cheryl” woven labels that you can sew into your own creations and things that you make for friends. I think it’d be a nice touch.
Or maybe just a “Cheryl” tag haha.
Thanks Andrew! yes! I need to look into where to have woven labels made. Joe kept bugging me to put some into the wedding ties, but I didn’t have time.
AMAZING! Have you ever considered your own youtube DIY channel?
Hi, how do you make that looping thread on the middle, that all tie makers do in order for the tie to retain it’s shape?
The stretch loop I think they call it.
Btw, I have found that your tutorial is the best on the web!
You should consider making a video 😀
Octav, are you talking about the French Tack? I talk about it in my post, but here is a video tutorial you can use. http://www.craftsy.com/blog/2012/10/learn-the-french-tack/
Hi Cheryl
Not quite
I was actually talking about this one:
http://www.samhober.com/necktie/custommadetie11.jpg
You see, it holds a loop in his hand, and I know the loop is from the slip stitch thread, but don’t know how to make it 🙁
Sorry Octav! I wish I knew how to help you! I found the tutorial that you got that image from and he doesnt really explain it. I will say that when I learned how to make my ties by disassembling an old tie from Jcrew and did not see that stitch there. I made mine without that stitch and they turned out fine. But I’ll be sure to let you know if I figure it out.
Help! I’m making skinny ties for a friend’s wedding and plan to use your awesome tutorial but cannot figure out how to print your pattern out for assembly on a regular printer. Thank you!!
sorry for the late reply! I’ve been on vacation!
Hmm, I’m not sure what program you are using, but there’s a way to do tiled printing in adobe illustrator.
Interesting tutorial… I was looking for tips to make a regular tie a skinny tie…
(btw. its time for a new cover for the ironboard)
LOL, yeah, you can see that it gets A LOT of constant use. i recently bleached that ironing board cover and its almost like new =)
If you still need the help Christy, printers have a “poster” setting and you can print it actual size.
I love the bow tie! Are you sure you don’t have a tutorial for it? It’s exactly the style I’m looking for…
Thanks Carrie!! I’m actually in the process of making another kid’s bow tie for another wedding this summer. If you can wait one or two months, I can totally write up a tutorial this time around (since I didn’t photograph the process last time)
WOW, this is absolutely epic. Thank you for the downloadable template!
Totally bookmarked AND just included it in this month’s round up on my own blog. I can’t find you guys on Twitter so thought I’d leave a comment instead! http://helario.us/post/87886584581/get-crafty-june-2014
x Helen
Thanks so much for your kind words and linking to my site! Your blog looks great, and I’m definitely going to have to try out one of those other projects you linked to!
One of these days I’m going to have to start a twitter account. I’m so behind the times. LOL
Cheryl– This is such an amazing tutorial. I just made 7 ties for a friend’s wedding from your excellent instructions and pictures and they are flawless! Well-done and thank you for sharing 🙂
I’m so happy it was helpful for you! I always get frustrated with online tutorials that gloss over little details. I definitely make an effort not to do that, and hearing wonderful things from readers like you makes it all pay off =)
Thanks so so much for this amazing walkthrough! I had just finished a kilt (http://www.scottishdance.net/highland/MakingKilt.html) and had some fabric left to make some matching items; this tie really is top notch thanks to your work! Cheers!
[…] Today my order shipped from JoAnn.com… and the future is near for my nephew getting his very own handmade Realtree camo neck-tie for Christmas via this tutorial. […]
Thanks a lot for this, Cheryl! Just got into a job that requires to wear ties with the uniform all the time, and being the crafty girl I am, I decided to make my own because that also shows my own personality and originality. I doubt someone will ever do that for the job. Anyways, I followed your tutorial and a second one I am actually from Mexico and obvs speak Spanish so I found this video https://www.youtube.com/watch?v=PMNh2SImcjg and it teaches how to trace and cut the pattern either it’s a wide, skinny, long or kid’s neck tie, and it’s really simple. If you want me to help you figure out what he says, I think you get my email with this comment, so I totally can. From there I just followed your pics and tips and it came out GREAT with the colours I love and I can also wash it at home! And your tutorial made me see it’s not that hard. So, thanks again! You’re still being read!
When printing out the pdf how big does it need to be?
Hi Cheryl, this is a great tutorial, thanks so much for posting! I am planning on making a tie for my husband’s birthday and am using quite a heavy herringbone wool. I was wondering if you still think it would be necessary to use interlining? The staff in the fabric store seemed to think not but they also admitted that they had never made a tie before! Thanks 🙂
Using Adobe Reader, there is no way to print this pattern that I can find, and most people don’t have a copy of illustrator. I either get it scaled to fit on one page (which would make a great tie for a kitten) or I get just one section of the pattern printed at full size but PDF Reader won’t print the rest of the pattern.
When I download the PDF file and choose Print, I thought that I might be able to tile the image from the Print “box”. I tried it out, printed at 100%, and the patterns seem gigantic! Is that how the pattern really is and I am just being crazy?
P.S.: I know about Illustrator and programs like that, but unfortunately, I am using computers from work which lack those programs because I do not have a printer to use at home. 🙁
I’m not sure how big yours ended up printing out, but the total size should be about 40 inches by 40 inches. You’ll know if the print out is the correct size if all of the blue grid boxes are exactly one inch by one inch. Tiling the print out is the right way to go about it.
the whole document is 40 inches by 40 inches. i’d do tiled printing on regular paper and then tape the pieces of paper together
Emma, i’m not sure, I wouldn’t prefer to use heavy wool because it might end up bulky when you tie the knot. I’m not sure if you could go without the interlining… it might work??
Awesome! thanks so much!
How long would you say each tie took you from start to finish?
This tutorial is wonderful! The instructions were so easy and the template was fantastic. I just am wondering, when you slip stitch the tie together, do you go through the canvas lining? or just the edges of the tie??
[…] joeandcheryl […]
[…] joeandcheryl […]
Hi Cheryl! Love the tutorial. Will these measurements make a tie long enough for a 6″3′ guy? I always have trouble finding him ties that are long enough! If not, which measurements would you recommend?
[…] joeandcheryl […]
where do you buy your fabric? I love it all!
How long would you estimate that it took you to make a single tie once you got he hang of the process?
Thank you so much for such a great tutorial! I’ve made a couple ties now using your pattern and all have come out great.
[…] 7. Handmade Skinny Ties […]
[…] I decided to make something for Felix. (Good wife, good wife!) I looked up tie tutorials, and found this wonderful website. She gave a wonderful explanation on making a tie! I used one of Felix’s old […]
Thank you thank you thank you. The best post on tipping a tie in the universe!!
I needed some ties for clerkship. Ties from the store are expensive and ugly. I decided to give it a try and I found this tutorial. On my first try the tie came out really well. These instructions are excellent! It took me about 5 hours. I bought extra fabric that I liked and will definitely be making more in the future. Hopefully it will only take half the time since I know what I’m doing now.
Just a tip for anyone who has difficulty printing it out, I used adobe reader (free online) to open the pdf. Then in the print screen there is a poster option. I used that and it took 20 pages to print out at 100%.
HI,
Thanks Jay for the help with being able to print out this pattern if we dont have Illustrator.
Thanks for sharing this pattern. it is the only one that i have found that explains how to make a tie traditionally but also the the assembly of the tip linings!!!! cant what to make some!!!
Thank you so much for this pattern!
I have a question: you note in some places specific seam allowances, but for the rest of the tie I couldn’t seem to find the seam allowances. Are the seam allowances for the rest of the tie 3/8″?
Hi Cheryl, I have made several ties usin directions from YouTube but have not been thoroughly pleased with them. However, that is going to change. Your directions and illustrations are so clear and perfect! Thank you so much for clarifying a lot of the details for me. Great job!
This is the best tutorial on making neckties ever! Congratulations! I often make ties for people but I have always had trouble with getting the perfect tip with some of the fabric showing.But with this tutorial,I think I finally got the point. Thank you so much!
PS,: did you ever publish the tutorial for the bow tie?