Follow Me on Pinterest follow us in feedly like us on facebook

Email Subscription

Enter your email address:

Delivered by FeedBurner


Winter Coat Progress Part 2

Other posts in this series: Part 1, Part 3, Part 4

Here’s part two of the parka making series.  At this point I’m through with cutting and most of the prep work so I’m full on into sewing mode.  I spent this entire past weekend sewing pockets, toggle straps, and actually constructing the majority of the shell of the torso.

These below will eventually become my toggle straps.  Hmm… toggles might be the wrong word.  I’m using buttons, but instead of having a button hole, I’m going to have a loop like just like a toggle closure.  Anyway, I made these out of the shell fabric.  I’ll sew them in sometime in the near future. Also pictured are the epaulettes.

Winter Coat Progress Part 2 - >> joeandcheryl.com <<

I also decided to make all of the pockets.  Here you can see the two side hand pockets and one inside pocket in the lining.

Winter Coat Progress Part 2 - >> joeandcheryl.com <<

Winter Coat Progress Part 2 - >> joeandcheryl.com <<

Winter Coat Progress Part 2 - >> joeandcheryl.com <<

This inside pocket is the perfect size for my iphone!

Next I sewed together the lower half of the shell.  Notice the fishtail hem!  There is no drawstring though, its purely decorative.

Winter Coat Progress Part 2 - >> joeandcheryl.com <<

Here’s the completed top half…

Winter Coat Progress Part 2 - >> joeandcheryl.com <<

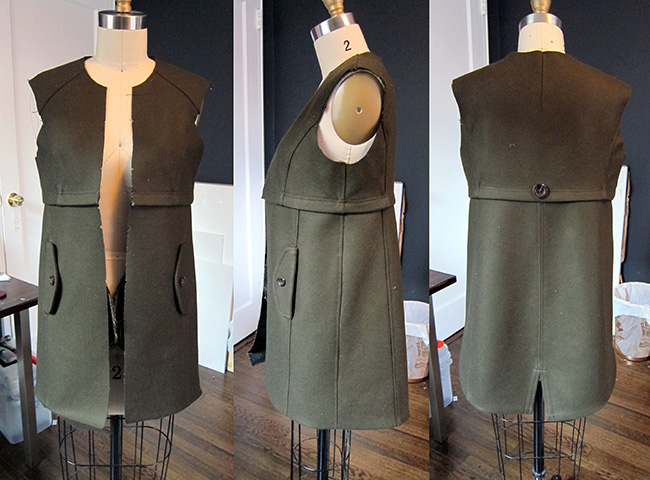
and here they are together!!

Winter Coat Progress Part 2 - >> joeandcheryl.com <<

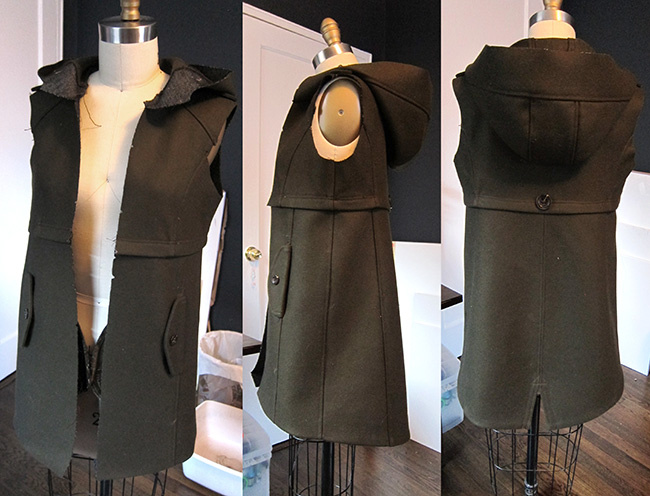
And last but not least, here’s the hood attached, complete with backwards epaulettes.

Winter Coat Progress Part 2 - >> joeandcheryl.com <<

Winter Coat Progress Part 2 - >> joeandcheryl.com <<

I’ll sew the button on after I attached the sleeve.

Next I have to sew in the front placket, add more snaps, sew in the zipper… maybe attach the sleeves, maybe work on the lining…


My Winter Coat Progress: Part 1

Other posts in this series: Part 2, Part 3, Part 4

I’ve been wearing the same winter coat for the past 4 years.  Joe has been telling me that I should buy a new one for the past two winters already.  He even increased my budget this year and basically gave me the OK to get almost anything I want.  Unfortunately, buying a coat has always been an ordeal for me.  I have a petite frame with disproportionately small shoulders.  Its almost impossible to find a coat that doesn’t make me look like I’m swimming in it.  Even when I do find one that fits my frame, its usually more of a fashion piece and doesn’t have enough insulation to keep me warm. Frustrating…

So I finally caved in and decided to make my own.  I’ve been really into the whole military parka look that’s really popular right now, but I’m putting my own twist on the trend.  I plan to make mine out of felted wool, rather than the woven cotton that you usually see. I want to give it a slightly more dressed up look.  It will almost be a parka/duffle hybrid. This is a pretty monster project and I’ll be lucky if I can finish it before the winter over.  It’s such a big project that I’m not going to give a DIY tutorial. I think it is simply way too complicated to explain step by step, but I’ll show you my progress so far!

I’m not that experienced of a draper and I wanted some sort of guarantee that I wouldn’t waste my time/money on a coat that would end up not fitting me. So I decided that I would base my pattern on a coat that I already own (the one I’ve been wearing for four years). In the picture below you’ll see that I started pinning muslin to my old coat to create the pattern.  It’s only a guide and starting point though, I did change the design quite a bit.

My Winter Coat Progress Part 1 - >> joeandcheryl.com <<

Here’s my finished pattern (I might have revised or added to some of these pieces since I took this pic).  Creating the pattern took me one whole day off of work during Christmas time.

My Winter Coat Progress Part 1 - >> joeandcheryl.com <<

The next step was cutting the pattern out of the actual coat fabric, both the shell and the lining.

My Winter Coat Progress Part 1 - >> joeandcheryl.com <<

My Winter Coat Progress Part 1 - >> joeandcheryl.com <<

For the shell, I bought the thickest wool felt that I could find in an army green.

My Winter Coat Progress Part 1 - >> joeandcheryl.com <<

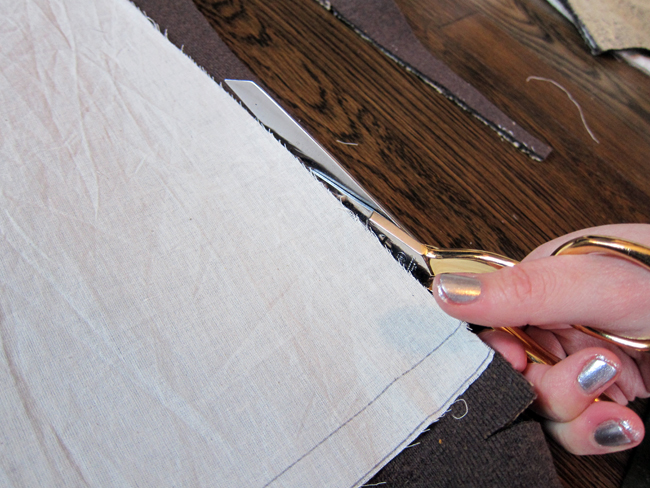
In this pic, I’m cutting out the lining fabric. You are looking at the reverse side here.

My Winter Coat Progress Part 1 - >> joeandcheryl.com <<

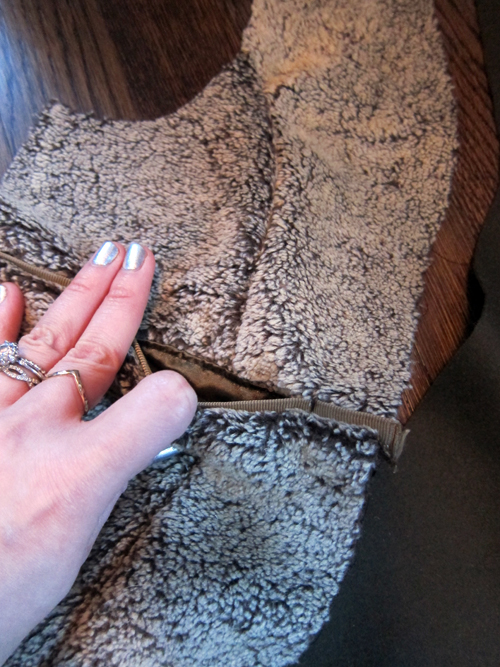
This is the correct side of the lining. It’s some sort of faux fleecy material for extra warmth. I like that it has light tips and dark “roots” giving it a more authentic fur-like look.

Once all of my fabric was cut out, I ironed on fusible interfacing for added structure to the parts that need it.  It wouldn’t hurt if it offered a little extra insulation too.

My Winter Coat Progress Part 1 - >> joeandcheryl.com <<

My Winter Coat Progress Part 1 - >> joeandcheryl.com <<

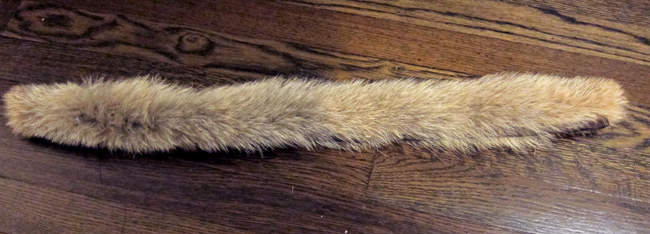
At this point I have devoted three full days of work to this coat with still nothing actually constructed.  I decided that I wanted to work on all of the detail work first, which tends to be the most time consuming.  I bought this great fur trim for the hood.  Mood sells strips of fur already finished with an edge of grosgrain ribbon. It’s also the perfect length for a hood.  I wanted to make my fur trim removable with snaps, so this was the most challenging part of constructing the hood.

My Winter Coat Progress Part 1 - >> joeandcheryl.com <<

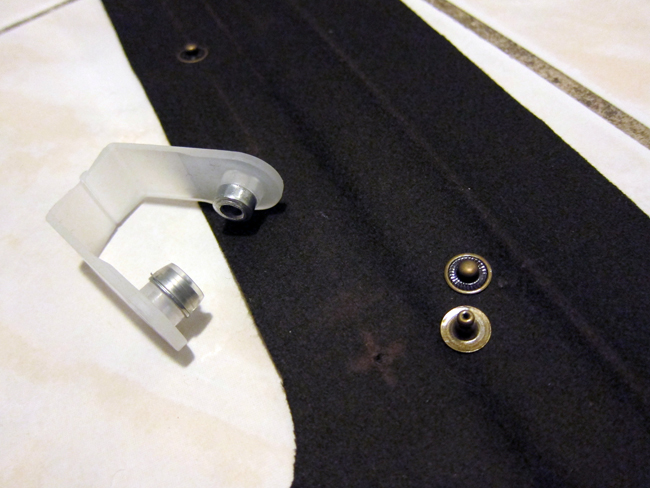
I bought mini anorak snaps and a home snap setting kit. Normally professionals use a large press for setting snaps.  The Dritz kit is a little more crude and less clean, but it did the job just fine.

My Winter Coat Progress Part 1 - >> joeandcheryl.com <<

My Winter Coat Progress Part 1 - >> joeandcheryl.com <<

Snap Setting tool for use with hammer.

My Winter Coat Progress Part 1 - >> joeandcheryl.com <<

My Winter Coat Progress Part 1 - >> joeandcheryl.com <<

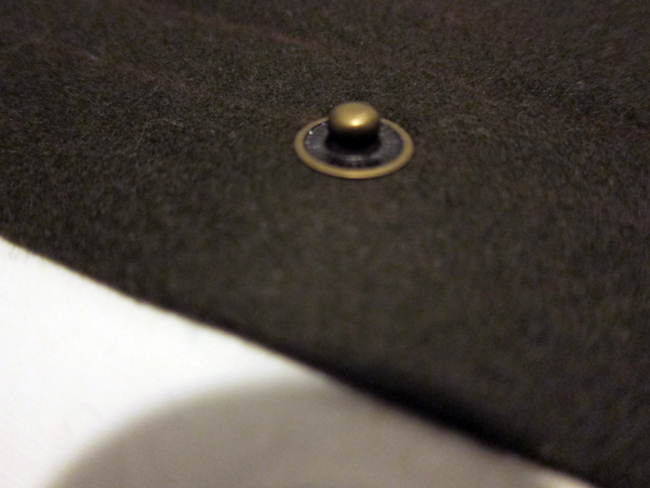
Female snaps set directly onto pre-sewn grosgrain fur trim.

My Winter Coat Progress Part 1 - >> joeandcheryl.com <<

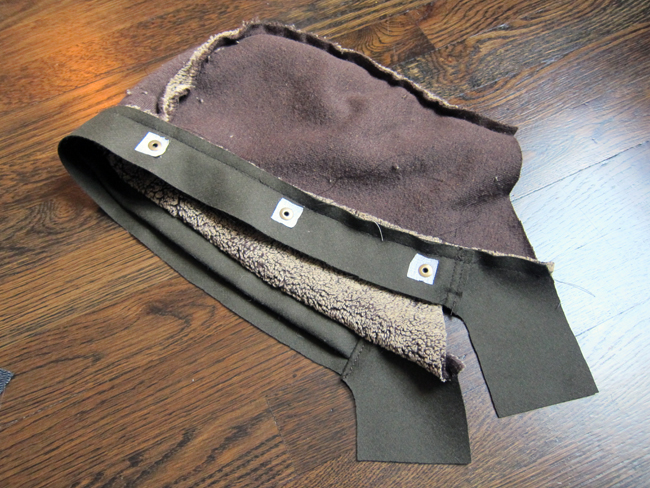
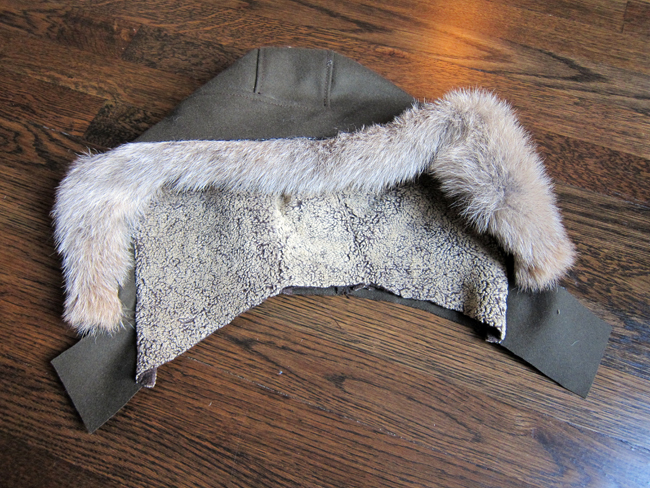
Finally did some sewing! here you can see the male snaps attached to the lining of the hood

My Winter Coat Progress Part 1 - >> joeandcheryl.com <<

furry lining!

My Winter Coat Progress Part 1 - >> joeandcheryl.com <<

I added an extra flap of wool to hide the snaps when the fur trim is not attached.

My Winter Coat Progress Part 1 - >> joeandcheryl.com <<

See how nicely the trim snaps in?

My Winter Coat Progress Part 1 - >> joeandcheryl.com <<

Lining with fur

My Winter Coat Progress Part 1 - >> joeandcheryl.com <<

I also sewed the shell for the hood.

My Winter Coat Progress Part 1 - >> joeandcheryl.com <<

I didn’t attach the lining to the shell yet, but here’s what it will look like when I eventually sew them together.  For now it’s just pinned in place.

My Winter Coat Progress Part 1 - >> joeandcheryl.com <<

I love hoods because they keep my head warm without messing up my hair the way a hat does.

And that’s all I’ve done up to this point!  All of this took me about three and a half days.  In my next entry I’ll show you how far I’ve gotten with sewing the shell of the coat.


DIY Stained Work Table

Happy New Year!  I can’t believe its 2012… especially because it’s now been a year since we were gathering paperwork to buy our apartment.  Anyway, time for another DIY project post!  I actually finished this one a few months ago, but never got around to photographing the finished result until now.
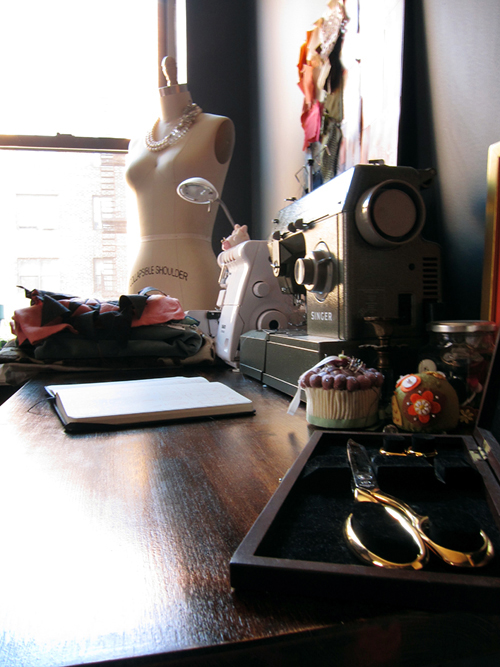
Since we don’t have kids yet (and don’t plan to for a couple more years), our second bedroom serves multiple purposes.  It has an extra bed so it serves as a guest room, it has a desk and bookshelf so it serves as a study/computer room, and it has enough extra space to serve as my art studio.  For it to be functional as a studio, I needed some sort of work surface.  Something attractive enough to coordinate with the rest of the room, but cheap enough that I can destroy it with my work and not feel bad… Cheap + Pretty = DIY!

I got the idea to customize a work table from one of my FAVORITE blogs, Little Green Notebook.  I used the same unfinished IKEA table top, but I used different IKEA table legs.  Also, instead of painting the legs gold and painting the top whitewash, I left the legs as-is, and stained the wood top in dark brown.

Staining is actually a really fun and easy process.  When I was younger, my parents bought most of my bedroom furniture from unfinished furniture shops.  We’d lay down newspaper in the garage and stain and seal it together.  I’d even attach the drawer pulls myself.  This VIKA table top is actually much easier than my childhood furniture since its basically just a flat wood board.

The first step is prepping the wood.  I propped the table top on two old paint cans and used the Ikea packaging as a drop cloth. Then I lightly sanded the surface to remove any splinters.  After sanding, make sure that any saw dust is wiped off.  Also make sure the wood is totally dry before painting on the stain.  I used Minwax PolyShades Stain and Polyurethane in one.  My original intention was to finish everything in one easy coat, but that’s not what happened – I’ll explain later…
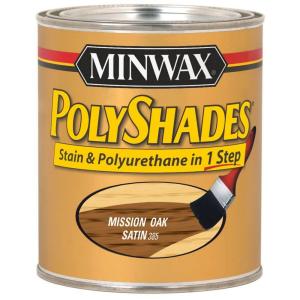
When painting on the stain, always paint with the grain of the wood. It helps to paint your strokes backwards towards the areas you just painted.  Usually I’d use a nicer brush for a project involving nicer furniture, but this table is meant to get messed up, so I used whatever cheap sponge brush I had lying around.

Unfortunately, the color turned out a little differently from what I was expecting.  The swatch at Home Depot looked more like a neutral medium brown, but I ended up with something that’s more of a yellowy dark brown. I’m wondering if that’s because it’s made out of pine.  My can of stain recommended using a wood conditioner for soft woods like pine, but like I said before, I don’t really care to be particularly careful or perfect with this project.

After giving my first coat a couple hours to dry, I decided that I should be able to make the color lighter by sanding it down and creating a rustic, distressed look.  From here onward, I’m defeating the purpose of using a stain and sealer in one and I am creating more unnecessary work for myself. Normally, I would sand lightly after the first coat, use the Minwax Polyshades for a second coat and call it a day.
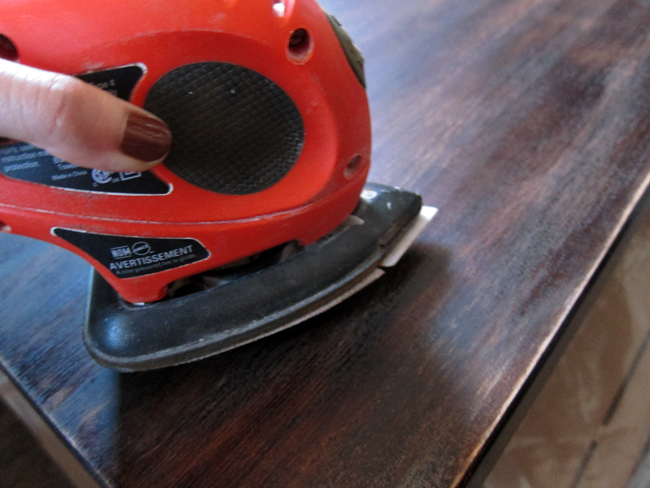
Go power sander, go!

Some heavy sanding seemed to really help with the color and had the added bonus of giving it a worn rustic look.  But I didn’t like that my wood is once more exposed and porous. Luckily I had some extra Polyurethane sealer lying around from a previous project.  I applied a nice coat of it once the saw dust was cleared away.

This stuff dries to touch pretty fast, but I gave it a couple days to dry just to be safe.  Two days later I flipped the top over to attach the legs.

When it comes to Ikea furniture, there’s a brute force method to screwing anything into wood.  They rarely pre-drill holes for you, but only give you a little dent to position the screw.  The screw basically ends up driving itself in, boring its way through the wood as you twist.

And that’s it!  Very easy if you pick the right color stain and don’t have to sand and re-seal.  I was annoyed at first, but the darker color actually works well with the room.  Its almost the same color as our desk and floor, so it definitely coordinates.  Now I only need two more things for my studio area.  I need an easel for painting and I plan to make a large linen covered pinboard to hang all of my swatches and inspirations (the one you see in the pic is just foam core propped up on the table).

Look carefully!  There are clues in these pictures for current and future projects that I will be posting on the blog soon!