
The way that this project came about is sort of a long story. Back in March (the beginning of of gardening season!) I decided to try my hand at growing ferns. I don’t get that much sunlight in my living room since its a north facing window, but ferns can handle low light and shade. So I thought they’d be perfect. I did some searching and found a starter set of four baby ferns, all different species. They were sold as a “terrarium set” but I kind of hate terrariums and I didn’t think it would be a big deal if grew them out in the open.
Why do I hate terrariums you ask? I mean they are pretty, but to me they always seemed so short sighted and limiting. What do you do when the plants grow too big for your container? Do you keep shelling out money for bigger and bigger glass containers? Or do you just let it grow for as long as it will and then accept the fact that it will choke and die?
Anyway, apparently one of my ferns really needs to be in a terrarium. Three of the four ferns have grown just fine in my living room environment. My foxtail fern (pictured in the terracotta planter) absolutely thrived! My holly fern (pictured below in the larger white planter) has also been quite happy. I also got a Korean fern which has been a slow grower, but fairly content. But the fourth fern – my poor little button fern – has not been happy at all. I did all that I could to increase the humidity. I tried misting twice a day, and I tried humidity trays. The environment has just been too dry, and while it has clung to life, most of the leaves have died away.
At the point where I was ready to give up on ever properly raising this species (this is actually my second try), I came across this image on desiretoinspire.net:
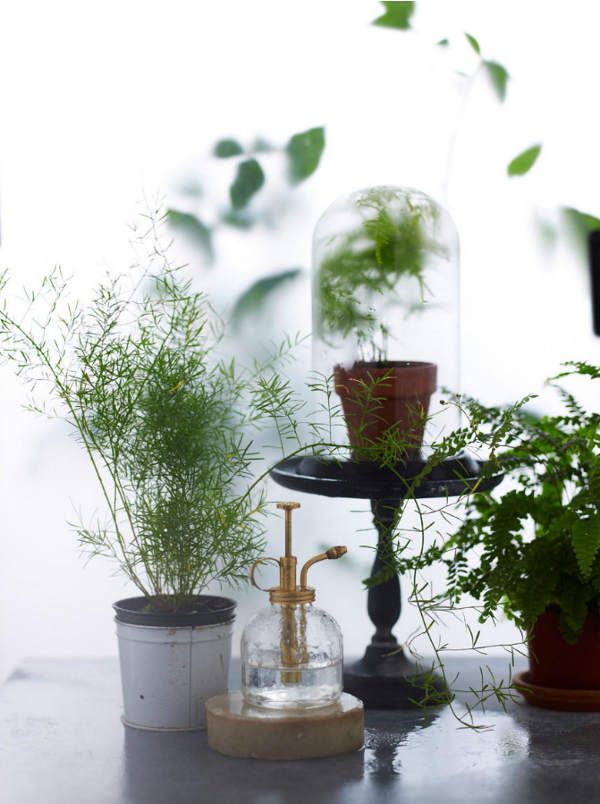
photo by Sarah Cave via desiretoinspire.net
SO INSPIRING! LOVE!!! OK, fine, I guess I don’t mind trying a terrarium, especially if it is this beautiful. I mean, I already have a foxtail fern just like the one in the photo that I can sit right next to it! And this might just do the trick for providing proper humidity to the button fern. But how to do it cheaply, hmmm….
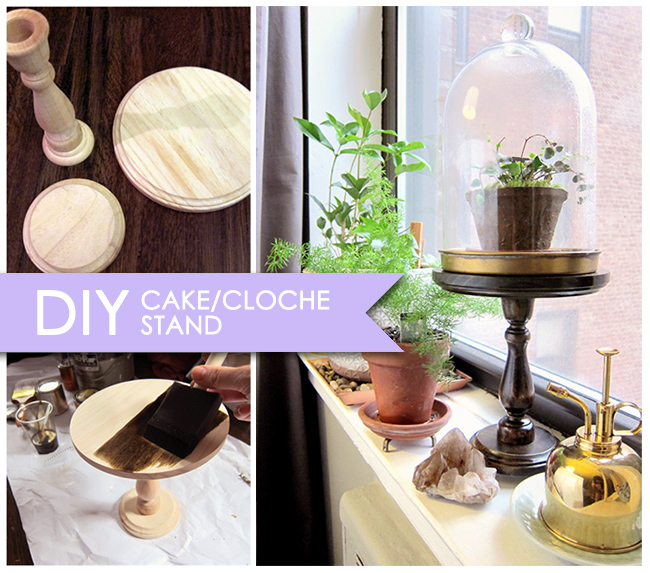
I found an inexpensive cloche (or bell jar) on amazon, but all of the pedestals and cake stands I found were way more than I was willing to pay. Or if they were cheap, they just didn’t have to right look. So of course, I decided to make my own. The one in the photo looks like cast iron to me, but I decided to make one out of wood. I’m using it as a cloche stand, but you can definitely do the same project as a cake stand. Here’s what you’ll need!!
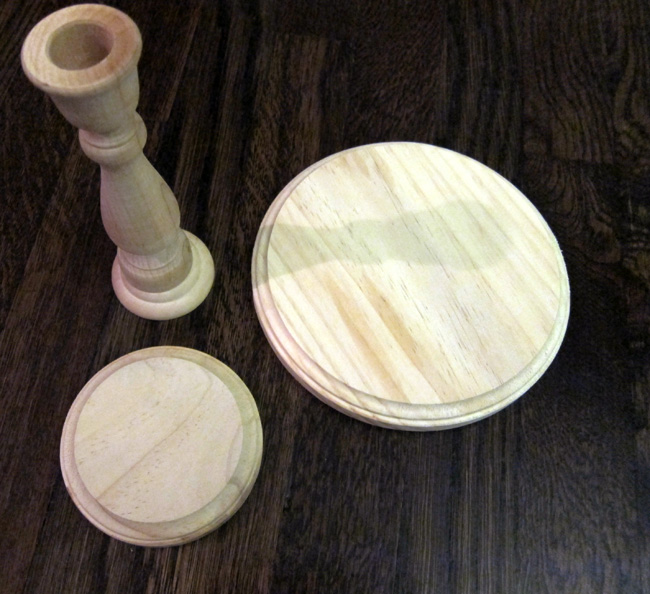
– One unfinished wood plaque, with a diameter at least one inch wider than your cloche, but you can go wider if you want. I used this 7 inch plaque.
– Another unfinished wood plaque in a smaller size for the base. I used this 4 inch plaque.
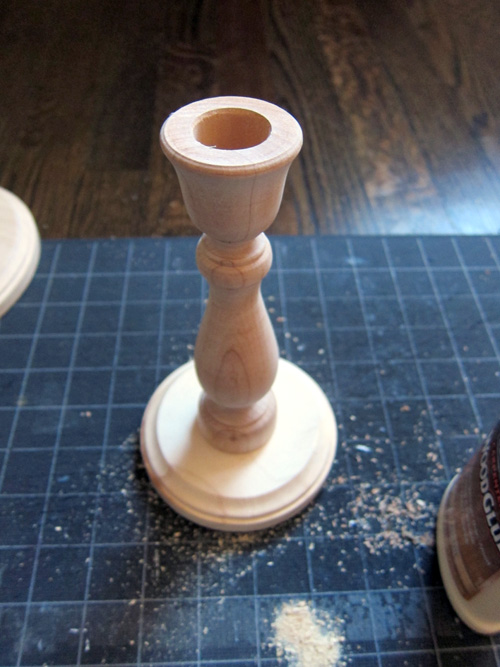
– An unfinished wood craft candle stick. I used this 6.75 inch candlestick.
– A pencil
– Sand Paper
– Wood glue
– A drill (optional)
– Wood stain or paint
– Polyurethane sealer (not necessary if you are just painting it)
– Disposable sponge blushes
I first started by sanding the wood. These are just cheapo plaques that are meant for arts and crafts, so they are quite rough and splintery when you first get them. So you’ll want to sand all of that away. You can buy them at any Michael’s or other craft store, but I got mine on amazon.
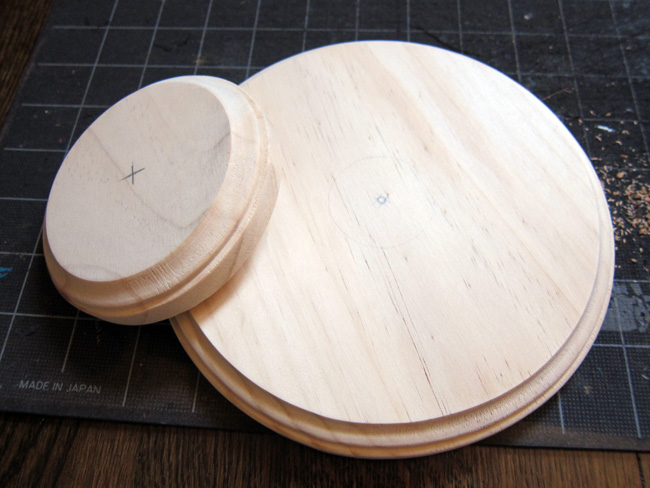
Then mark where the centers of the plaques are located. This will help you to properly center the candlestick. An easy way to do this is to trace the circle onto a sheet of paper. Cut the circle out, then fold it into quarters. You can punch a little hole into the intersection of your folds and trace that with pencil onto the center of the plaque.
These next few steps will depend on the specific candle stick that you buy, so they are optional.
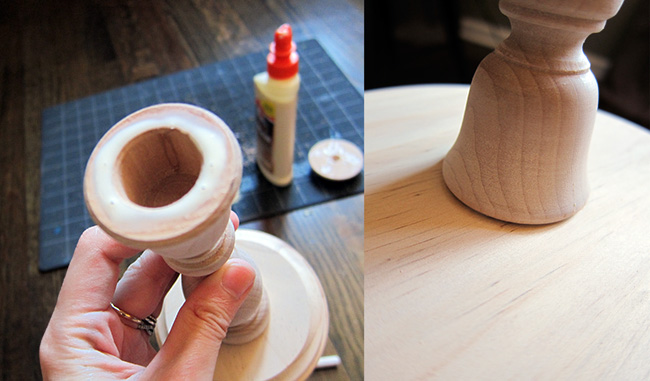
I noticed that the base of my candle stick was a separate block of wood that was screwed on.
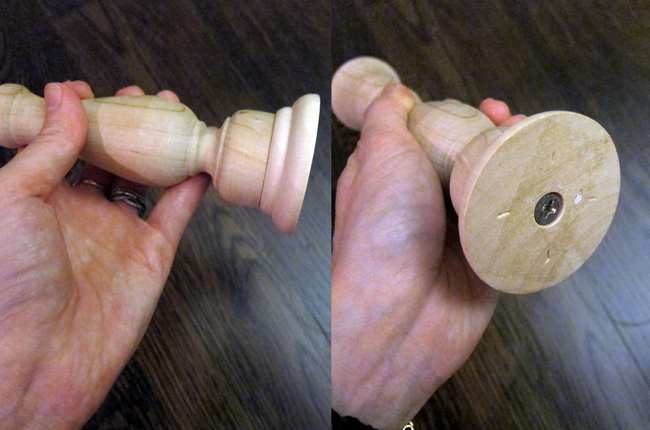
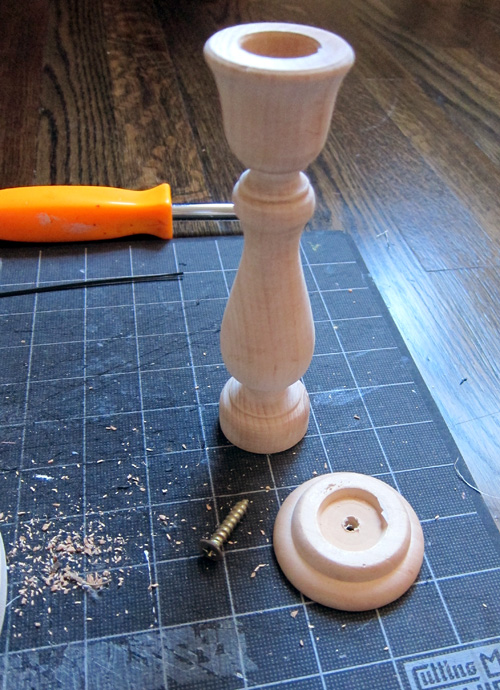
I decided that I’d like to lose that extra height, and the built in screw hole would be an excellent way to securely attach my 4 inch plaque as the new base. So I unscrewed and removed the original candlestick base. It was glued on, so I had to use a screw driver to pry it off. Then I had to sand off all the excess glue.
Next I drilled a hole into the center of my 4 inch plaque. Make it large enough that the screw will just slide through, but not wide enough that the head slips though.
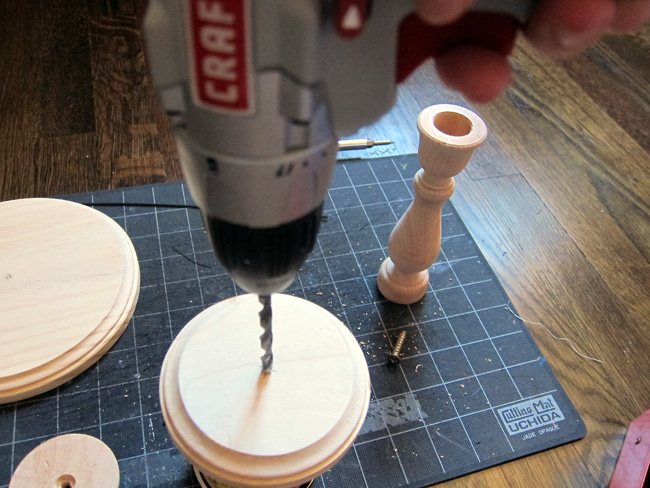
Its hard to tell from this photo, but I used an old empty can to prop up the plaque while drilling. YOU MUST prop it up on SOMETHING so that you do not drill into your work surface.
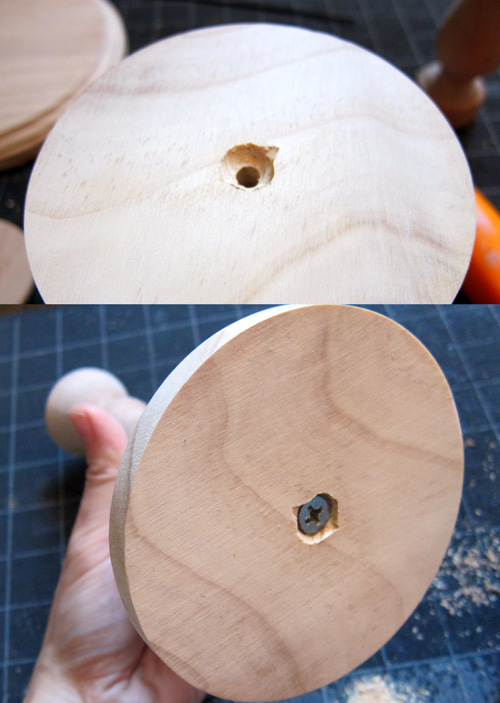
Then I drilled just into the same hole, but just at the surface, with a much larger drill bit so that the head of the screw could be recessed into the wood. It doesn’t matter how neatly you do this since the bottom will never be seen.
Now apply a very small amount of glue to the bottom of the candle stick and screw everything together. Make sure to use a minimal amount of wood glue. If it squishes out, the wood will not take stain in that spot and you’ll end up with an ugly little splotch. You can sand it away, but not squishing out the glue will save you a lot of work.
Note: you can totally skip the drilling and the removal of the candlestick base if its not worth the effort for you. You could always just glue the new base directly onto the original base of the candle stick, but I liked the look of removing the extra part. I also thought screwing the new base in would add extra strength. Totally up to you though.
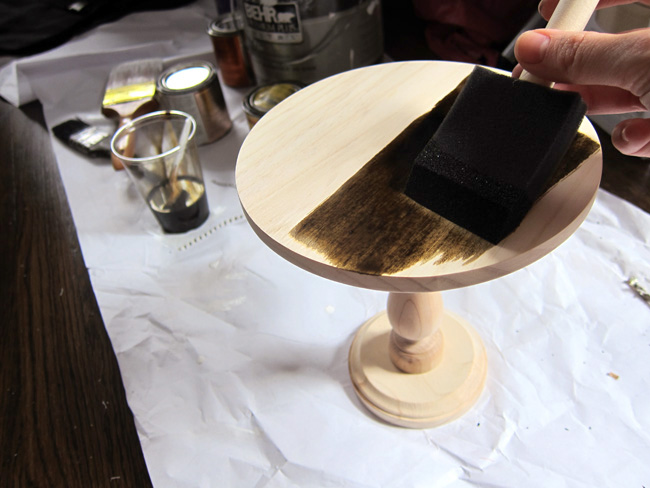
Now you can glue the wider 7 inch plaque to the top of the candle stick. I like it with the decorative side glued to the candle stick and the flat, smooth side as the eventual top of the cloche stand. And again, go easy on the glue. What I show, pictured below, might actually be too much. I had to wipe a little off.
The sturdiness of your cloche stand will depend on how tightly the glue bonds the wood pieces together. To insure a nice tight bond, I stacked a bunch of heavy books on top and left it to sit there for a whole day. So take a break, go get lunch, enjoy the rest of your day.

So you should have decided by now if you want to paint or stain the wood. With painting you don’t have to worry as much about the squished glue since paint will just cover it up. But I thought seeing the wood grain would be so beautiful. So I stained and sealed mine.
Start by doing one last bit of sanding. Make sure to get rid of any dried glue, then wipe off all the dust.
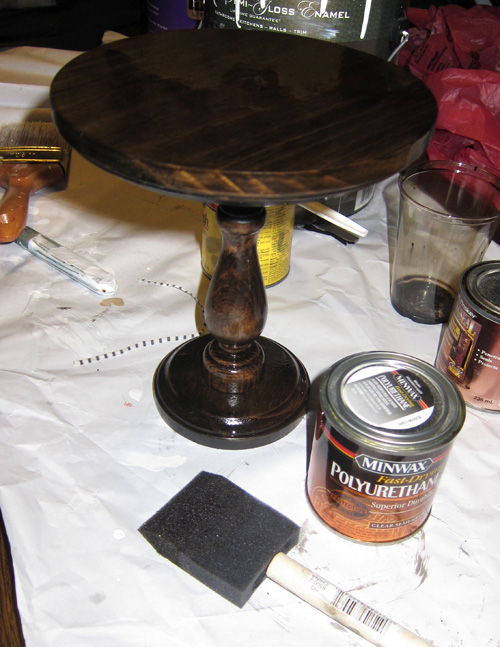
For stain, I have tons of little cans left over from past projects so I just mixed a few together, but I have a feeling Dark Walnut by Minwax would be pretty similar. Staining is SO easy. Just paint a nice even coat on then let it dry for a few hours. I waited a whole day. After its totally dry, you can do a second coat if you want it darker, but I was happy with the first coat.
Next do any last minute light sanding with a finer sandpaper. And again, make sure to clean off all the dust. Then finally finish it off with a nice even coat of Polyurethane sealer. Give this a good day to dry also.
When the sealer is dry, the stand is ready to use! You can put the planter and cloche directly on top of the stand, but there will be a lot of moisture and this may damage your wood finish. I recommend using some sort of tray to contain the moisture. Amazingly I already had a little brass tray that I had be using to display glass bottles. The tray fit the cloche EXACTLY! So lucky! But you could also use Deroma terracotta planter saucers in the appropriate size. Keep in mind that these are porous so moisture may still get through. I’d seal the bottom with Polyurethane, or use a coaster or something like that… or felt feet. I think a ceramic plate would work well also. Get creative!
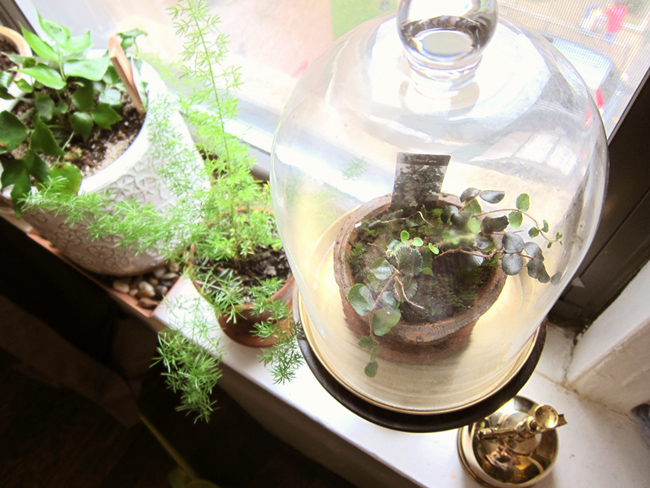
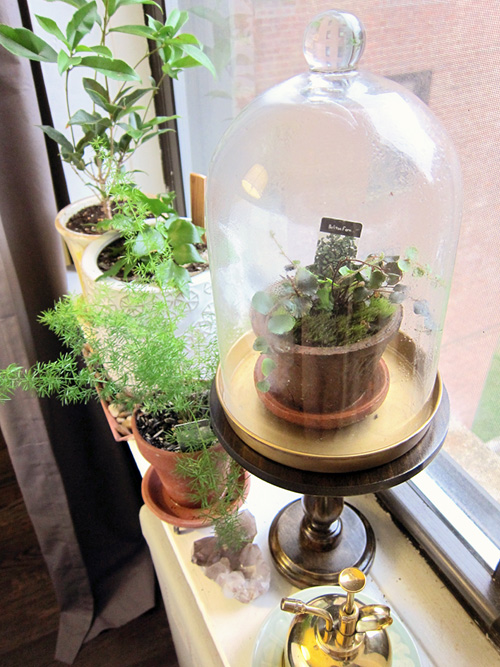
Anyway, here is the finished project sitting with the rest of my windowsill garden! Ever since I put the button fern into the cloche, its been doing SO MUCH BETTER! Out of no where there’s all this new growth. I think that’s definitely a good sign that I did the right thing. Hopefully it doesn’t outgrow it too quickly.
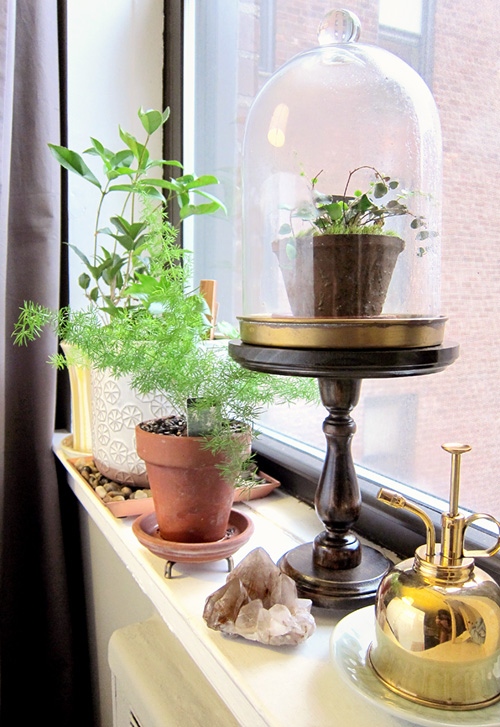
Coincidentally, I already owned many of the items pictured in that inspirational image. I have always had the mister, and the foxtail fern has been with me since March.
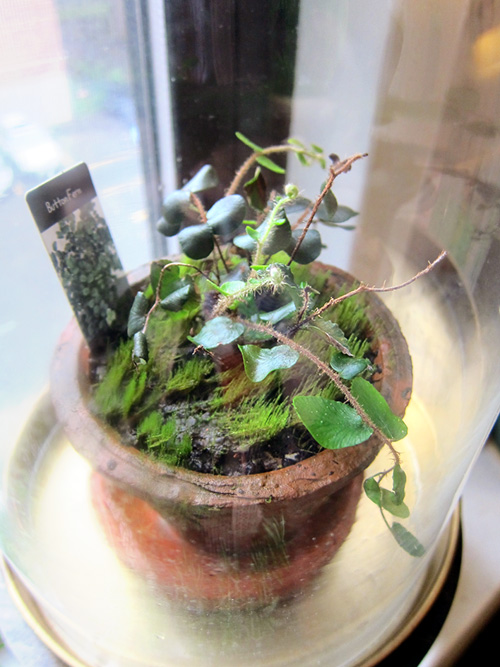
The button fern is still not back to full health yet, but check out those new little fiddle heads growing in! Saved this little guy from near death. I also added some moss that I scraped off of the sidewalk somewhere.


I love that you picked up moss from the sidewalk.
So many plants !
Oooh, I want to make one. The more plants in the home the better I say. 🙂
Where did you purchase the wood candlesticks and wood disks? Love your project you made with them 🙂 So beautiful!
I believe I linked to the products in my post! Everything is from Amazon.com =)