Follow Me on Pinterest follow us in feedly like us on facebook

Email Subscription

Enter your email address:

Delivered by FeedBurner


Fiddle Leaf Fig Update

Other posts in this series: Part 1, Part 3

Lately I’ve been getting a lot of requests for updates to last year’s fiddle leaf fig tree post.  So I’m happy to say, the tree is still doing quite well!

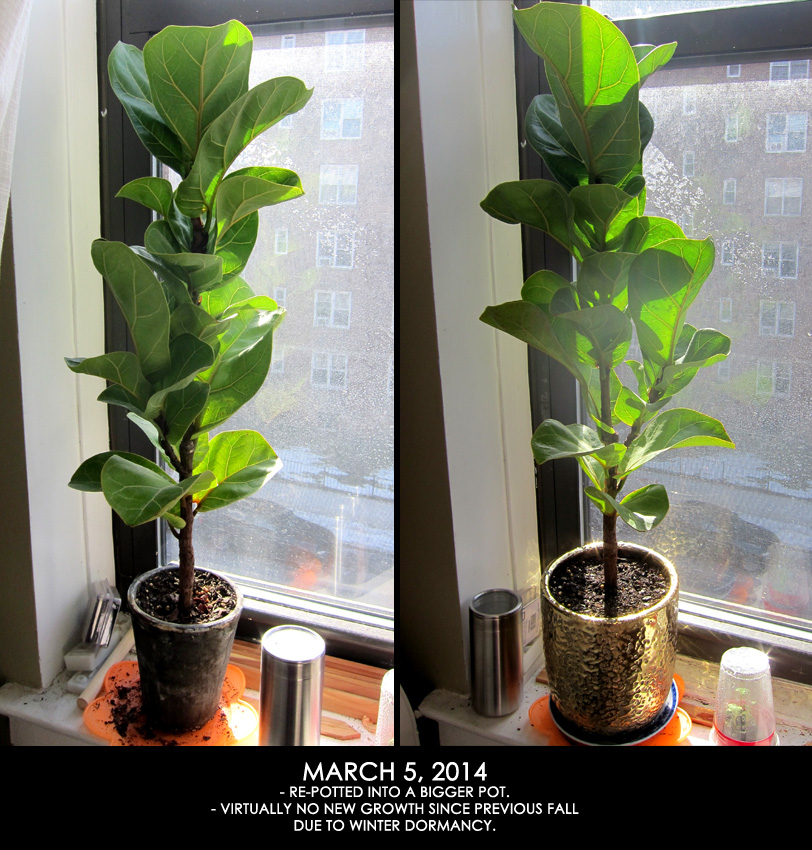
To sum up, here’s a quick look at the growth from last year.

Fiddle Leaf Fig Update - >> joeandcheryl.com <<

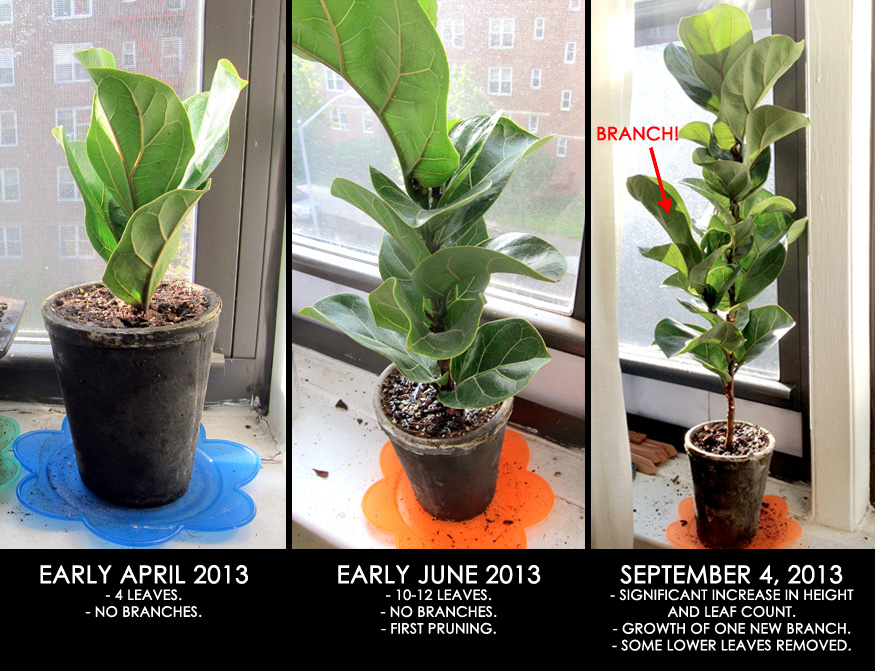
It was extremely gratifying to see it thrive under my care!

So what has happened since then? Not a whole lot actually, but there are still some fun things to share about.

September marked the last of the growth for 2013. Pretty much as soon as Fall arrived, it had entered into Winter dormancy.  At this point I already felt that it had outgrown its pot, but decided to wait until the next growing season to subject it to the trauma of re-potting.

When March rolled around, the days were getting longer, and the growing season was fast upon us.  I decided this was the perfect timing for re-potting.  As you can see from the photo below, my little tree had not changed at all since September.

Fiddle Leaf Fig Update - >> joeandcheryl.com <<

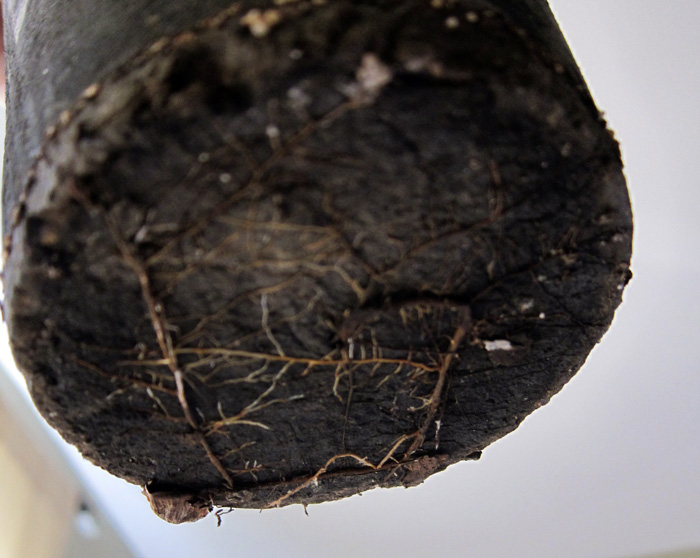
So how did I know it needed to be re-potted?  Honestly, I would have re-potted it whether it needed it or not, but there were a few possible clues.  First, proportionately the plant just seemed way too big for the pot. Secondly, whenever I watered it, very little water seemed to absorb into the soil and tended to drain right through into the dish.  That was a clue that there might not be much soil left – most of it was probably taken over by roots.  This hunch was supported when I took a peek at the bottom of the pot.  Tons of roots were growing through the bottom of the drainage hole.

Fiddle Leaf Fig Update - >> joeandcheryl.com <<

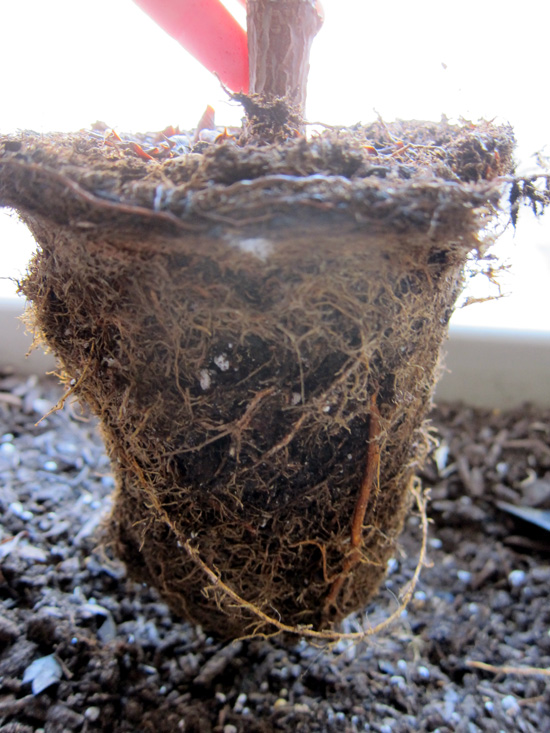
Anyway, I went ahead with the re-potting. The root situation that I saw confirmed that it had become root-bound.

Fiddle Leaf Fig Update - >> joeandcheryl.com <<

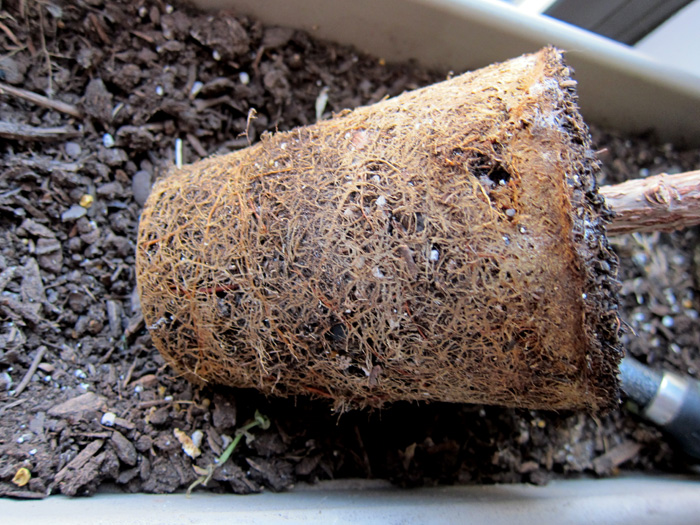
Look at all those roots!  I think if I had left it much longer, it would have choked itself to death.  When re-potting, its important to loosen up the roots a bit before transferring to the new pot.  Even with more space, it will continue the habit of growing in this tight knot and choke itself.  Loosening up the ball a bit will help it to grow outward again.

Fiddle Leaf Fig Update - >> joeandcheryl.com <<

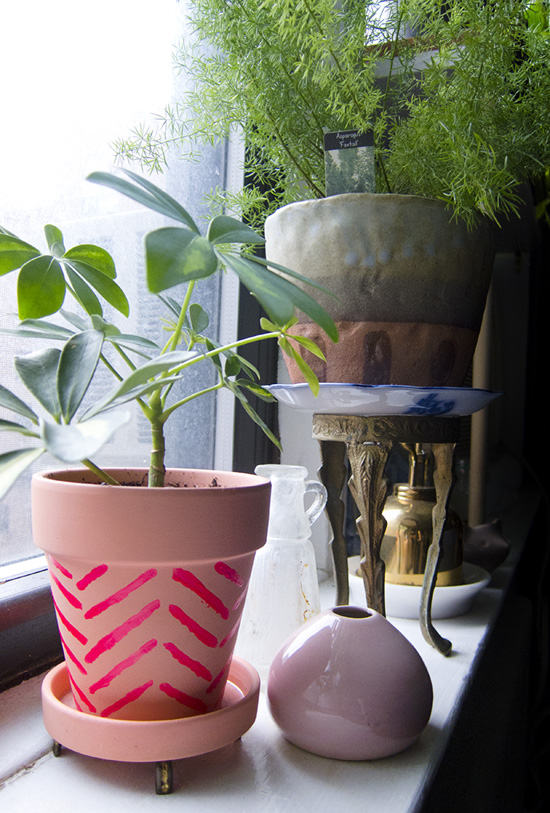
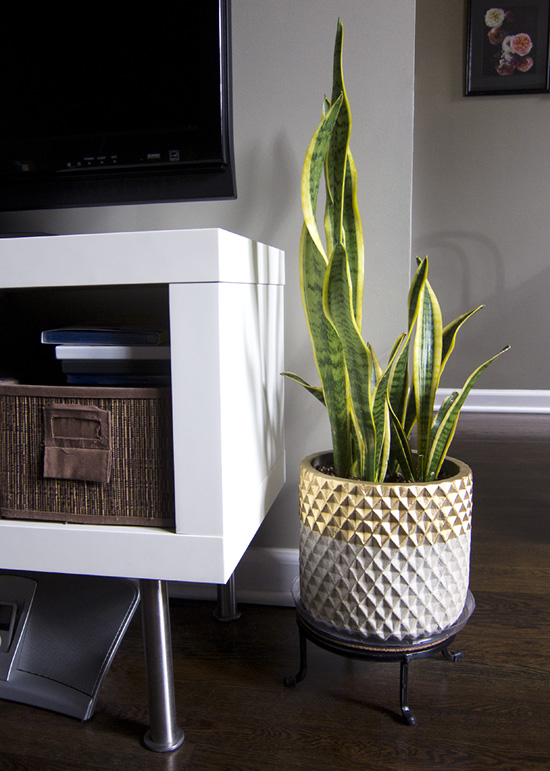
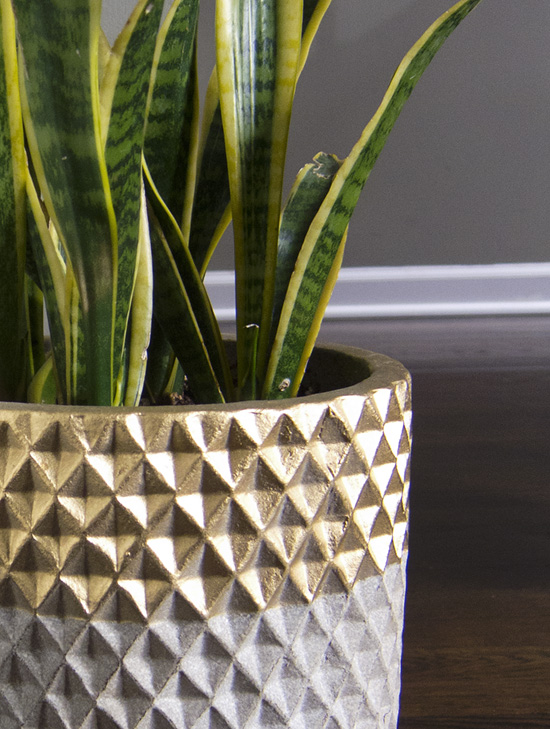
Also, a note on the new pot I used.  I bought this gold metallic glazed terracotta pot from Anthropologie. Unfortunately it didn’t come with a drainage hole which is a big problem for fiddle leaf figs (they don’t like soggy roots.)  So I simply used my power drill with a masonry bit to drill a hole into the bottom.  Worked like a charm!

Fiddle Leaf Fig Update - >> joeandcheryl.com <<

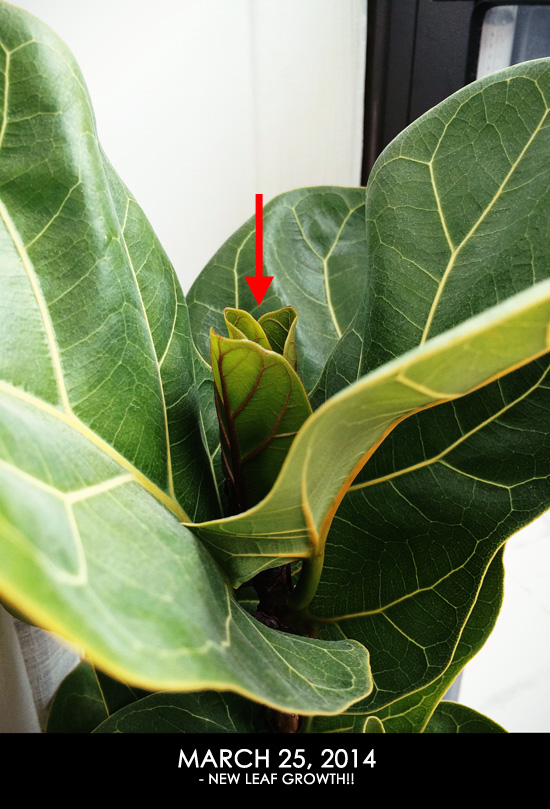
Less than a month after repotting, rapid leaf growth began again. It may have already started in earlier in March, but the buds were covered by flaky brown husks so I didn’t notice.

Fiddle Leaf Fig Update - >> joeandcheryl.com <<

I let it grow happily for about a month longer, but decided to do some pruning again in late April – once again, in order to encourage branching.  Here’s a photo of the poor thing after I chopped its head off.

Fiddle Leaf Fig Update - >> joeandcheryl.com <<

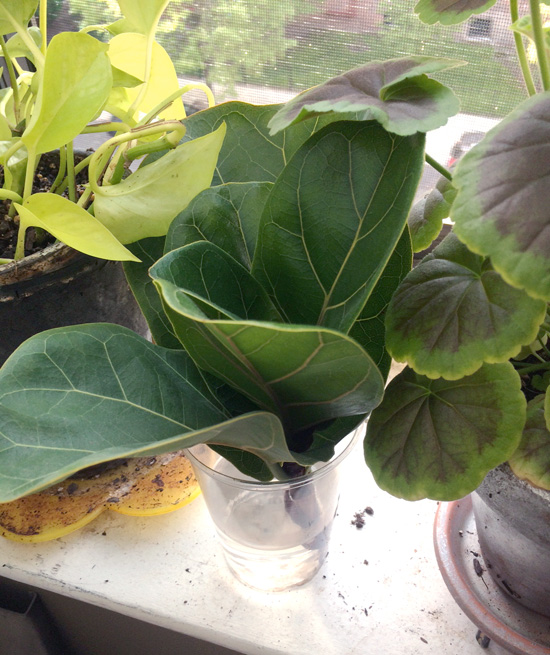
I decided to propagate the severed top again.  This time I gave it a longer stem than I did in my last post so I was able to fill the rooting cup with more water. This is way better because I don’t have to check on it and refill the water quite as often.

Fiddle Leaf Fig Update - >> joeandcheryl.com <<

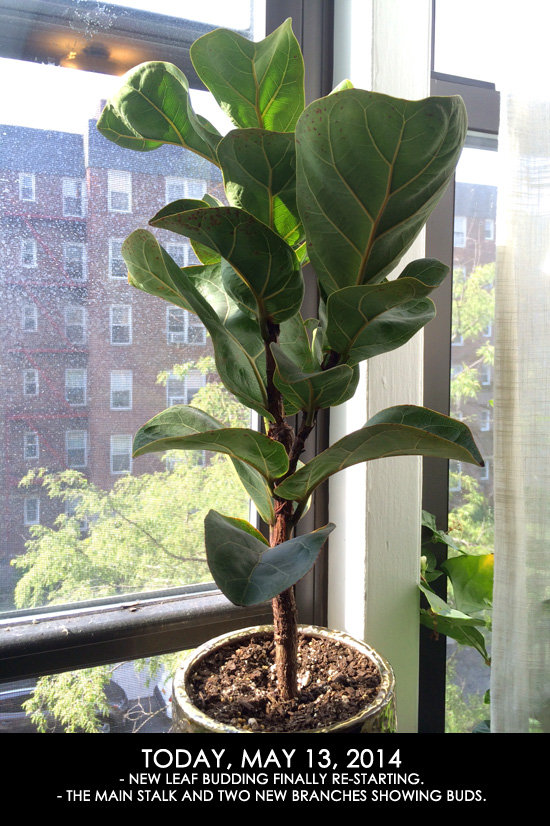
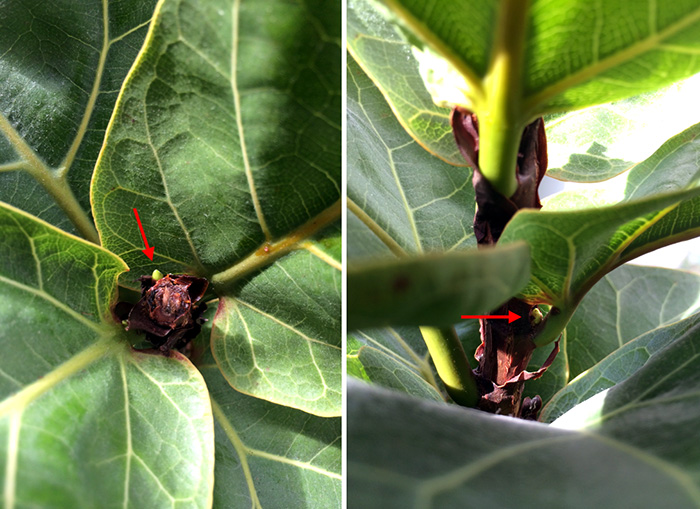
Today it’s been about a half a month since I pruned.  The cutting still does not have any roots, but that always takes at least a whole month.  The main plant is doing great though!  It already has 3 new leaf buds! One growing from the main stalk, and two growing out of leaf armpits which will eventually grow into two new branches! Hmm, I’m sure there must be a more technical term than “leaf armpits”…

Fiddle Leaf Fig Update - >> joeandcheryl.com <<

Fiddle Leaf Fig Update - >> joeandcheryl.com <<

Keep checking in for more updates!  I plan to keep adding photos to this post throughout the summer =)


DIY Painted Planter

Ok, here’s a little mini post while I finish up a couple other bigger projects.

DIY Painted Planter - << joeandcheryl.com >>

If you’ve been reading the blog for a while, you’ll know that I’m an avid window sill gardener. Not only do I love growing and nurturing my plants, I also love paying attention to the aesthetic presentation of my plants. One great way to add a little pizazz to your boring old terracotta planters is by painting them with simple patterns.

I recently bought this adorable pink planter from West Elm.  I love the pop of color it adds to my window garden, but it needed a little something more.

DIY Painted Planter - << joeandcheryl.com >>

DIY Painted Planter - << joeandcheryl.com >>

Using a little neon pink acrylic paint and a paint brush, I quickly added a simple herringbone pattern to it.

DIY Painted Planter - << joeandcheryl.com >>

For me, it was the extra dose of personality that it needed!  On a side note, the plant inside this pot is a variegated schefflera.  I grew this little guy from a cutting and it only had one leaf as of 6 months ago. Its growing so fast, I may have to re-pot it in a couple months.

DIY Painted Planter - << joeandcheryl.com >>

Anyway, acrylic paint worked great for this simple project, but I’ve also used spray paint to spruce up planters in the past.

A year ago I bought this lovely textured “Bataan” planter from Crate and Barrel.

DIY Painted Planter - << joeandcheryl.com >>

However, when I bought it home, it just felt a little blah with the rest of my neutral decor.  I decided to use gold spray paint and some masking tape to create a color blocked look.

DIY Painted Planter - << joeandcheryl.com >>

DIY Painted Planter - << joeandcheryl.com >>

That tiny little update added so much sophistication in my opinion.  It also helps it stand out in the sea of grey that is my home.

Exciting! USA Today: HOME Magazine

Exciting! USA Today: HOME Magazine - << joeandcheryl.com >>

I’d like to announce some very exciting news about the blog today! Our Kitchen DIY (specifically the tile back splash) was featured in USA Today’s HOME Magazine! Their Spring 2014 issue focuses on home DIY’s and I was approached by one of their editors when she randomly came across our blog. At first I was sure it was a scam because who would be interested in my humble little blog? But it’s legit and I am just so pleased with the opportunity to share my experience with a wider audience. I hope it inspires more people to tackle their own DIYs!

Check out the whole project here: Part 1, Part 2, Part 3, and Part 4

Exciting! USA Today: HOME Magazine - << joeandcheryl.com >>

Exciting! USA Today: HOME Magazine - << joeandcheryl.com >>

P.S. My apologies for going so long without posting.  Life has been extremely busy ever since the New Year, what with Fashion Week and other work-related busy seasons.  I promise I have a bunch of exciting projects in the pipeline to share with you!