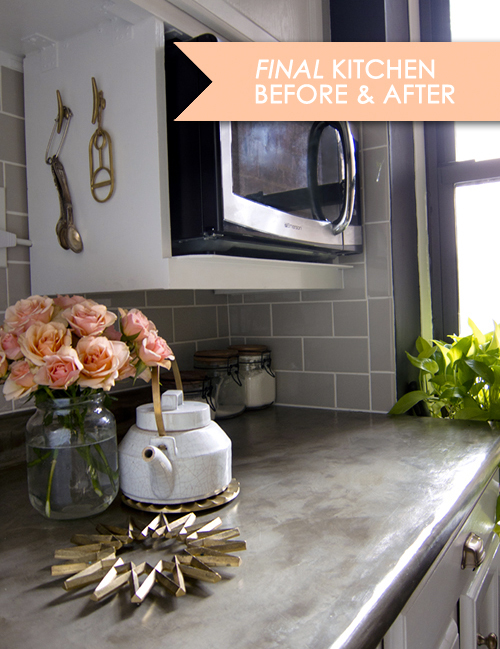
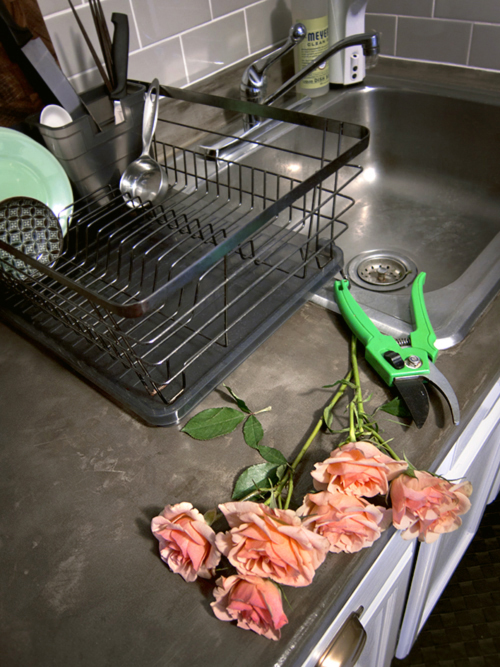
This is the last post in my four part kitchen series. I’ve been trying to improve my photography skills and have been experimenting with shooting in RAW, white balancing, and all my other manual settings on my camera. The only photos I’m not too happy with are the pics with the sink. The lighting was terrible. I think that’s the next thing I need to learn more about… lighting.
Anyway, I’m so happy with the way it turned out. The only thing left is the floors. They are driving me crazy. They are still that pinkish fake marble looking tile. Currently plotting solutions, but that’s a huge project for a later time. Oh, and we could use a new fridge too.
Onto Part three of my four part series. This part is less about aesthetics and more about functionality. Of course, when things are less of a mess, that always helps make things look better.
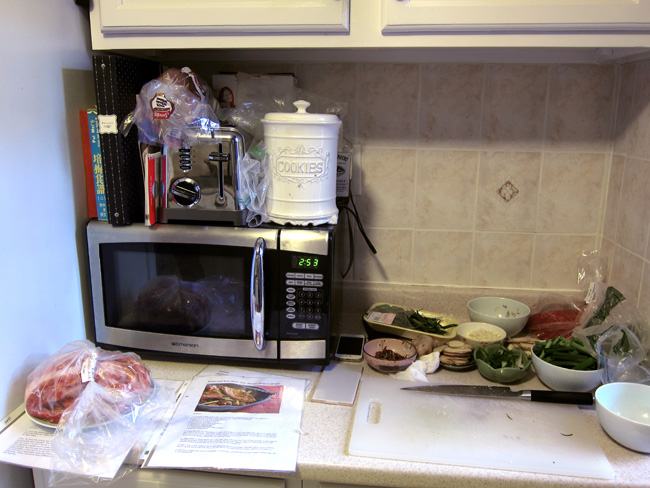
Originally I was only planning to do the counter tops and back splash. However, the lack of counter space and storage space was really starting to drive me crazy. Our kitchen only has two sections of counter space. One is the little sliver between the sink and the stove. That is not functional at all since it is occupied by the dish drying rack. The other counter is across the room next to the refrigerator. This is the only useful space for food prep, but nearly half of it was taken up by the microwave. When doing food prep, I’d mainly just fit my cutting board and barely had additional space for ingredients, recipe book, utensils, etc. Many times I’ve knocked items onto the floor when opening the microwave door. Below I took a picture of how it used to look on a typical night when I would cook dinner.
So crowded. And look at all that crap on top of the microwave! The top of our fridge was getting pretty ugly too. We just had nowhere else to store this stuff.
So I decided to free up counter space by making a microwave cabinet that I could undermount beneath the existing kitchen cabinets. And to make up for the lost “storage space” on top of the microwave (and to clear off the fridge a bit), I decided to install a long shelf on the wall above the kitchen door (to the left of the fridge.)
And just like all of the other projects in this kitchen, I did it for CHEAP. I spent maybe $30 on wood, and another $15 on brackets, screws, and other hardware.
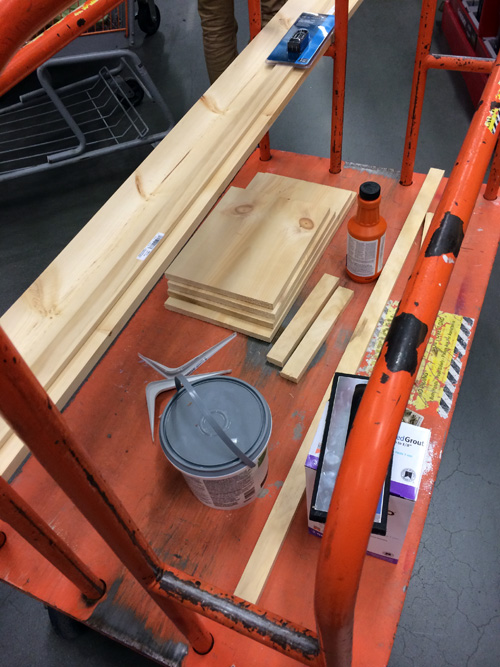
First stop, Home Depot! I love that they will cut wood to size for you there. So I took many careful measurements and created detailed plans for how I would build the cabinet and shelf. Prepared with my measurements, I got a bunch of lumber cut to size. (in the pic below, you can also see all the grout and stuff I had to buy for re-tiling)
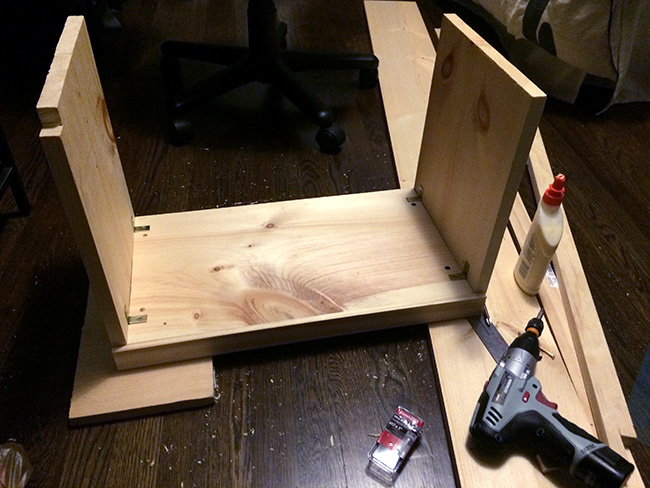
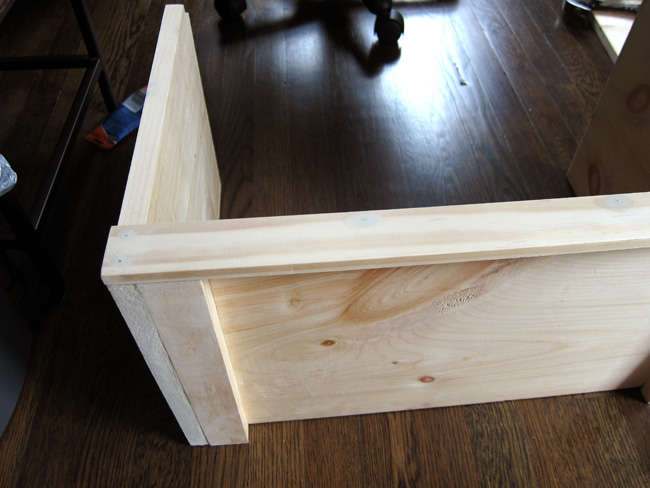
Unfortunately I did not take process shots when I first started building the cabinet. I got too excited and the first pic I took was when the basic structure had already been built.
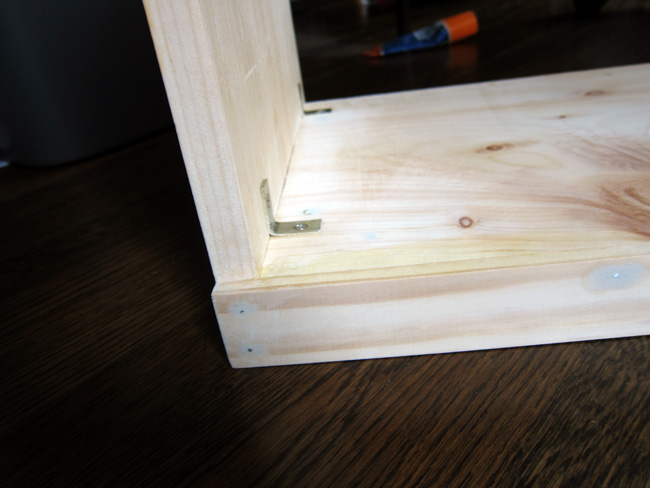
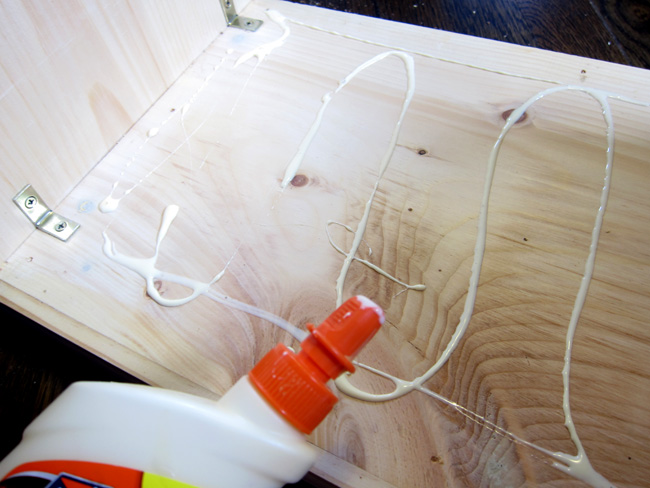
Anyway, there it is. I was very paranoid about it being strong enough (mainly because Joe tends to think everything will always fall apart whenever we get anything new). So I super duper reinforced everything. I attached the boards to each other with wood screws, but also used metal corner braces AND wood support beams on the bottom outer edges. All joints had a nice line of wood glue to make it extra tight.
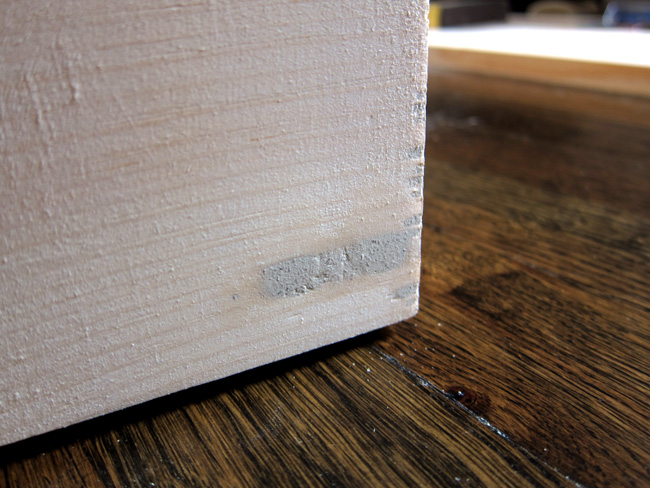
I trimmed the front bottom edge with a simple flat piece of molding to give it a clean finish. And I used countersunk flat screws that I later covered with wood filler and then sanded flat.
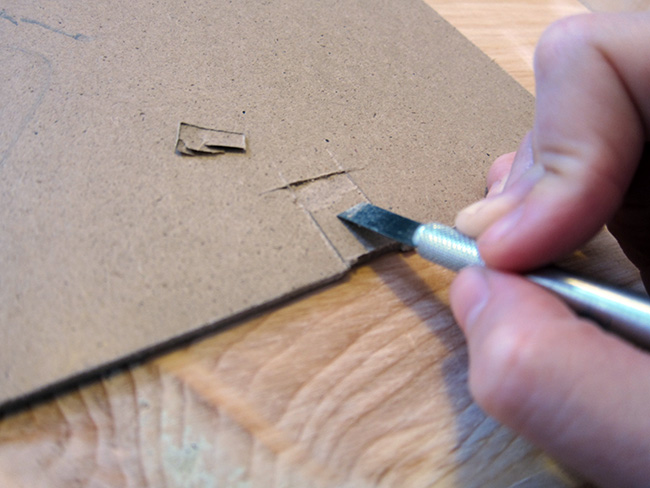
The depth of the shelf is the same depth of the existing cabinets which JUST accommodates the depth of the microwave feet. The actual front of the microwave would protrude outward a little but. I was thinking about this and half way through building this thing, I kept having visions of pulling the microwave door open and having the whole thing slide off the shelf. So I decided to extend the lip of the shelf with a little piece of masonite hardboard. I cut a piece to fit the dimensions of the shelf and then carved away a little bit of it so that it would lay flat against the corner braces that I had already installed.
Then I glued it on, screwed it in place, and painted the whole thing white to match our cabinets. Luckily I had plenty of paint left from when we first painted them white. The paint had thickened up over time so I had to use a little paint conditioner to smooth it out.
Later, after I finished the counter top resurfacing and all the re-tiling, I installed the microwave cabinet. The right side was drilled directly into the studs in the wall to make sure that it was nice and sturdy. And the left side was attached using a combination of corner braces and a cross beam I attached under the original cabinets. It was more challenging than I expected since the original cabinets were installed crookedly. I had to make sure that my addition stayed level.
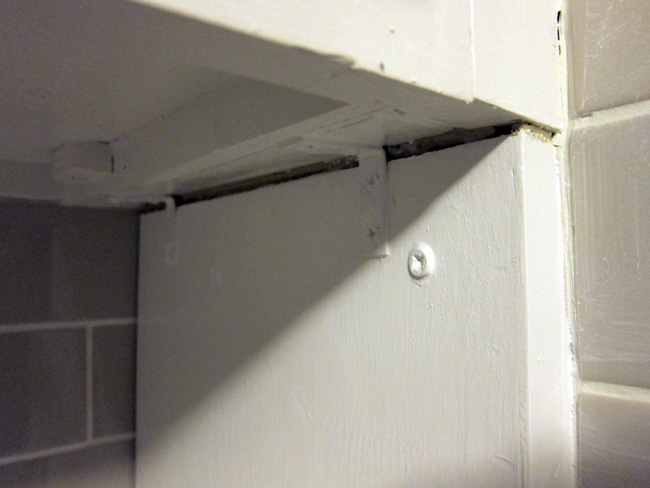
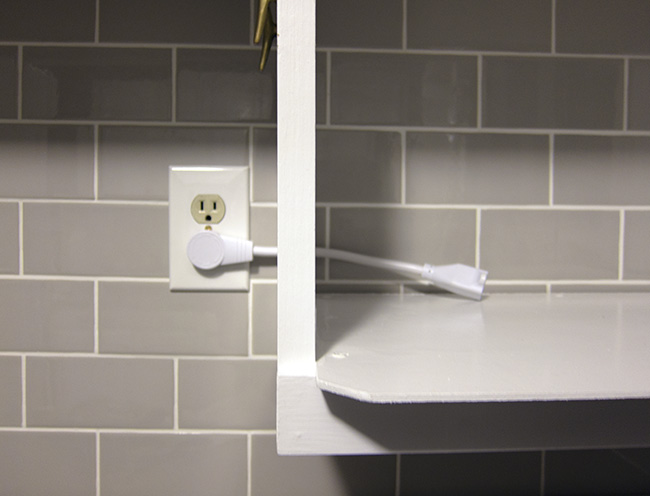
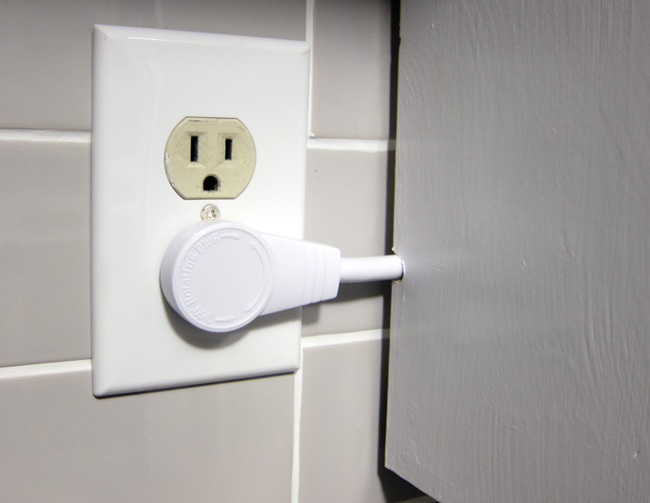
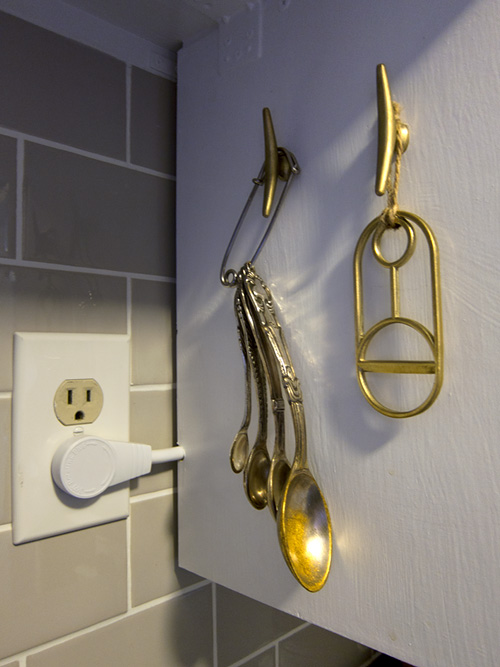
All hardware was painted white after I was done and I caulked around the edges to give it a clean finish. I also cut a little notch into the back of the cabinet so that I could pass through a small extension cord with flat rotating plug. This way the microwave could be plugged in without looking like a mess. Looks nice and clean, just short of doing any electrical work behind the wall.
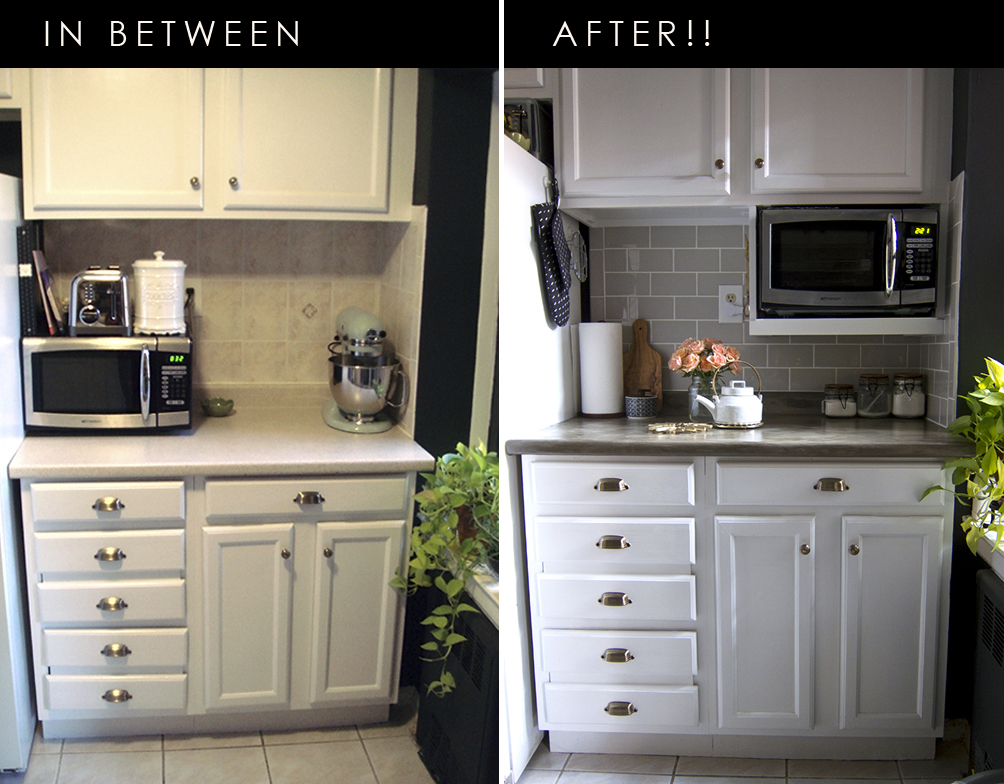
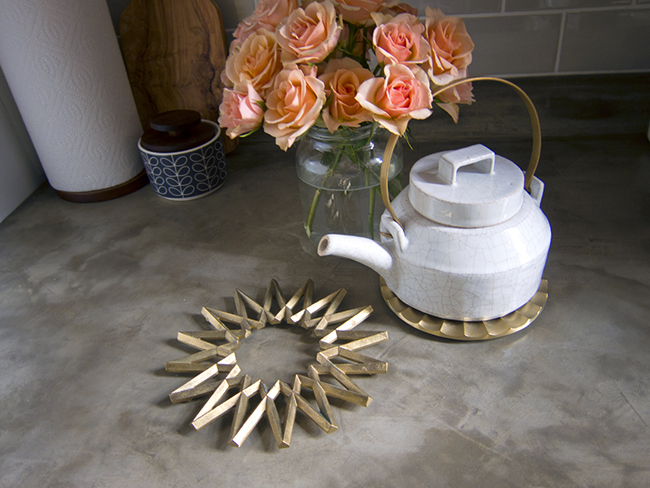
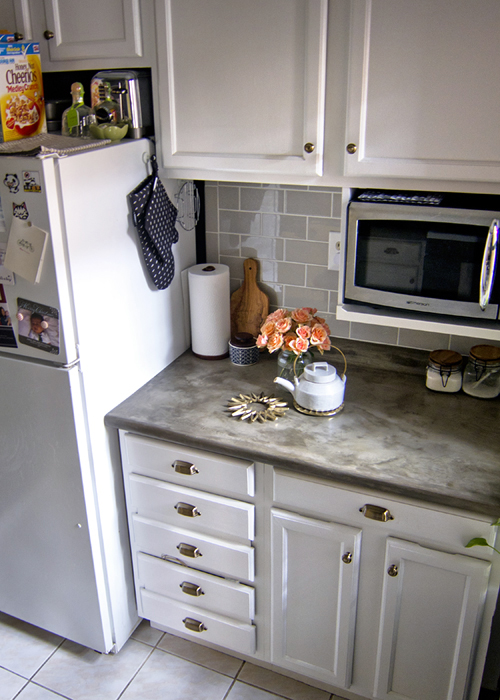
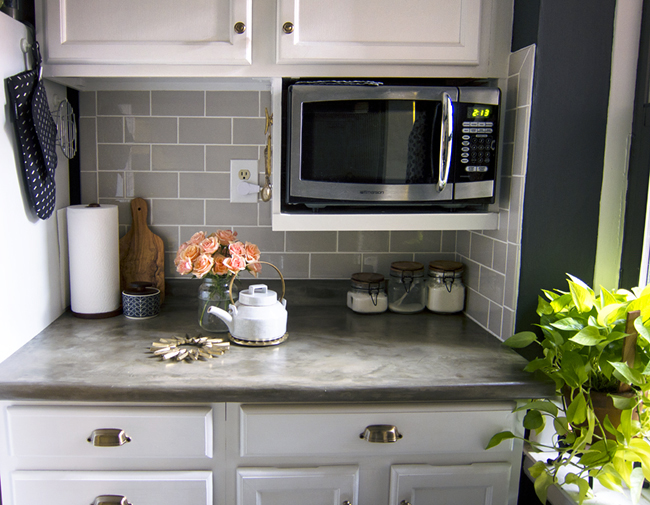
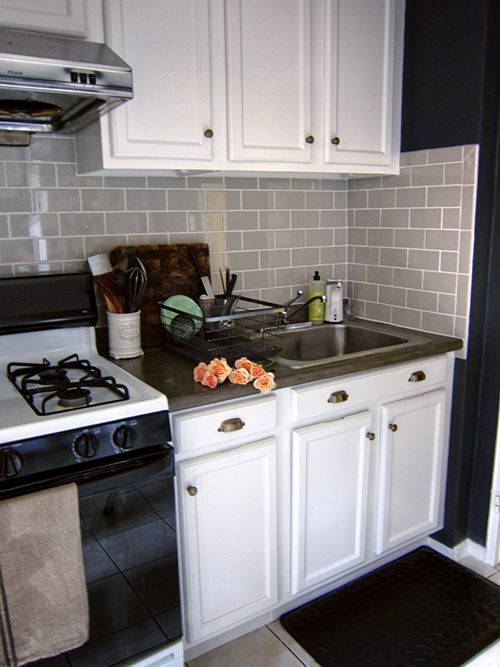
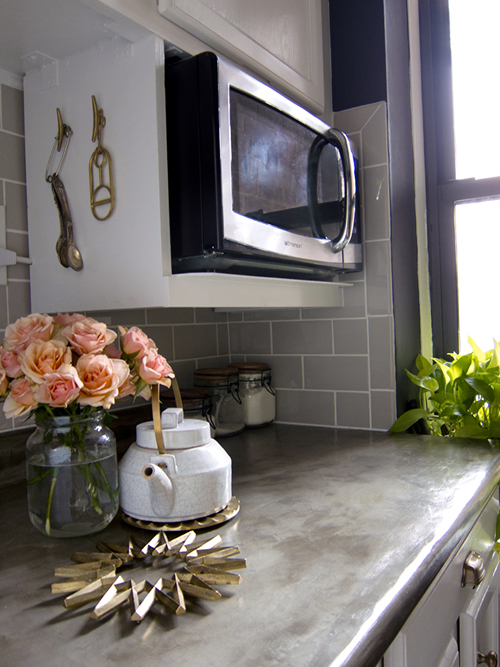
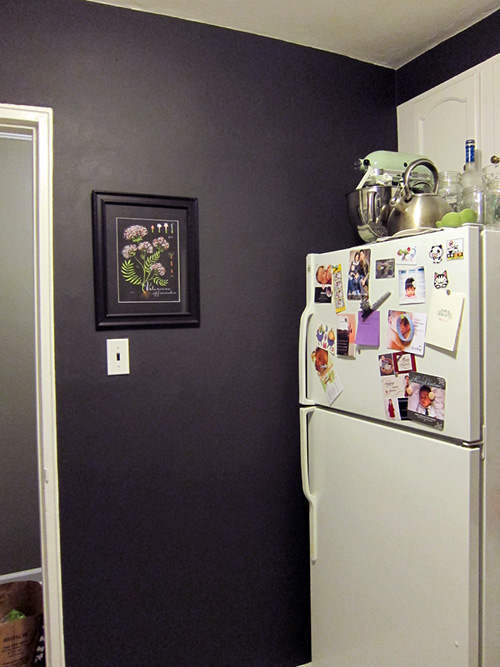
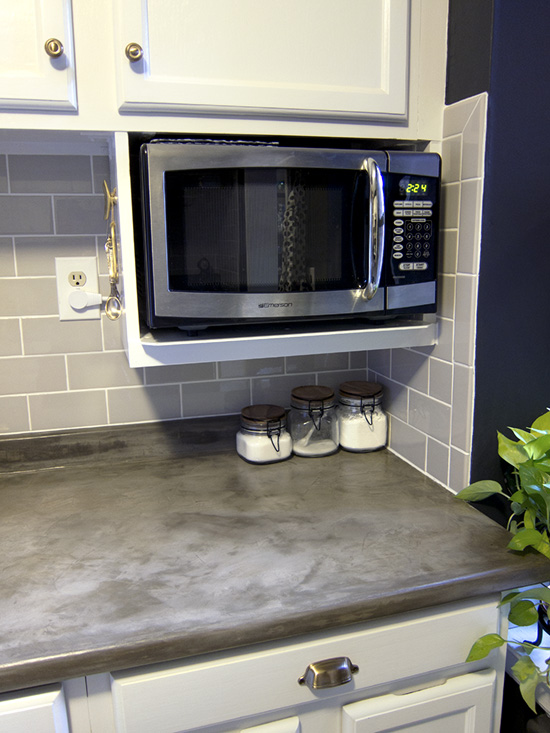
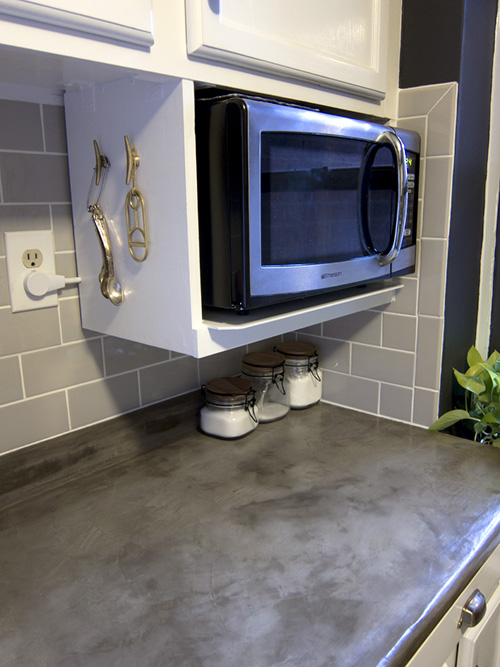
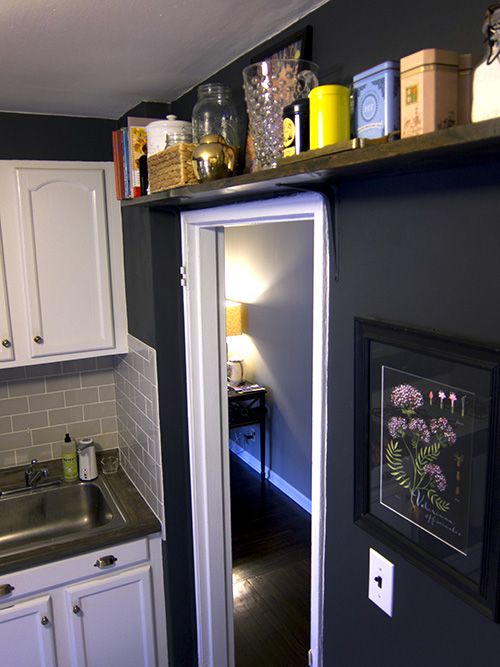
And there’s the finished cabinet doing its job quite nicely in the kitchen. Our counter space is still small, but compared to what I had before, this feels down right luxurious!
I also got a couple of brass hooks from Anthropologie and screwed them into the side for hanging utensils I use more often.
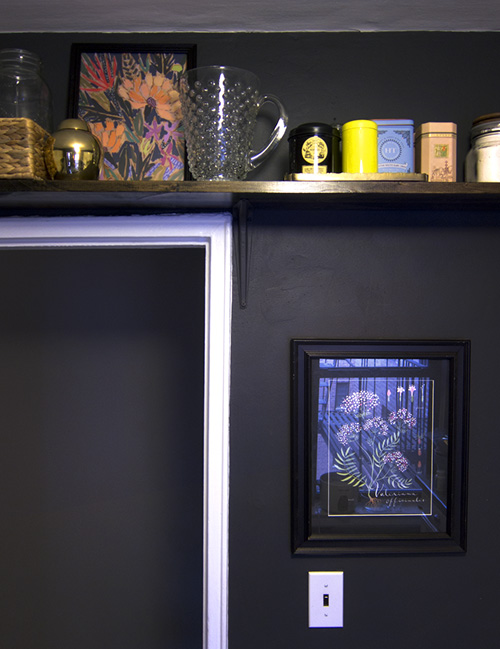
Now where to put all that stuff that used to be sitting on top of the microwave?? The best solution was to install a shelf above the kitchen door. I stained it and finished it the exact same way I did with our foyer shelf. The only difference is that I used cheap utility brackets that I painted to match the wall. I liked how utilitarian they look in the kitchen, and you hardly even notice them since they match the wall color.
The only annoying thing about hanging the shelf was that pretty much everything in our old apartment is crooked. The door frame is on a slant, our walls are curved, and even the ceiling slopes a little. I did my best to keep the shelf level, but you’ll notice that the angle looks different next to our slanted door frame. Trust me, the shelf is level, the door frame is not.
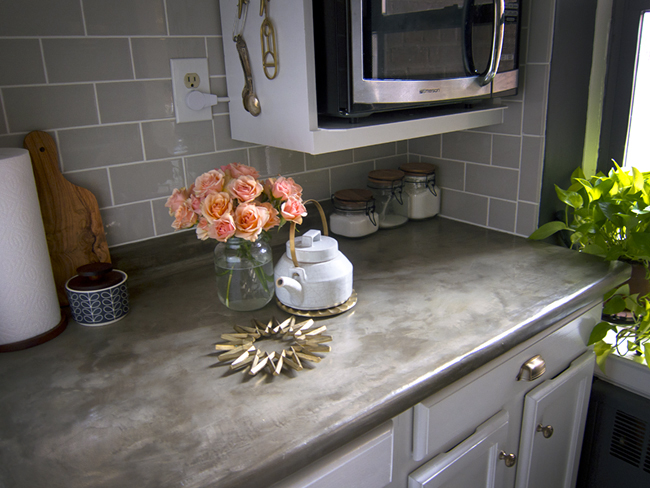
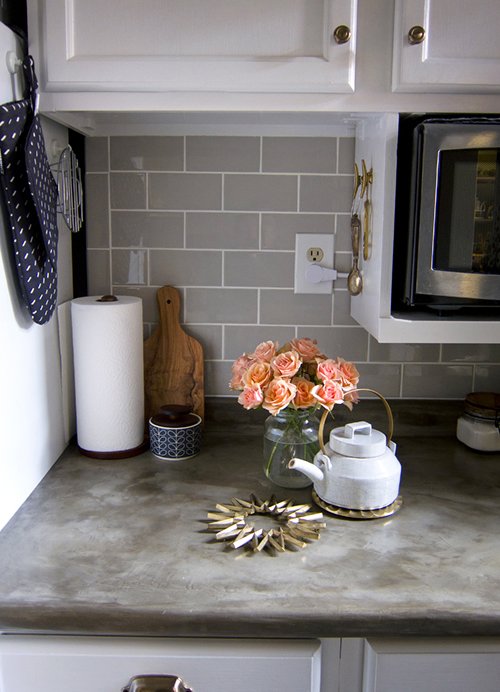
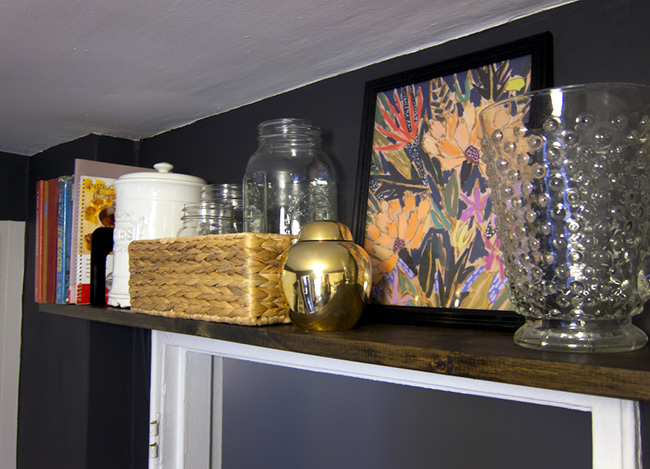
I’m so happy with this shelf, and I love having a place to display my tea canisters, glass jars, and cook books. There is definitely more order in this kitchen now.
Later this week I’ll put up one last post with all of the before and after pics of the kitchen =)
OK, part two! once the counter tops were done, we moved onto tiling the back splash. This youtube video taught me a lot of what I need to know about tiling, and I highly recommend watching it before tackling a project like this.
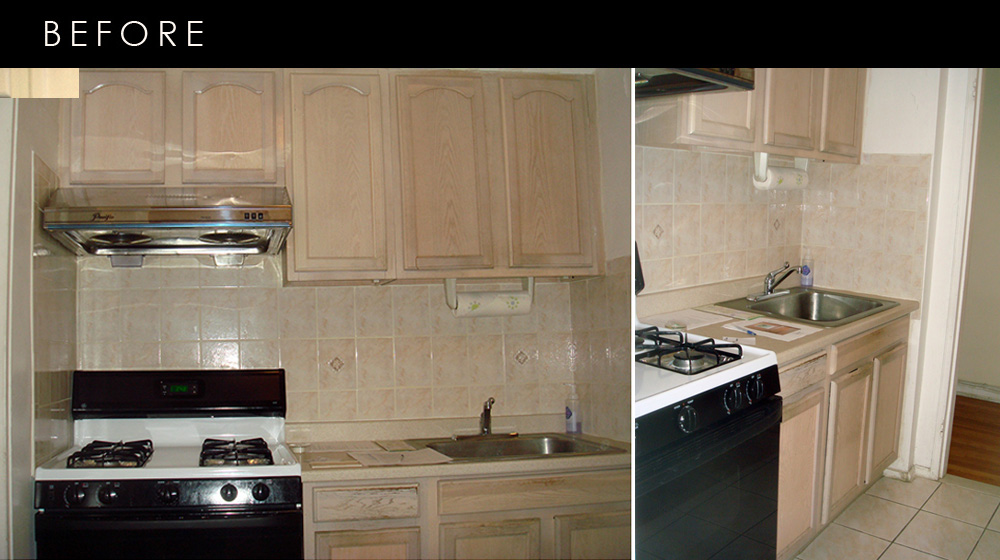
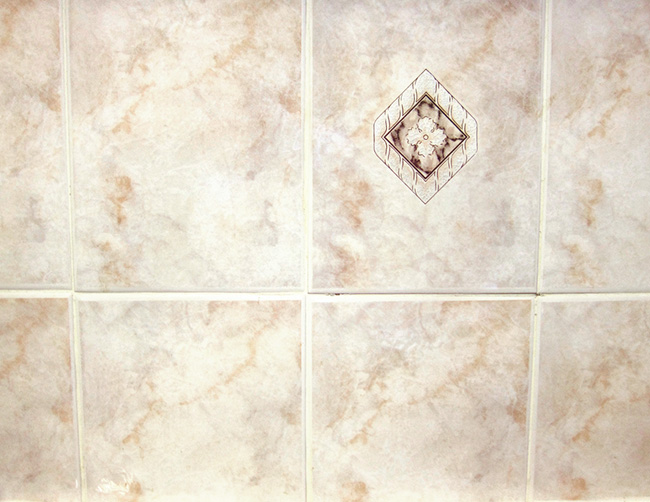
Here’s what our ugly old tile looked like. Its more of that pinky beige color and has fake marble printed onto ceramic. I hate that every tile is the same fake marble pattern and that it repeats over and over and makes it extra obvious that its fake. If you cant afford real marble (which we can’t) use something else and make it look intentional. Don’t get an obvious fake that calls attention to itself. Major pet peeve of mine.
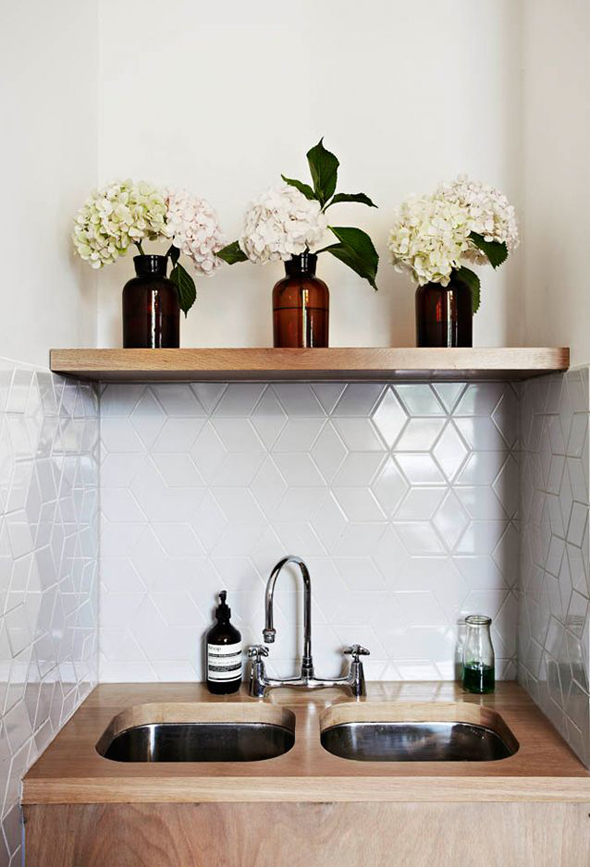
When deciding on new tiles, I would have loved to do something like this photo below:
I love the unconventional “falling blocks” shape, but had no idea where to source something like this. I did a bunch of internet searches, but came up empty. Also, after some thought I decided it might make things too complicated for a noobie like me. A standard rectangular shape would probably be much better this time, but I will be keeping my eyes open for these diamond shaped tiles for future projects.
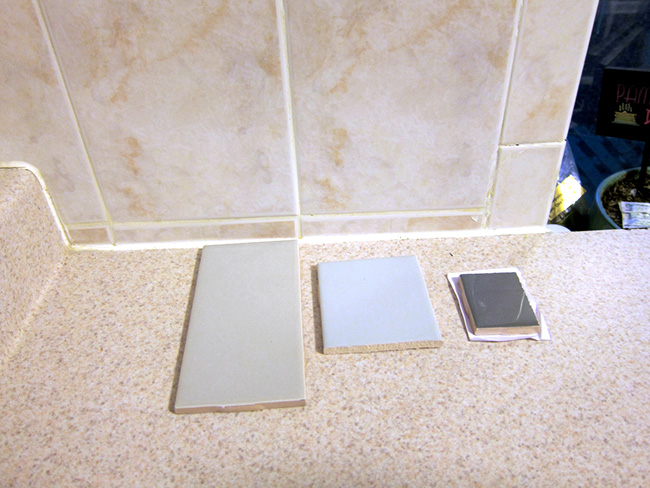
Anyway, The new tile I chose is a pale warm grey subway tile that I bought from buytile.com. Their prices were very fair and they had lots of shades of grey (and other colors) to choose from. I wasn’t sure what I wanted at first so I ordered a few samples.
Ultimately I decided the “tender grey” by Apricot Tile (the large tile on the left) would compliment the color of the concrete the most. I ended up spending around $100 for about 30 square feet of subway tile, and several bullnose tile for the border. Always buy a little more than you really need, tiles will break and you’ll definitely need the extra. I also spent a little more on the grout, spacers, thin set, etc. too.
Like I mentioned in my last post, we did all of our tile removal BEFORE we even got started on the counter tops. Tile removal is a pretty violent process, so I didn’t want to risk damaging all of the work we would have done with the concrete by doing it afterwards. Also, I wanted to be able to spread the concrete evenly and smoothly to the edge of the wall, and the old tile would have gotten in the way. Removing the tile FIRST will allow for more professional looking results.
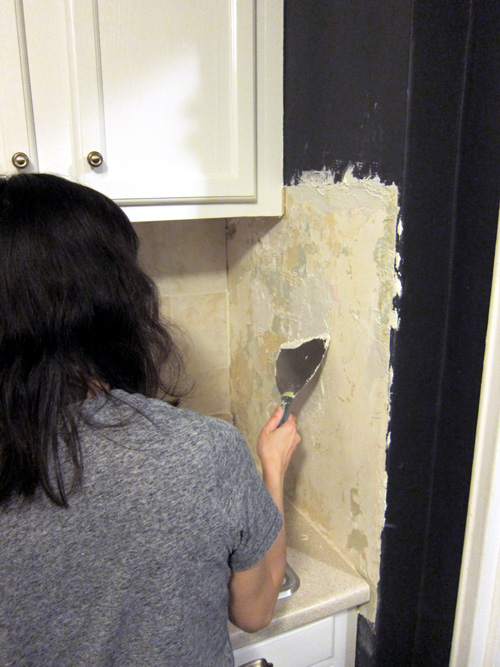
Tile removal (or “tile demolition” as Joe and I like to call it when we want to sound hard core) is really simple and easy, but it does require a bit of physical effort and can be quite tiring. Luckily Joe has had a bit of free time before he starts a new job so he did most of this for me. Thank goodness for men and their brute strength.
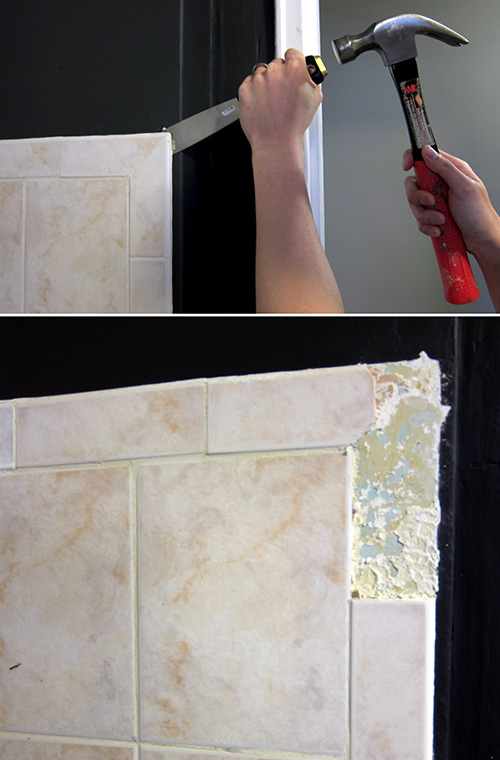
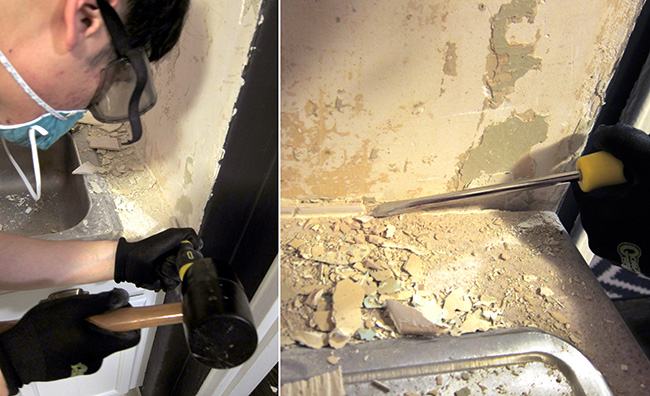
Anyway, just wedge a putty knife between the old tile and the wall… tap the back of the knife a few times with a hammer… and then it should just pop off. Some tiles may be more stubborn than others. You can just keep hacking at it, or use the putty knife as a lever to pry it off. CAUTION – definitely wear shoes and safety goggles while doing this whole project. There will be sharp flying shards of tile that will definitely cut feet and poke eyes.
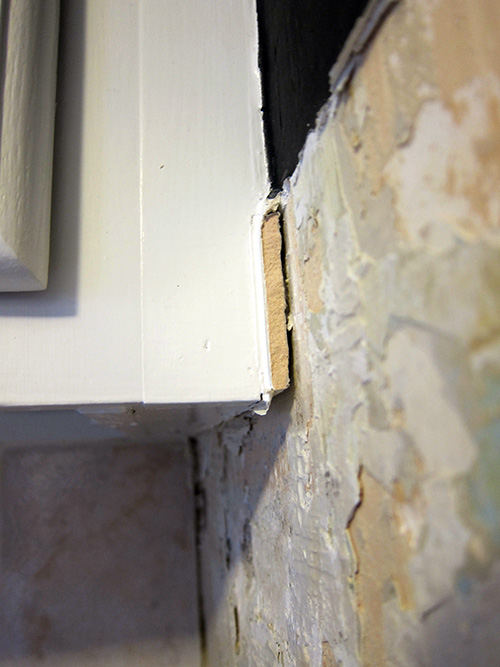
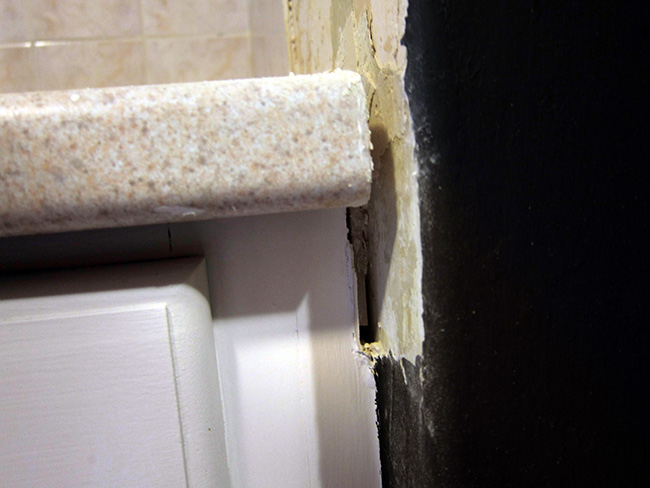
Let me just say, this apartment is just full of surprises. Back when we renovated the bathroom, we found that the previous owners had just tiled on top of the old tile on both the walls and the floor. They took short cuts left and right. Well the kitchen was no different. As we removed tile, we realized that the previous owners installed all of the cabinets and countertops right on top of the backsplash which I can only imagine are the old tiles from before they renovated or whatever. This made things a little tricky.
We ended up having to use a screw driver to chisel away at the tile that was trapped underneath, just to get a flush edge with the counters and cabinets. It also left gaping holes in spots that I had to spackle over. Super duper annoying. But these kinds of surprises are pretty standard with renovation projects.
As I mentioned in my last post, we only removed the tiles from the side walls. I decided to take a little shortcut of my own and just tile over the tile on the back wall. I wouldn’t lose any counter space because of the trim on the back of the countertops, and you are not able to perceive any additional thickness with your naked eye. This made it a lot easier and more manageable for us noobie tilers. We removed the side walls because you’d be able to see the additional thickness on the bordering bullnose tiles.
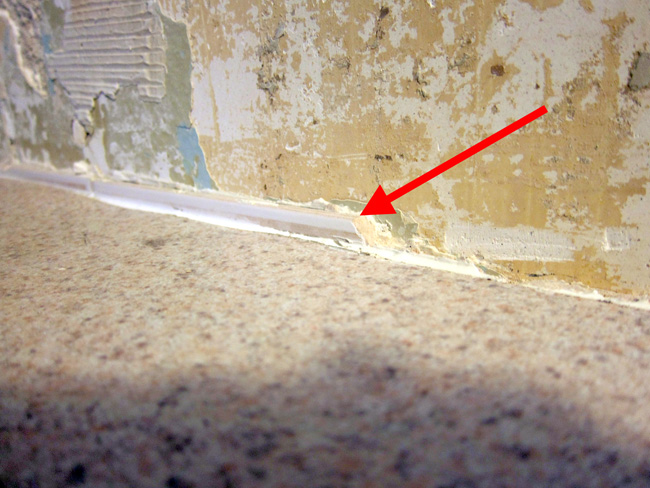
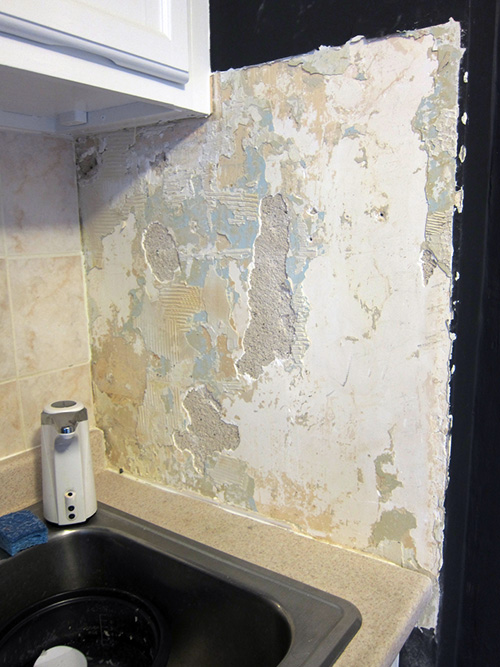
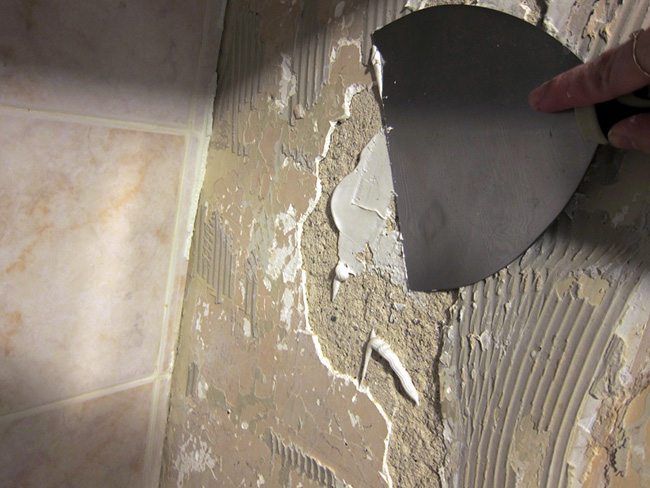
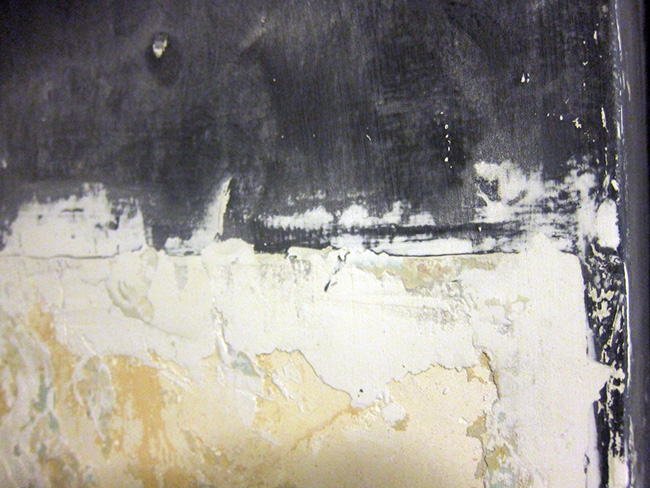
Once all of the tiles were removed, I had to patch up some of the holes were left behind. You want a level surface when you apply the new tile. So I bought a nice bucket of spackle and went to work. It doesn’t have to be perfect where the tiles will be, just enough for a level gluing surface.
But you should also spackle around where the painted wall formerly met the old tile. Once you are done with the project, you’ll have to re-paint the walls, and you don’t want it to be a bumpy mess. So in those edge areas, definitely sand down the spackle when it dries. This will restore the smoothness of the walls for painting.
After all of this, I did the countertop resurfacing project.
When you get back to tiling, everything is going to be a dusty mess. Clean off all dust with a damp rag before applying tile. You want a nice clean surface for the Thin-set to bond with. I used this pre-mixed Thin-set mortar, but if you mix it yourself, you want about the consistency of peanut butter.
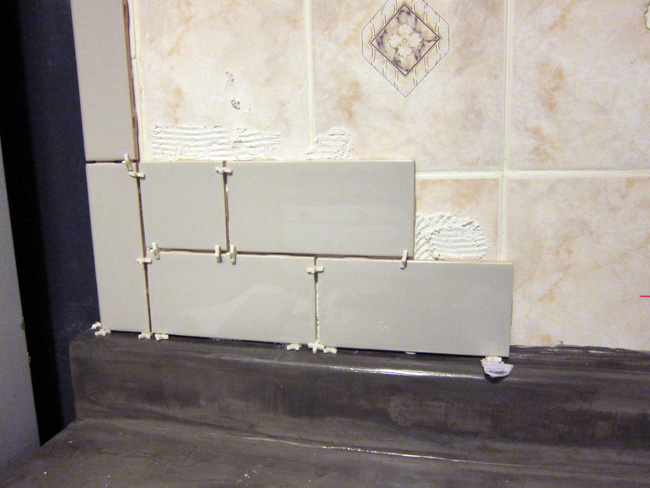
You have two choices. You can use a notched trowel to apply the thin-set directly to the wall, or you can “back butter” directly onto the back of your tiles (also using a notched trowel). I found back buttering to be a better option for me. This way I could draw a level line guide directly onto the wall. Also, Joe and I created a bit of an assembly line where he’d back butter, hand me the tile, and I’d position/apply/etc. This ended up being very efficient for us. BTW, this is one of the few joeandcheryl.com projects that actually involve both Joe and Cheryl. Haha.
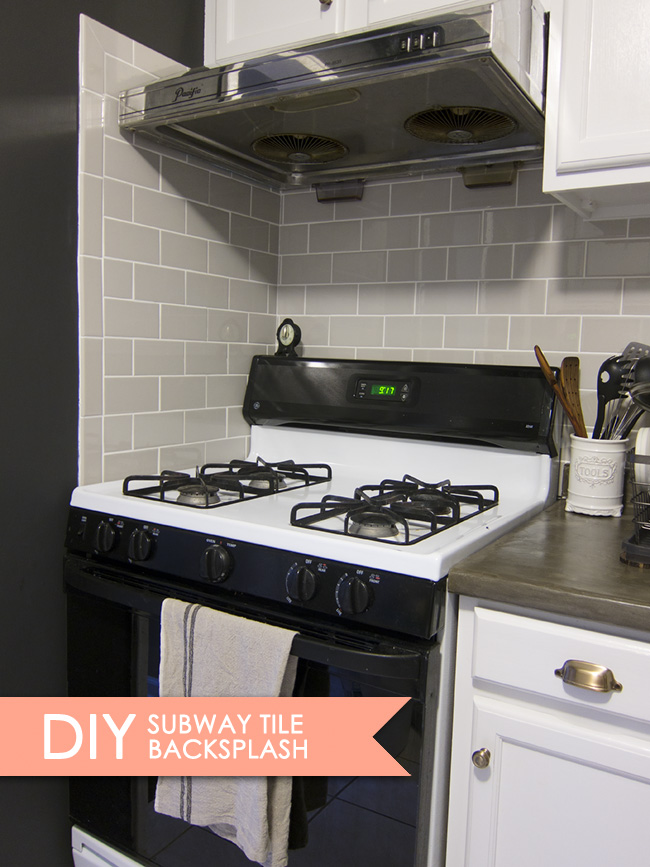
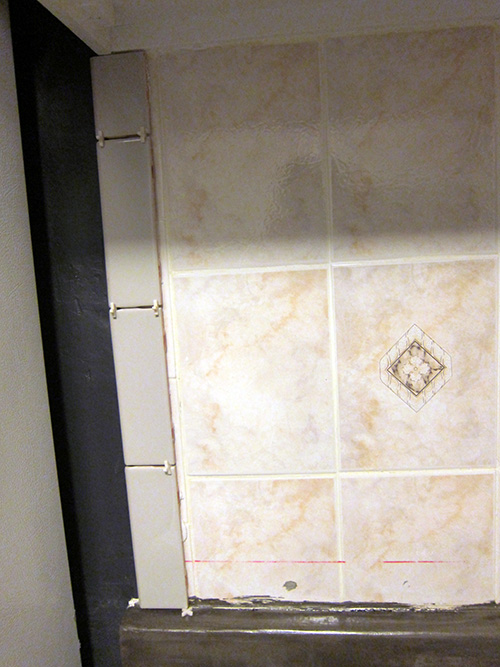
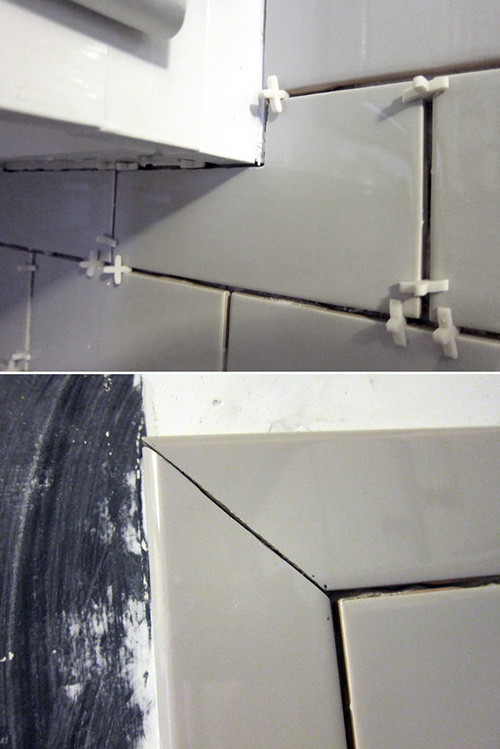
I liked starting out with the bullnose tiles on the border, then filling in with the subway tile. When you start with the subway tile, apply the bottom row first, making sure that it is level. You’ll see my red sharpy level line in the photo below. Once you have that row down, you don’t have to think as much for the rest of the rows as they will just stack on top and will naturally be level too. Note: I used eighth inch spacers for everything.
If there was a corner involved in the bullnose tile, I’d save the top bullnose piece until I was done with all the subway tile to get a more precise measurement.
I’d say the most challenging thing was cutting the tiles to the correct size. I decided not to buy a wet saw since its pricey and I’d have nowhere to store it. So I used a tile scribe instead, which is basically like an exacto knife with a tungsten tip that you can use to score and snap your tiles. It wasn’t until after the whole project was done that I realized I could have RENTED a wet saw from home depot. That would have saved me so much time and trouble.
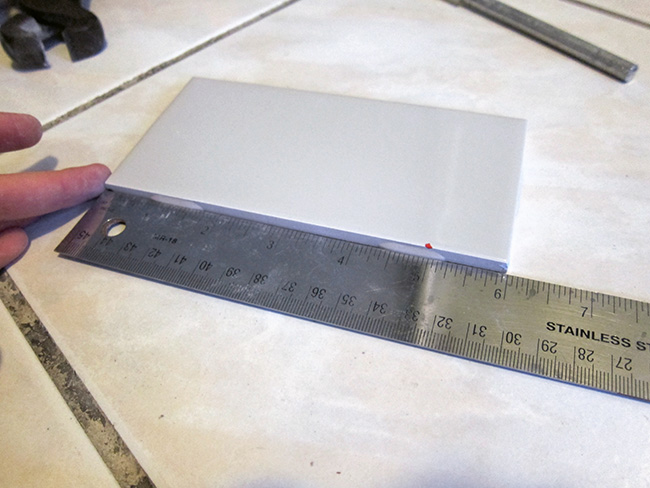
Well, what’s done is done. This is how you use the tile scribe. Measure and mark where you want to cut the tile.
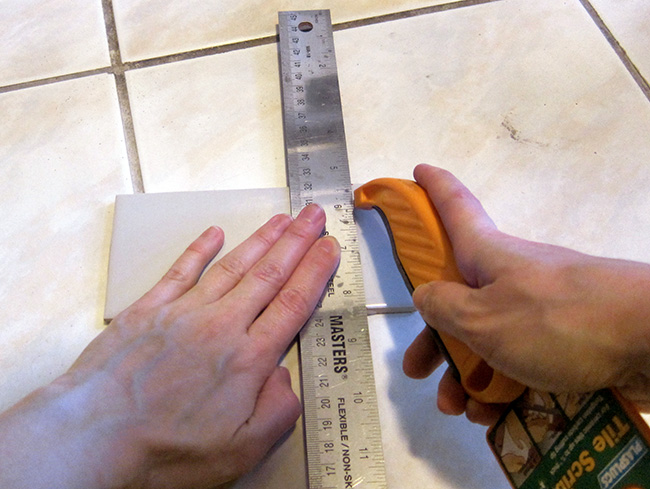
Then use a ruler and the tile scribe to score a line on the surface of the tile.
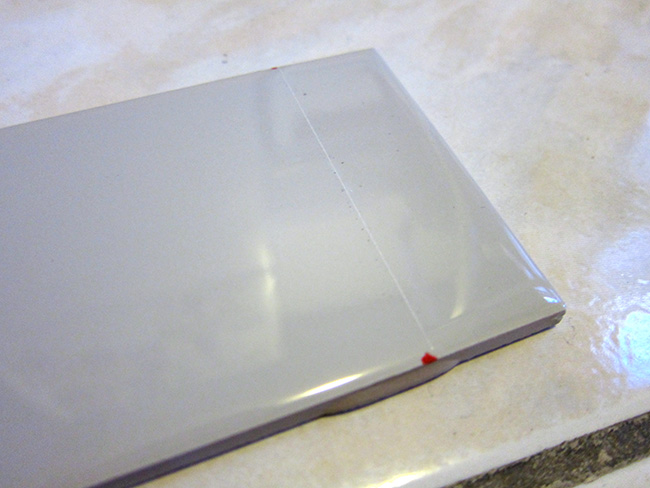
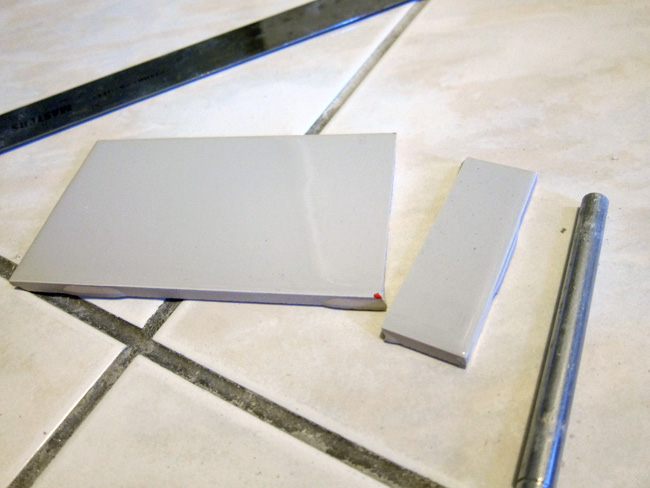
Then simply place on top of a pencil and snap it in half!
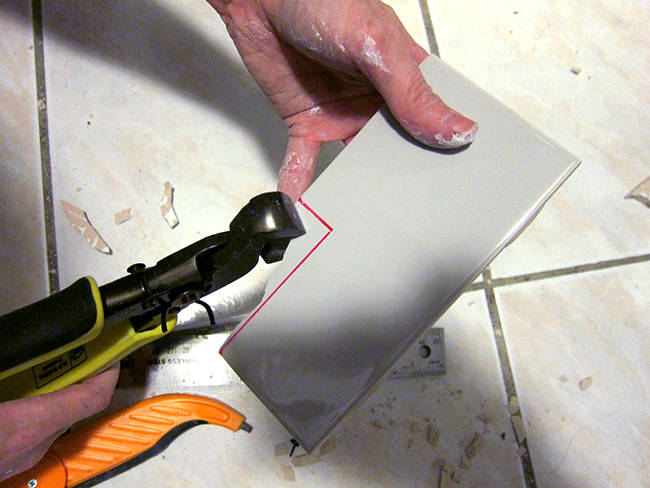
It only gets tricky if you need to do a 45 degree angle or a corner cut. These cuts were very very challenging and I ruined many tiles trying to do it.
What I found to work best was scoring the tile first, but NOT SNAPPING. It never snapped right and in this situation and tile nippers worked much better. And if you are doing a particularly narrow section, you’ll want to take teeny tiny nibbles so that you don’t accidentally crack the whole thing in half. For this reason alone, a wet saw would have been way better. Again, be careful, the shards will be very sharp and I did slice my fingers open a couple times. Definitely wear shoes, gloves, and goggles.
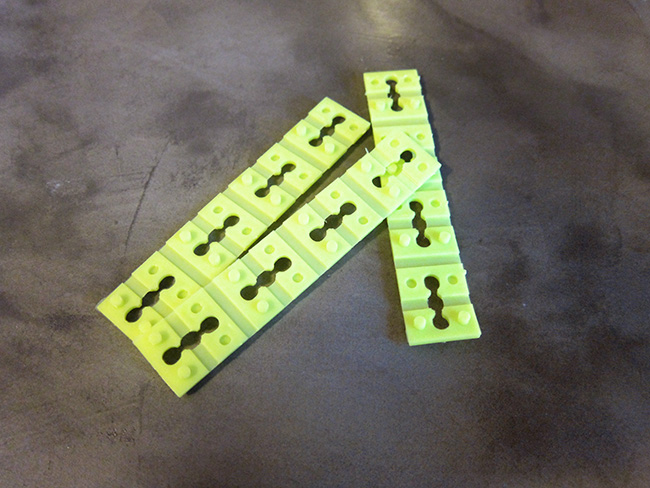
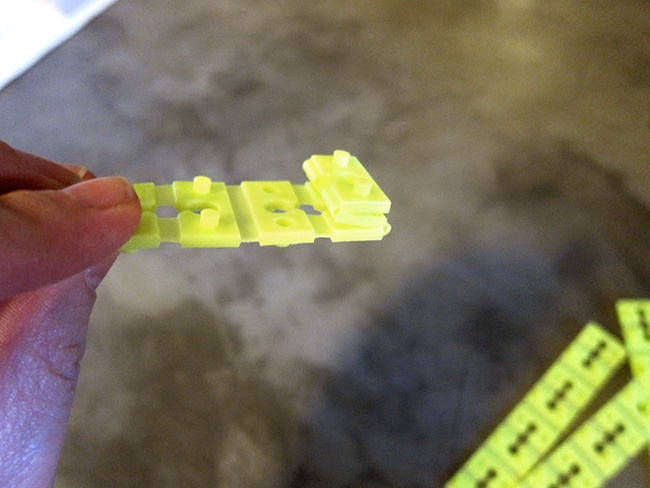
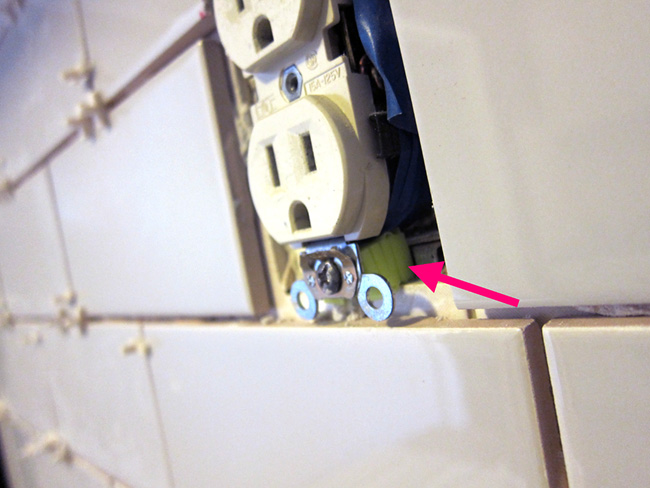
Another important thing to keep in mind is the electrical socket. Make sure to turn off power to any sockets you’ll be working around. Also, if you are tiling on top of tile, you’ll want to use electrical spacers to extend the socket so that it is flush with the new tile.
Once you have all of the tile applied, give it at least 24 hours to dry. When all is dry, it’s time for grout!
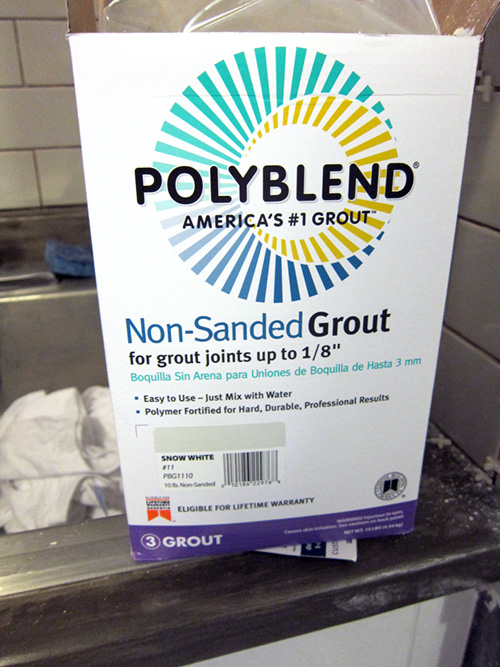
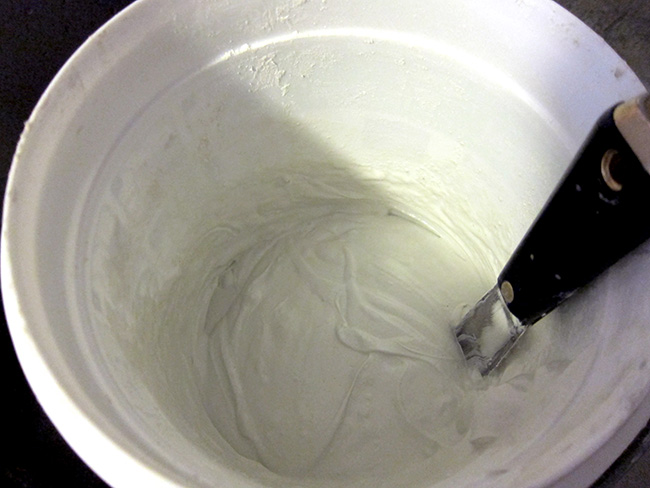
I went with a standard white non-sanded grout (sanded is more for floors). Follow the instructions on your packaging, but when I mixed mine, I tried to get the consistency of – you guessed it – peanut butter. And just like I did with the concrete, I mixed it, let it sit for 10 minutes, then mixed it again.
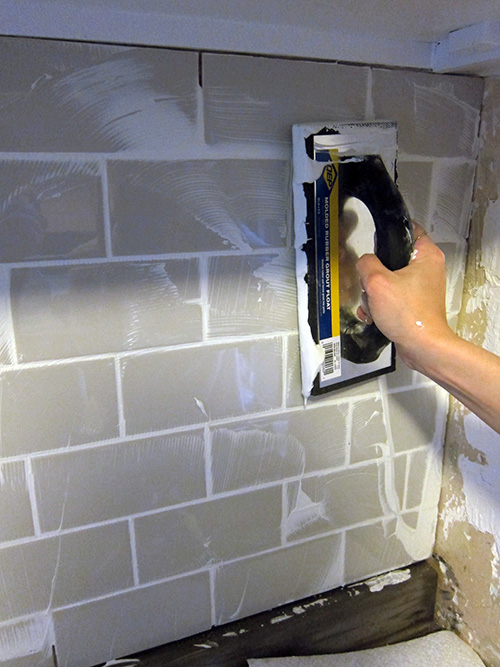
I used a rubber grout float to squeegee the grout into the crevices between all of the tiles. Make sure to note the time when you start.
Once its all done it will look like this.
Wait 20 minutes from when you STARTED grouting, then come back with a damp sponge and wipe all the excess grout from the surface.
You’ll notice a slight foggy haze on the surface of the tiles at this point. Wait another three hours and buff it off with a cheese cloth to restore the shine of the tile.
Give your grout another three days to totally dry and then apply grout sealer.
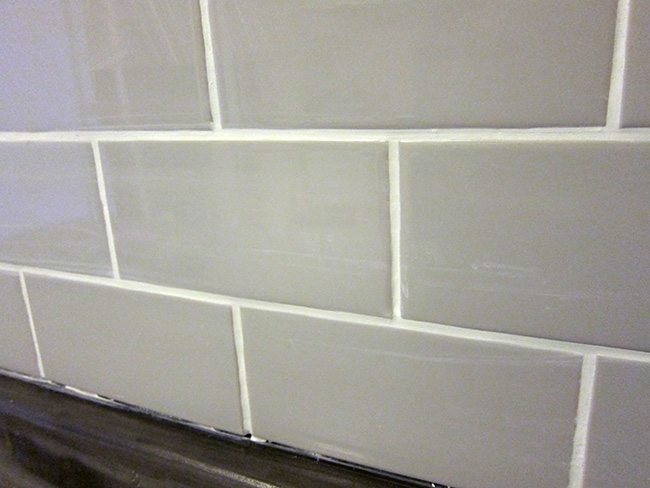
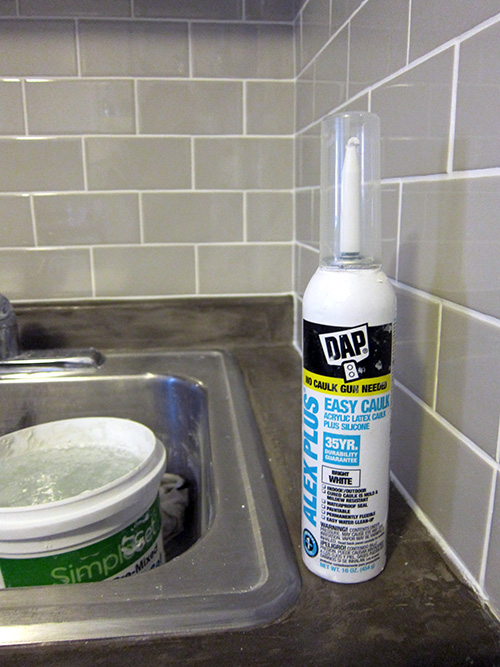
And the final touch is caulk. You can see from the photo above that it’s still a little ugly where the tile meets the countertops. Apply a line of caulk along all edges where the tile meets another surface (like counters, cabinets, walls, etc). To get a perfect clean caulking job, dip your finger into soapy water and run your finger along the caulk line. For caulk, I used this nifty product from Dap called “Easy Caulk.” You don’t need a caulking gun to use this and it squirts out of the nozzle just like a whipped cream can. They used to sell it at Home Depot, but now I only seem to be able to find it on Amazon.
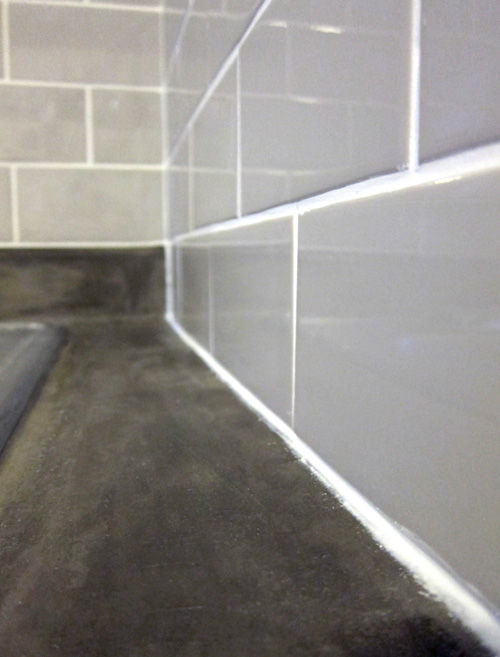
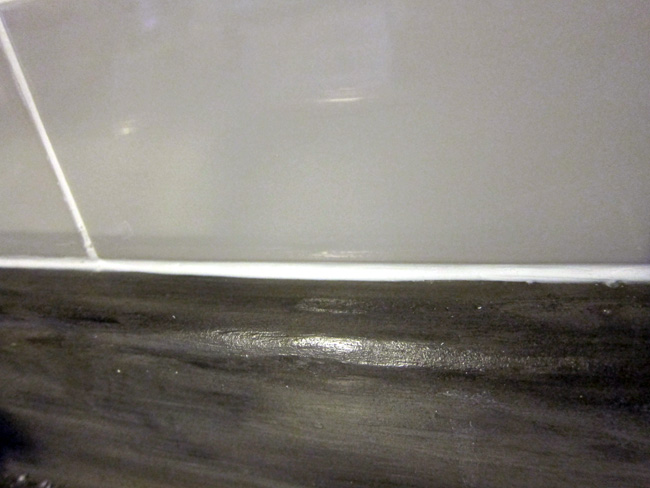
I had a harder time with caulking along the rougher parts of the countertop. But it turned out OK for the most part.
Finally, finish things off by touching up the paint on the wall. Luckily I had tons of paint left over from when we first moved in.
My next post will be about the new shelving I added to the kitchen =)